DIY paper cone for Christmas tree
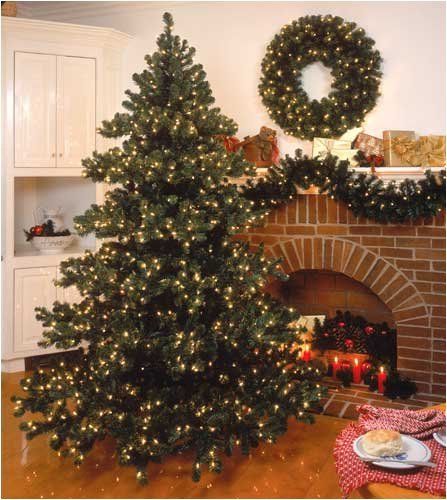
Almost every person strives to create an atmosphere of a real holiday in their home on the eve of the New Year. After all, this is a special time and you need to enjoy it to the fullest. How can this be made a reality? Get busy decorating your home, and you can make decorations yourself. Let's consider this option as a DIY paper cone for a Christmas tree.
The content of the article
Making a Christmas tree decoration
To make such a fake you will need very simple materials, namely:
- Colored paper.
- Scissors, PVA glue.
- Glue gun.
REFERENCE. Such a cone could well become an unusual box for gift wrapping.
How to quickly make a decoration
It is worth noting that the manufacturing process is extremely simple. You can build one, and then many of these cones in the company of children, this will allow you to spend a fun and fruitful evening.
REFERENCE. Let's make one such cone and, having understood the manufacturing process, you can easily make many such fakes. By combining them together, you can make a very nice garland to decorate your home.
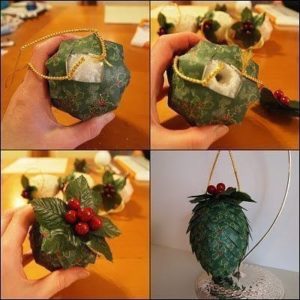
- You will need a foundation. It could be polystyrene foam. It needs to be given the appropriate shape. You can also make the base using the papier-mâché technique.
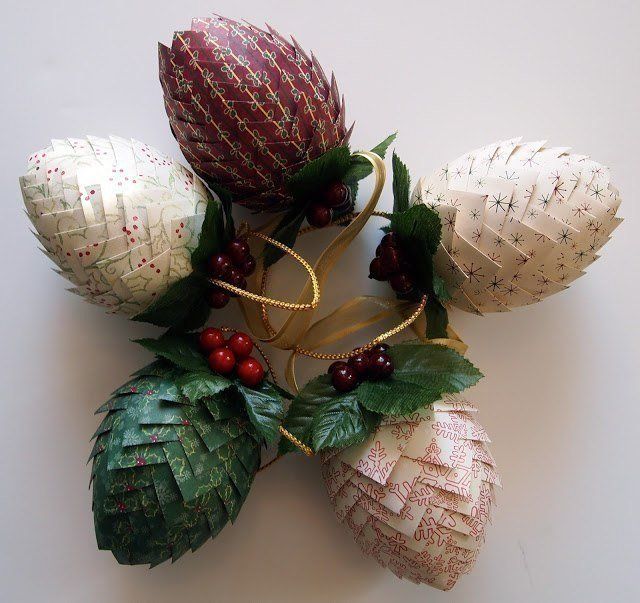
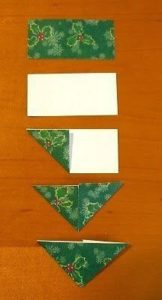
- In the next step, you need to move on to making the petals of the pine cone. To do this, take thick paper.
- Make preparations. Their length should be twice the width.
REFERENCE.You can choose the color of the paper and the design on it, focusing on your personal preferences; there are no restrictions here. If you want to make a fake as close as possible to a real pine cone, choose the appropriate color.
- So, the corners of the rectangular workpiece should be turned towards the middle. One scale is already ready. The rest must be done in exactly the same way.
- When you have prepared the required number of blanks, you can move on to decorating the base. You need to start attaching the scales from the bottom and gradually moving up.
- Attach each piece to the base. This can be done using sewing pins or glue.
- When gluing the second circle. Move the scales a little; you need to glue them in a checkerboard pattern.
- When you have almost completely filled the base, all that remains is to make the top. It is necessary to make a loop for fastening.
- Decorate your work with decorative branches on top. These can be spruce or pine branches, which will come in handy.
NOTE. If you decide to choose the papier-mâché base option, at the manufacturing stage you can place a souvenir inside the blank.
Simple manufacturing option
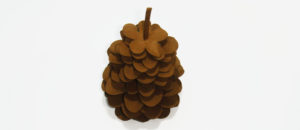
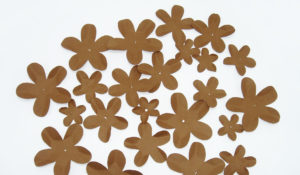
There is another way to make such a fake. Stock up on brown paper, a simple pencil, scissors and glue. If you look at a real cone, it resembles a flower in cross section. It is based on this that we will assemble the product.
It is necessary to cut out many flower blanks, which should differ in size. The template is shown in the photo. Cut out all these blanks and start assembling your fake.

REFERENCE. To make the process of cutting out flowers go faster, you can fold the paper several times.
String the cut out elements onto the base, having previously coated it with glue. As a base, you can take a regular stick or make it out of colored paper and roll it into a tube.
IMPORTANT. To give the petals volume, they need to be folded in half.
As you can see, as a result of simple manipulations you can make a very nice little cone.