What to make a cone for a Christmas tree from
You can find a lot of ideas on how to make a Christmas tree with your own efforts, and almost all of them involve the use of a cone. It, in fact, is the basis - the Christmas tree, which you will further decorate according to your preference. Let's look at how and what to make a cone for a Christmas tree.

The content of the article
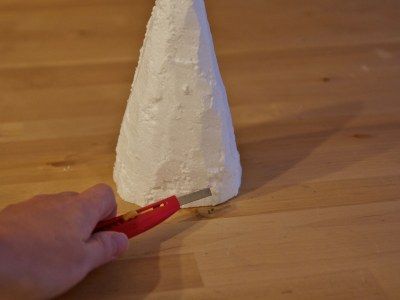
Foam cone
If you decide to work with a foam base, you can purchase it in specialized stores, but be prepared for the fact that it is not cheap. It is much easier to make such a blank using your own efforts.
You will need:
- A piece of foam.
- Knife with a saw blade.
The manufacturing process will not take much time. Follow the algorithm:
- Cut a rectangle of the required size from a piece of foam plastic; these are the estimated dimensions of the cone with a small margin.
- Next, at all four corners it is necessary to make cuts at an angle to form a future cone.
- Now all that remains is to trim the workpiece until you get the most accurate workpiece.
IMPORTANT. Cut the foam a little at a time so as not to spoil the part. Your movements should not be sharp, but smooth and a little persistent.
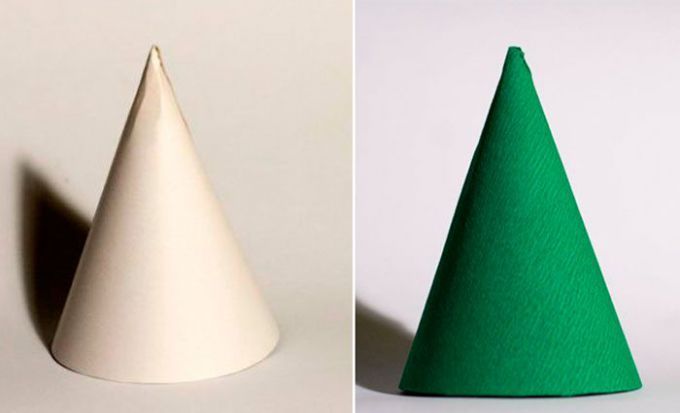
Conical blank made of cardboard or paper
To get a decent result, you need to choose a good and beautiful cardboard. Prepare the following tools:
- Pencil and ruler.
- Compasses and scissors.
- PVA glue and tape; perhaps it will be more convenient for you to work with a stapler.
When you have everything prepared, you can proceed directly to the manufacture of your workpiece. The process is quite simple:
- First you need to make a circle on cardboard. Take a sheet of cardboard and, using a compass, draw a circle of the diameter you require and cut it out.
NOTE. The height of the product directly depends on the radius of the circle you drew, therefore, the higher you want the tree, the larger the radius of your circle should be.
- Now the circle needs to be divided into four sectors. They should be the same, draw them directly on the workpiece with a pencil.
REFERENCE. To make the sectors even, you need to draw two perpendicular diameters through the center or fold the workpiece in half, first horizontally and then vertically.
- One sector needs to be removed (cut it out).
REFERENCE. You can cut a piece of a larger size, in which case the dependence applies: the narrower the segment, the wider the cone will be, and accordingly, vice versa.
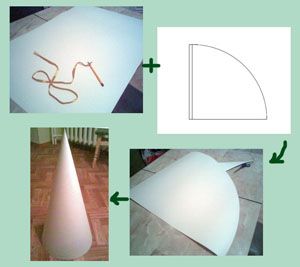
- Now you can roll the workpiece into a cone and overlap the side edges using a stapler, tape or glue. A stapler will most likely be more reliable.
REFERENCE. If you don’t have a compass, you can easily replace it by taking a pencil and a string. To do this, measure the radius you need on the thread. With the finger of one hand, secure the edges of the thread in the center, and on the other side of the thread with a pencil attached, you will get your homemade compass. As a result of several steps you will be able to get a good circle.
We described the process of making a cardboard blank. As for using paper, the manufacturing algorithm is the same, but you will only get a softer product.