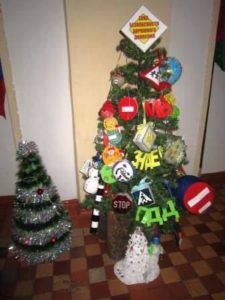
DIY road sign on the Christmas tree
Decorating a Christmas tree for the New Year is always a fun and interesting event. For children, you can organize not just exciting entertainment, but also teach several lessons on traffic rules. To do this, you and your kids need to independently make several Christmas tree crafts in the form of road signs. Today we offer a master class that can be repeated with children aged 6 years and older.
Making Christmas tree decorations will teach your child to use certain materials, help develop accuracy when working with small parts, and consolidate knowledge of traffic rules.
The content of the article
Materials needed to make a road sign for a paper Christmas tree
 Before selecting the material, you need to decide what kind of sign you want to make with your child. The color scheme will depend on this. It is recommended to make several crafts for the “DIY Road Sign” Christmas tree at once: a traffic light, a pedestrian crossing sign and a stop sign.
To work you will need:
- white cardboard - this will be the basis of our crafts;
- mild scissors (if the child does not know how to use this item);
- a simple pencil;
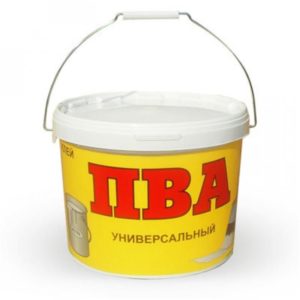
- PVA stationery glue;
- yarn of several colors - for our products you will need: red, white, green, blue.
TIP: Bring a few extra Christmas decorations. For example, snowflakes or tinsel.
Rules for working with PVA glue and scissors
 Before work, it is necessary to explain to children safety precautions when working with certain tools. While making crafts, the child must constantly be in the field of view of adults.
There are several mandatory rules:
- When working with glue, you must use a brush. If the tube has a dispenser, you should act carefully so that the substance does not get into your eyes.
- The amount of glue squeezed out of the tube should not exceed what is necessary, otherwise the product will spread around the edges.
- Remains of glue are removed with a cotton pad or cloth.
- After using the substance, hands should be washed thoroughly with soap and running water.
- You need to use the glue carefully so that it does not get into your eyes or mouth.
- The scissors must be held in the working hand and not pointed upward.
- The tool should not be left open.
- The scissors should be passed in the closed state with the rings to the partner.
- When working with sharp objects, you need to watch your non-working hand.
- It is not recommended to place scissors on the edge of a table or shelf; they may fall and injure a person.
By following these simple rules, you will ensure the safety of yourself and your child.
Instructions for making the sign
 Now let's figure out how to make a sign from a paper base.
Step 1: yarn of different colors is finely chopped, but not mixed together.
Step 2: cut out one triangle from cardboard (for a traffic light). The base and height of the figure should be 15 centimeters each. Then we make another triangle 1 - 1.5 cm smaller than the previous one.
Step 3: you need to put a small shape on top of a large one and circle it.
Step 4: Apply a layer of PVA glue to the edge (along the formed border), and completely cover the smaller figure with the substance.
Step 5: Gently sprinkle the glue-covered area of the large triangle with red chopped yarn, and the entire smaller shape with white yarn.
Step 6: You need to press down the yarn a little so that it sticks to the cardboard. Excess particles can be shaken off by turning the work over. You should wait until the adhesive dries.
Step 7: you need to place the smaller triangle evenly on the larger one and glue it.
Step 8: now cut out three identical circles and glue a strand of traffic light colors. Then we glue the circles onto the base of the sign.
TIP: instead of cutting out two triangles, you can use a ruler and pencil when marking the border.
Step 8: you should decorate the resulting sign with a decorative element.
You can make other traffic rules signs in a similar way.
TIP: when making a toy, a road sign on a Christmas tree with your own hands, you can tell your child about the traffic rules and give examples.
How to make a road sign for a Christmas tree from CDs
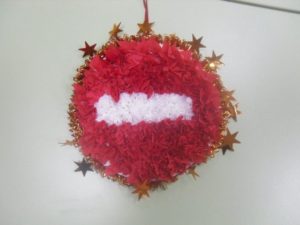 If you have old laser discs available, you can make a cute Christmas ball. For work we will need:
- CDs - 6 pieces;
- screwdriver or drill - make holes in the disks;
- pieces of bendable wire;
- self-adhesive pictures with traffic rules signs or you can draw them yourself (then you will need special glue);
- a sheet of cardboard or paper;
- You can take tinsel for decoration.
It is necessary to draw a pentagon with equal sides of 6.5 centimeters on a sheet of paper and cut it out. The result was a stencil for making holes. We place it on the disk and mark in the corners where future holes will be located.Using a tool, we make holes and connect the laser plates to each other with wire.
TIP: discs should not have stickers; items must be degreased before use.
Next, stick the pictures onto the road sign on the Christmas tree 2018 with your own hands - do not forget about the safety rules. The final act of work is decorating the ball with tinsel. Pass the threads through the holes made and fasten the decorative tool along them.
TIP: You can make other geometric shapes from disks with different safety rules. For example, how to behave on ice or in public transport.
What other materials can a road sign be made from?
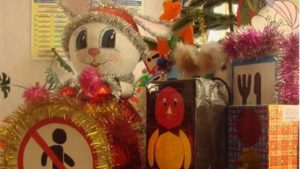 Let's look at what other materials you can use to make a New Year's tree toy or road sign with your own hands:
- An old technique that is taught in pedagogical courses. The material is prepared in advance. So, we will need: a sheet of thick cardboard, eggshells, paints, varnish, a brush and pencil, glue. We take cardboard and draw on it any traffic sign that the child can understand. Then we lay out the outline and the sign itself, like a puzzle shell. They need to be folded as close to each other as possible. For example, for a “pedestrian crossing” sign, stick the shell only in the outline of the person, the crossing and the border of the sign. Let the work dry. Then you should decorate the craft. It is better to choose gouache; it sits better on the shell base without leaving streaks. When the paint dries, the product is covered with a layer of varnish. While the polish dries, you can sprinkle dry makeup glitter on top.
- Cereals are another natural material that can be used as a base. Also suitable: white beans, rice, white seeds. The toy is made in the same way as a shell craft.You can use nail polish instead of paints, then the product will be brighter. In this case, no coating varnish is required.
- You can create a three-dimensional toy from colored cardboard. For example, make it in the form of a cube or pyramid. On each face you can apply a design using the two methods described above.
- A three-dimensional traffic light made of cardboard will look beautiful. To do this, you need to make a base - a cylinder. You need to take cardboard that is blue or another interesting color. Then, you need to stick on the applique - the face (you can simply draw it with felt-tip pens or cut out the details from paper). Next, paint three cotton pads red, yellow and green. Glue them to the base. You need to make hair, arms and legs for a traffic light from paper or yarn. Paint a lollipop stick black and white to create a traffic controller’s stick. Give the traffic light a name, this will make it more interesting for your child to create it.
- A snowman painted with traffic light colors will look fun. For the body you will need three balls rolled out of cotton wool (you can take ordinary white Christmas tree balls made of plastic). The parts must be painted green, red and yellow. Let the parts dry, then glue them together with a “moment”. Let the red ball be the face of a snowman - a traffic light, and you need to attach handles to the yellow ball, and legs to the green ball. The limbs are made of sticks and cotton wool.
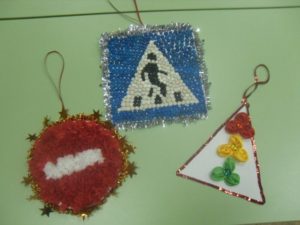
- You can also embroider signs with little craftswomen, however, this must be done on a special border (canvas for embroidery). The product can be made with girls from 8 to 9 years old. This way the little housewife will not only consolidate her knowledge, but also learn the basics of needlework.
- It would be more interesting for the boys to cut out a craft from wooden elements with dad and color it.The main condition is that in order for the little apprentice not to get hurt, he must first be taught how to use the tools.
TIP: each of the proposed New Year's toys can be decorated with tinsel and sparkles.
At the end of the work, you need to take care of securing the toys. The loop can be made from a paper clip, thick threads, wire or Christmas tree rain. Each element is carefully attached from the wrong side.
Now is the time to decorate the New Year's beauty with the whole family. Crafts made with your own hands will delight your child for several years.