DIY cardboard Christmas tree house
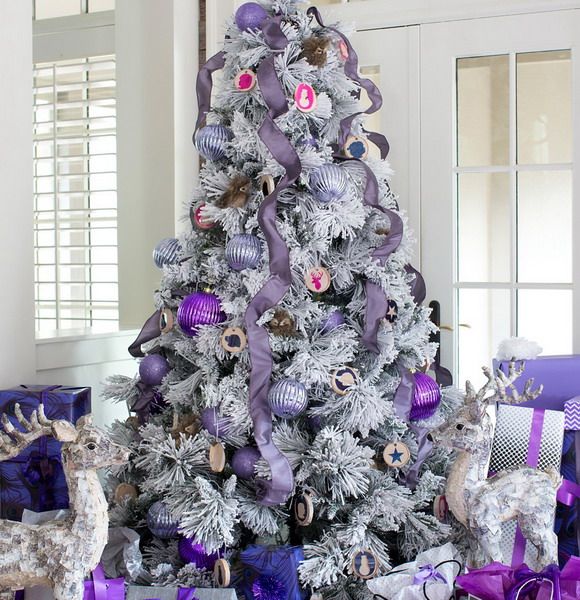
 What is New Year without a Christmas tree, and decorating it is a real pleasure, each toy has its place. So many pleasant emotions and memories accompany such moments! New Year's toys carry not only the bright colors of the holiday, but also a piece of happiness.
The content of the article
DIY New Year's house made of cardboard
To create a New Year's toy you will need a little cardboard and a little imagination. The density of the cardboard does not matter, nor does the size. Required tools and materials:
- Stationery knife or scissors.
- Scotch tape or PVA glue.
- Paints and brush.
- Pencil.
- Ruler.
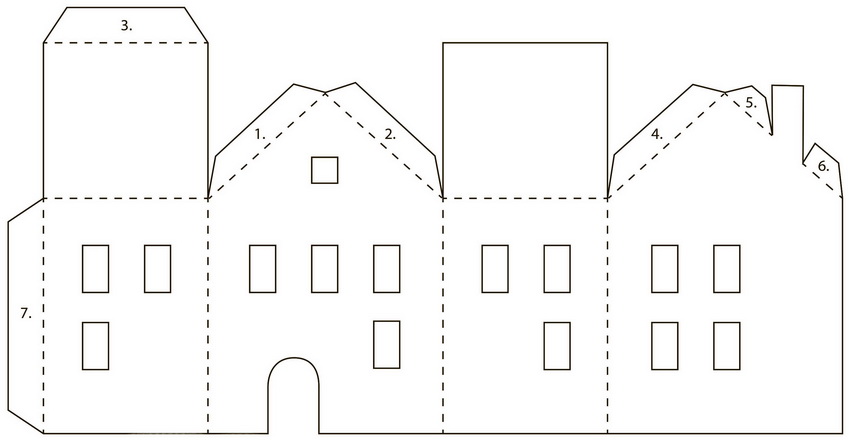
We draw a diagram of the frame of the house, add a little length and width for connection. Parts can be separate or combined.
We cut along the drawn lines and cut out the windows. Using tape or glue, glue the joints together. The resulting toy can be painted and decorated with various materials. Add snow to the edges of the roof using glue and cotton wool. Glue a square of the required size to the bottom of the toy - it will serve as a floor and give strength to the structure.
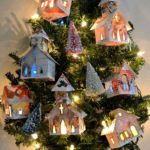
ATTENTION! If you create several houses, you can place a garland in them by making a hole in the base; the light from the windows will delight you and surprise your guests.
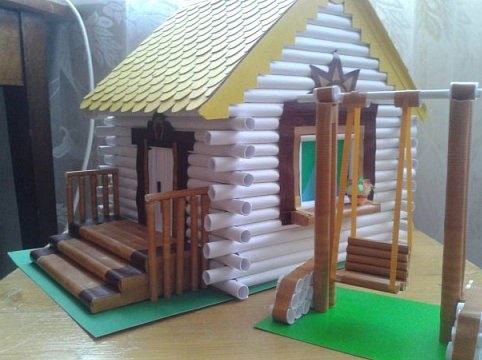
House of their paper straws
A real log house, even if it is made of paper, looks very beautiful. It can be placed under the Christmas tree or on a table by the fireplace; this craft is created from cardboard or paper. This requires:
- Paper sheets (colored or white - they can later be painted).
- Paper glue.
- Scissors.
- Stationery set (pencil, ruler, eraser).
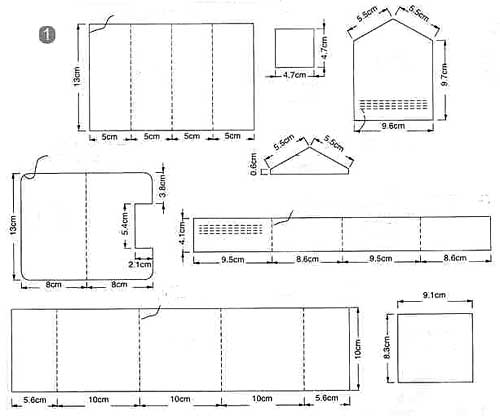
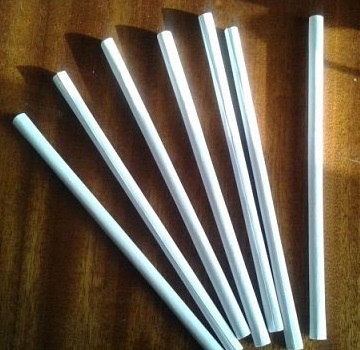
We draw a house design and start cutting out rectangles or squares from paper, depending on the design. We roll them into a tube, forming paper logs, and use glue to secure them in this form.
Let's make 2 logs - one is slightly larger than the other and break them into a square, so that there are protrusions on both sides. The base for the house is not necessary, but for reliability you can use cardboard paper.
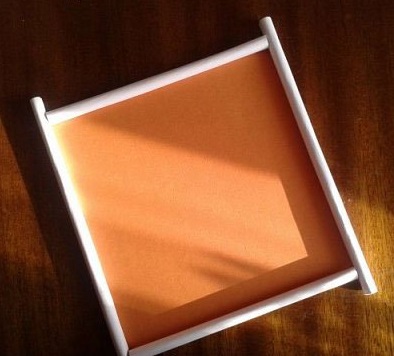
We grease the logs with glue and connect them, making sure that after the short tube there is a long one, creating the image of a chopped house. In places of openings we use shorter parts.
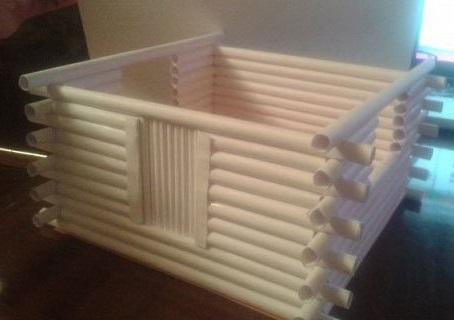
Finally, we decorate the hut with different decor. We attach shutters, doors, create a porch and paint it in the required color.
ON A NOTE! If there are no paper sheets, you can use newspapers and magazines, as well as old notebooks and unnecessary books.
New Year's house out of a box
When there is absolutely no time, but you need to create a toy in the form of a house, you can use a box of any size - the larger the box, the larger the craft. Necessary materials:
- Boxes (any).
- Paper tape or adhesive tape.
- Scissors.
- Paints and brush.
Any boxes you have in the house, milk or pills, are suitable for creation.
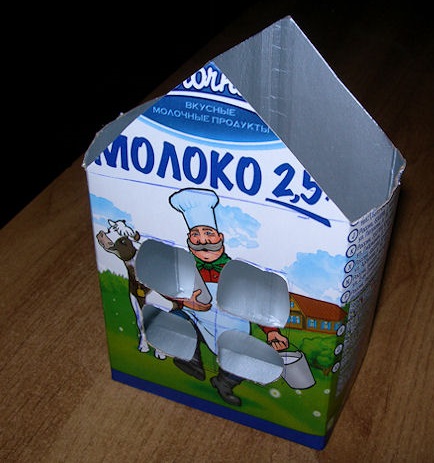
We cut holes in the boxes to create windows and doors, cut off the top in the shape of a triangle - later the roof will be attached there.
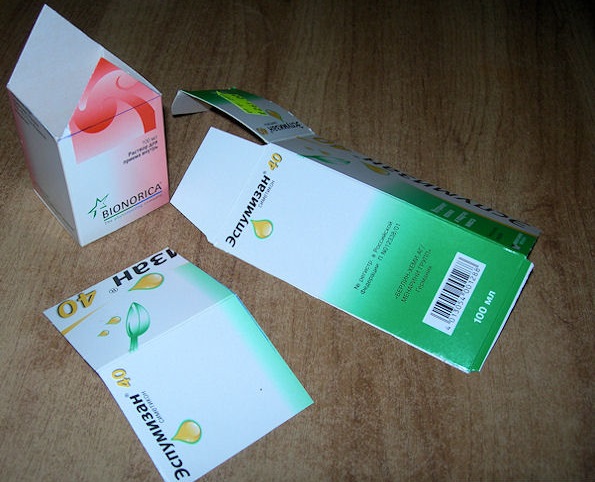
Cut out a rectangle from the second box and fold it in half. Using adhesive tape we connect the parts.
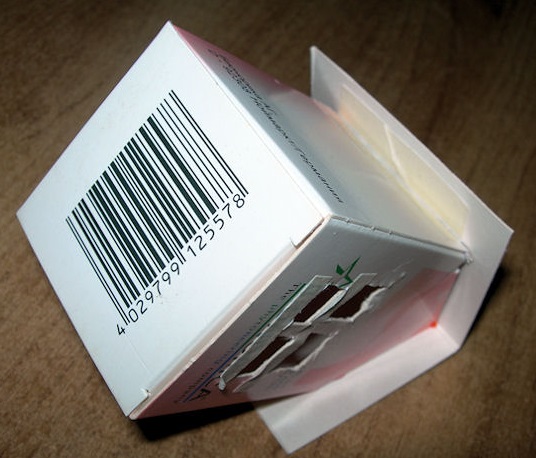
If necessary, wrap the craft in paper and secure the joints with glue. We paint and add decor. Our toy house is ready.
Santa Claus's house
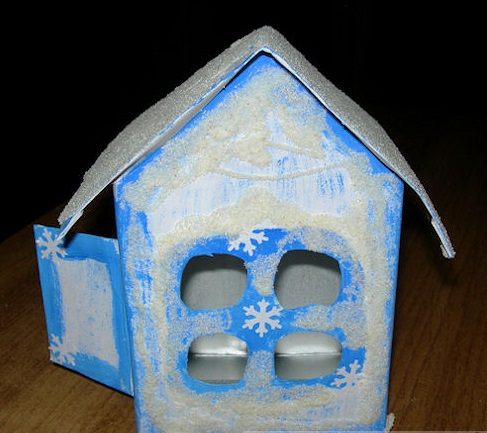
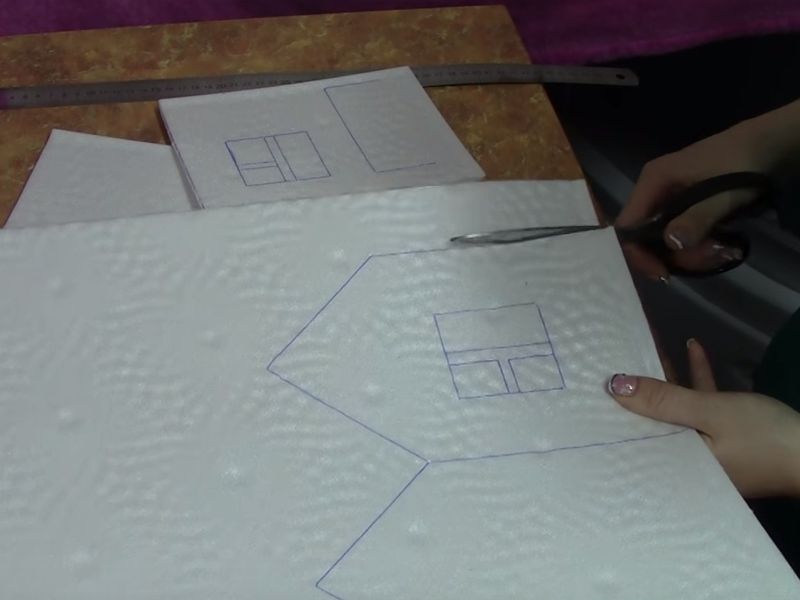
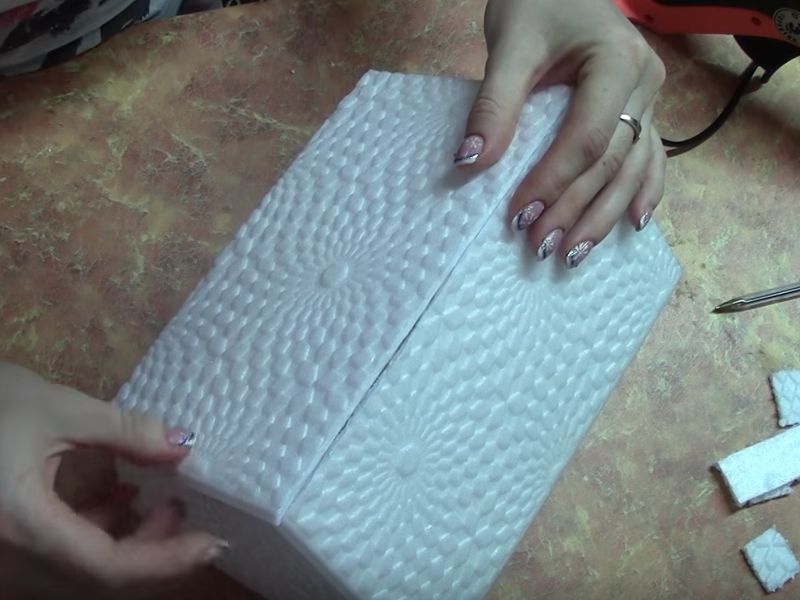
Children are looking forward to the New Year holiday, when Grandfather Frost will come and bring gifts. IN In some countries, it is customary to hang socks to place gifts, but creating a house for this purpose will give the holiday a special atmosphere. We will make it from cardboard or ceiling tiles. To do this you need:
- Ceiling tiles (can be replaced with cardboard and covered with cotton wool).
- Cotton wool.
- Stationery knife.
- School set (ruler, pencil).
- Tinsel.
- Furniture gun with glue (if the part is missing, you can sew it together).
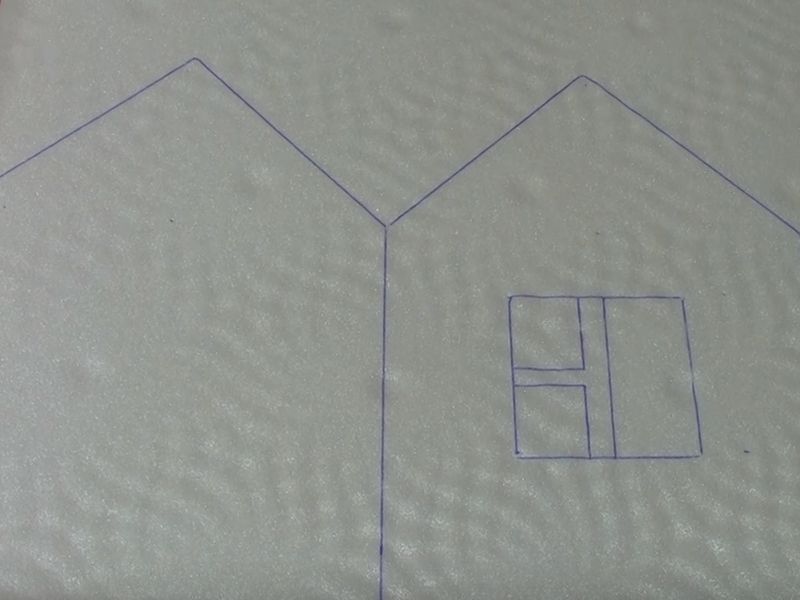
We mark the details on the tiles, draw and cut out future openings for windows and doors.
We fasten the parts using furniture glue.
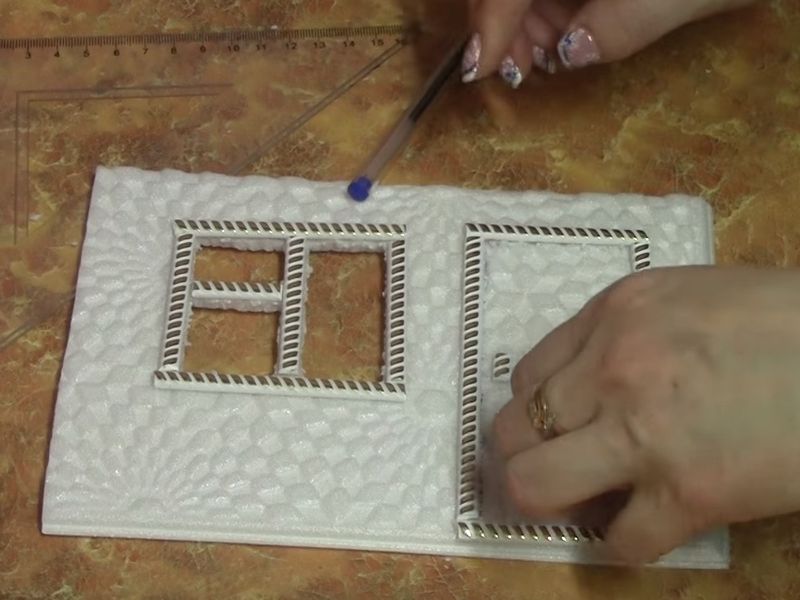
We decorate the seams of the joints with tinsel. This will create a festive look.
We will install a Santa Claus toy next to the house, and you can place a small light bulb inside the structure.
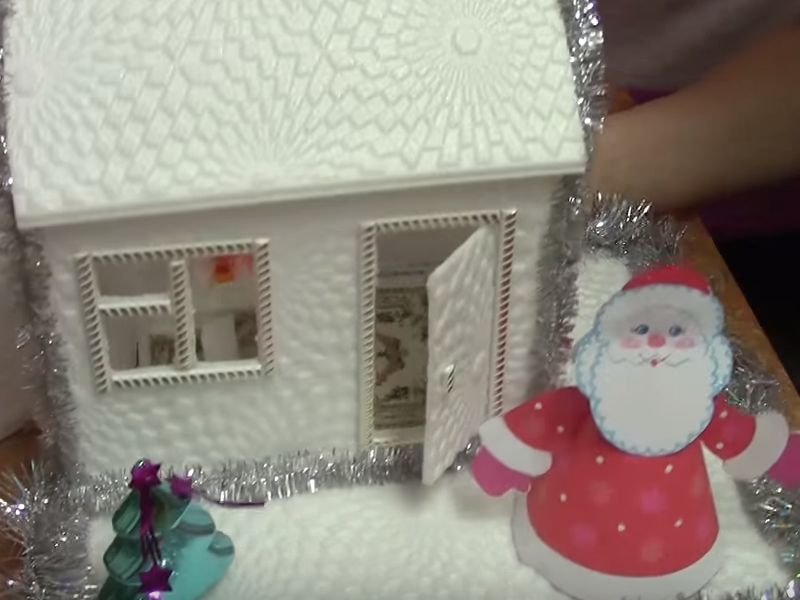
IMPORTANT! Do not place a high power light bulb in the house, this may cause a fire.
Housing for a gnome
All children know that gnomes live in a fairyland and strange houses. The gnomes wear funny caps, and the roofs of the houses have the same structure. To create such a craft you will need:
- Toilet paper roll.
- White and colored paper.
- PVA glue.
- Cotton wool.
- Markers or colored pencils.
Wrap the sleeve in white paper and cut it to size. On the resulting rectangle, draw or glue cut-outs of colored paper in the form of windows and doors.
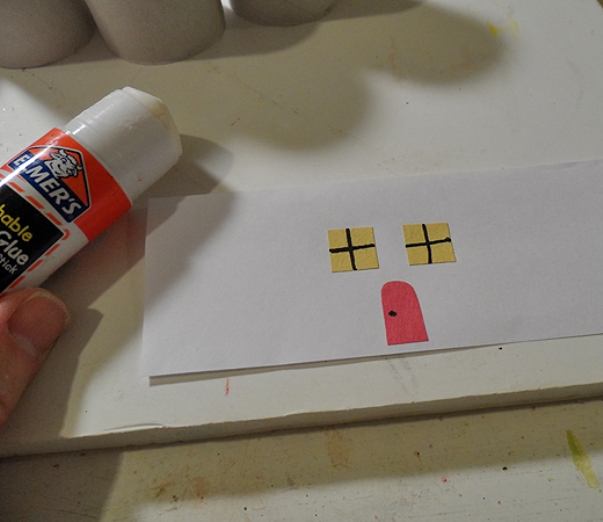
Attach the rectangle with the openings to the sleeve using glue.
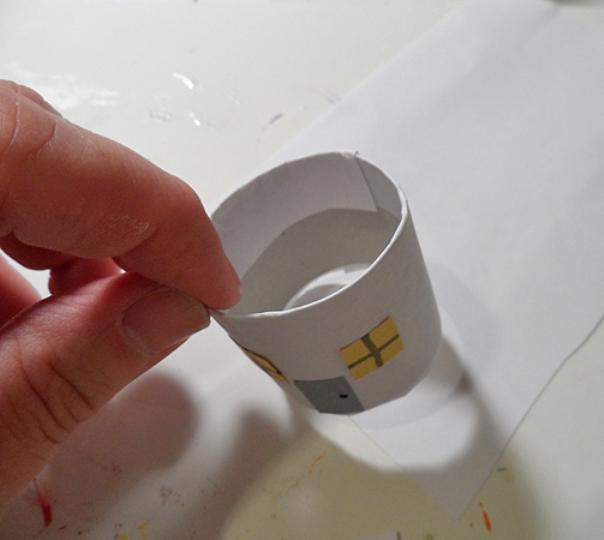
Let's create a cone-shaped roof from colored paper and apply glue in a spiral. We fix the cotton wool on the strips of glue - as if there was snow.
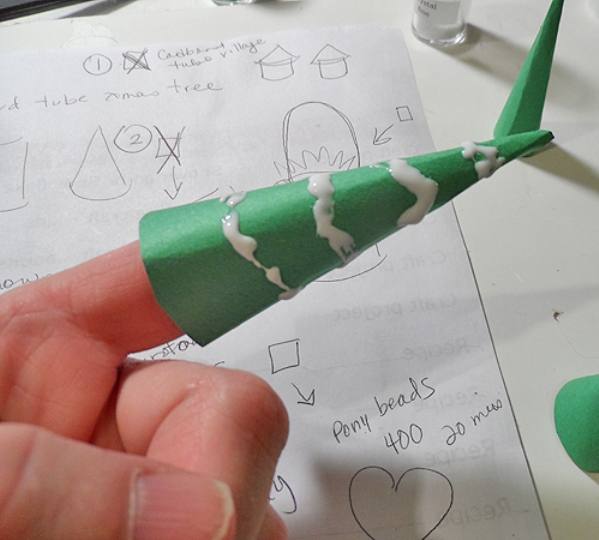
Your fairy-tale house for the gnome is ready, attach a thread and hang it on the Christmas tree.
(photo 20)