How to install a faucet on an acrylic bathtub, instructions
It's the twenty-first century. Humanity has visited the bottom of the Mariana Trench, taken a walk on the Moon, and even sent spacecraft to Mars. But I never really learned how to build a bathroom or even a toilet room.
No matter what modern technologies and tools we have, but as soon as you look at the cramped cubicle of the bathroom, you immediately feel such despondency that you could even howl at the moon. If in your own bathroom you fight every day for every inch of free space, then some problems can be resolved if you equip the side of the bathtub with a faucet.
The know-how that appeared not so long ago has many positive aspects, however, there are also many disadvantages. But first things first.
The content of the article
Features of the mixer installed on the side of the bath
The fact that this faucet allows you to save space in the bathroom is far from the only thing it can boast of. When it is located almost above the bowl itself, it is possible to avoid splashing water on the walls, which means stains appear on them. Hence the reduction in cleaning time.
This type of mixer is characterized by high performance. This is noticeable by the reduction in the time it takes to fill the bathtub. Naturally, this also promises some benefits financially.Judge for yourself - the bathtub fills up faster, which means the water won’t cool down so quickly and you don’t need to spend money on additional heating.
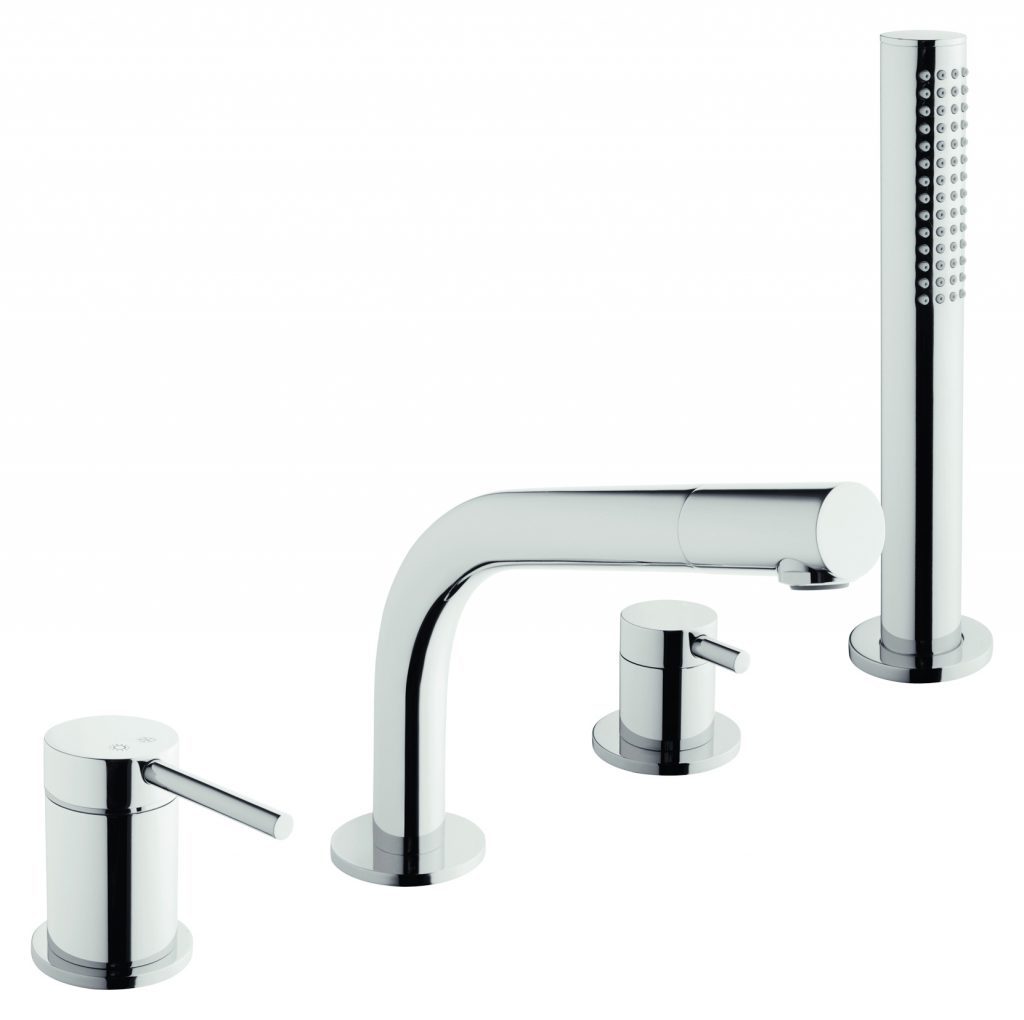
The design of the faucets is stylish, and there are many design options. Those who wish can install a cascade type model for themselves. Its elements are separate, which allows them to be spaced apart from each other. The control panel can be installed in the headboard. The tap itself is in the central part of the side, the shower head is in the corner.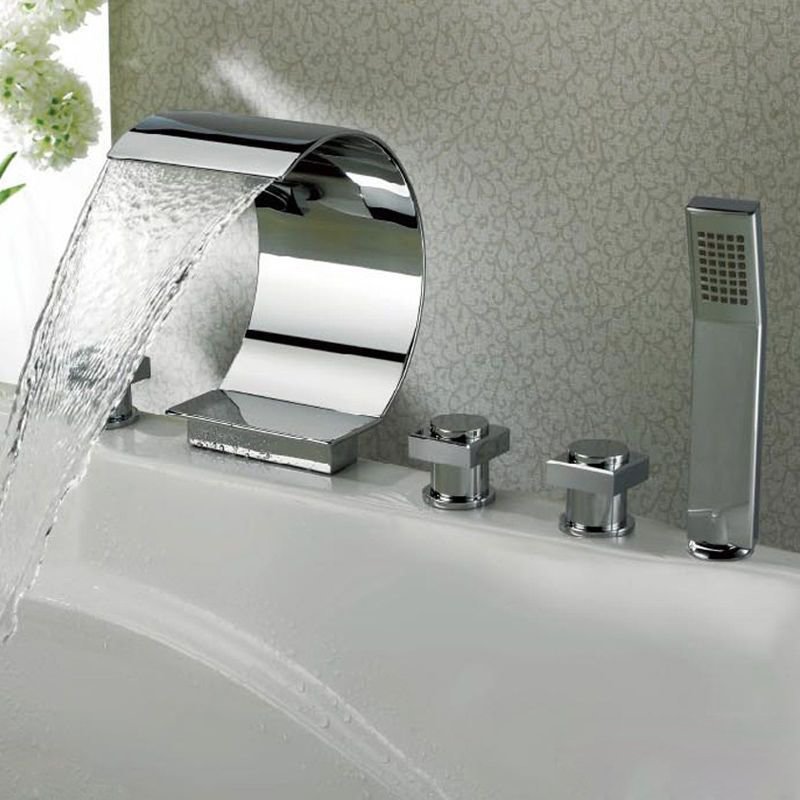
The shower head, as a rule, is fixed directly to the side, and the hose is hidden in the space between the wall and the side of the bath. Sometimes a false panel is installed for this purpose.
It goes without saying that the appearance of the room is transformed. An additional point is that the noise level is reduced.
Naturally, it is impossible to do without a certain amount of “tar” in this “barrel of honey”. It’s only in manufacturers’ advertising that everything is smooth and cloudless. And those who want to install such a mixer on their own will have to think about how to solve some problems.
Attention! When purchasing, you should not choose a model based on low cost. The operation of this device has some features that subject it to very heavy loads. Accordingly, an inexpensive, and therefore low-quality, mixer will quickly fail.
Most often the shower hose fails. The fact is that it spends a lot of time rolled up. Accordingly, it is highly susceptible to deformation. Over time, cracks become visible on it, and water seeps through them. Even models that can easily be classified as expensive have this problem.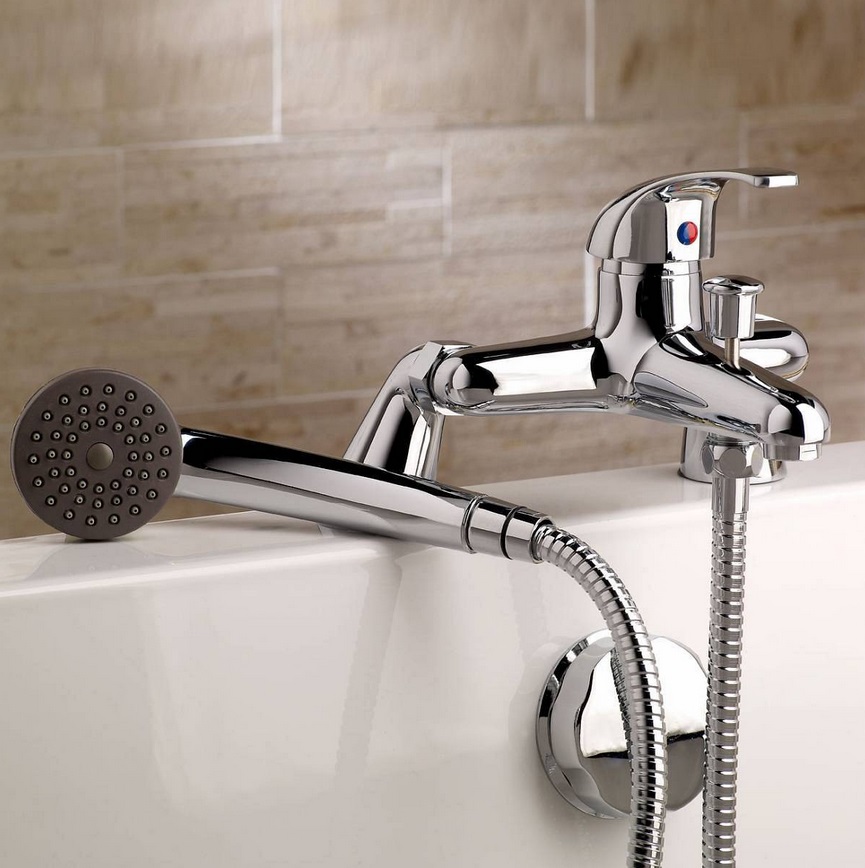
This circumstance will have to be taken for granted and put up with.That is why more experienced people immediately purchase several spare hoses in order to quickly replace them if necessary. Most often, this affects models whose spout and shower head are combined into a single whole.
Do-it-yourselfers at home should know: this type of faucet is easiest to install if the bathtub is made of acrylic. If the installation is done on a bathtub model made of cast iron or steel, there is a high probability that the integrity of the enamel will be compromised, and this always leads to rust. Accordingly, it will require repair, and what is even worse - complete replacement.
If you don’t have much experience in plumbing, then it will be easier and more reliable to invite a specialist. An alternative option is to purchase a bathtub with factory-made holes for the faucet. But only acrylic bathtubs are supplied in this form.
Design of a mortise mixer
Typically, a mixer of this type has a modular design, however, there are also monoblock options. Before starting installation work, it is highly advisable to read the instructions, understand the design of the device, and also familiarize yourself with the manufacturer’s tips and recommendations on how to install and how to use it in the future. 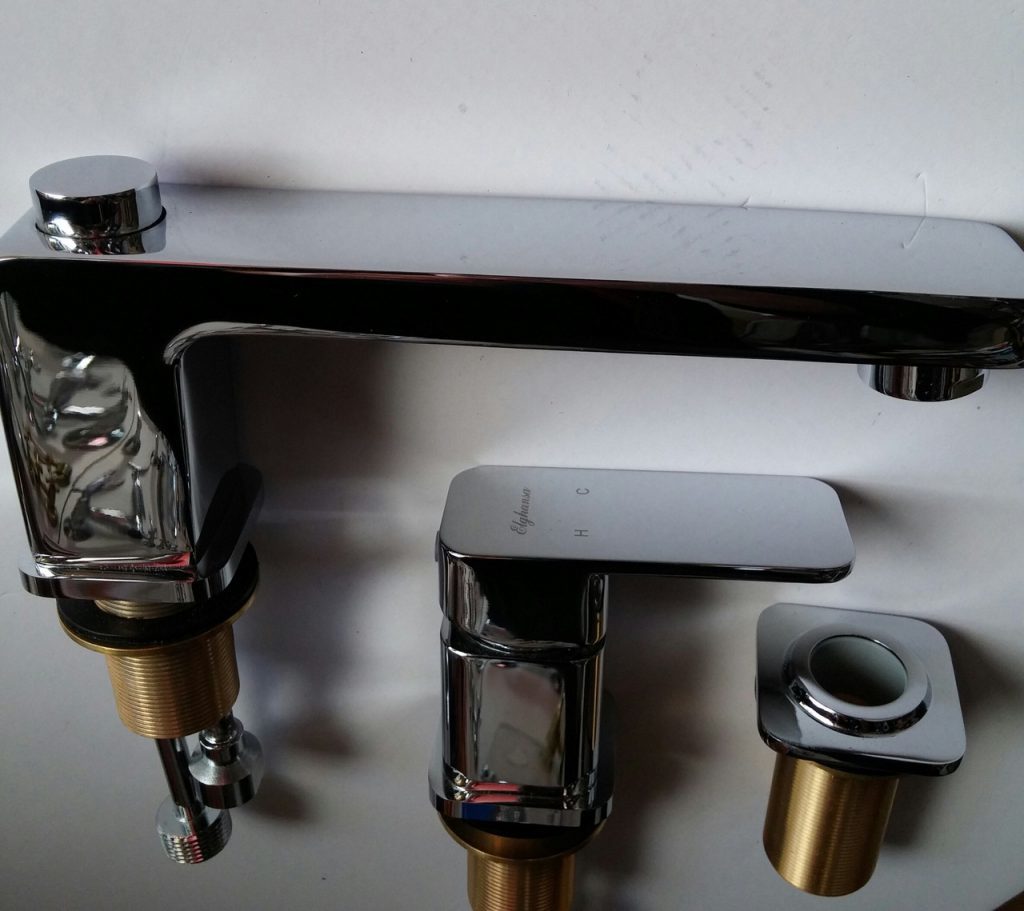
The monoblock mixer is a one-piece design that just needs to be installed and that’s it. A modular model is a set of individual elements. The first place is given to the crane. This is the main part of this product. The valve body is equipped with three outlets:
- under cold water;
- under hot water;
- for spout.
A separate place is allocated for the watering can. All inlets have a standard diameter, so there is no strict restriction on where to connect the spout and where to connect the shower head.In order to connect cold and hot water pipes, you will need half-inch eccentrics.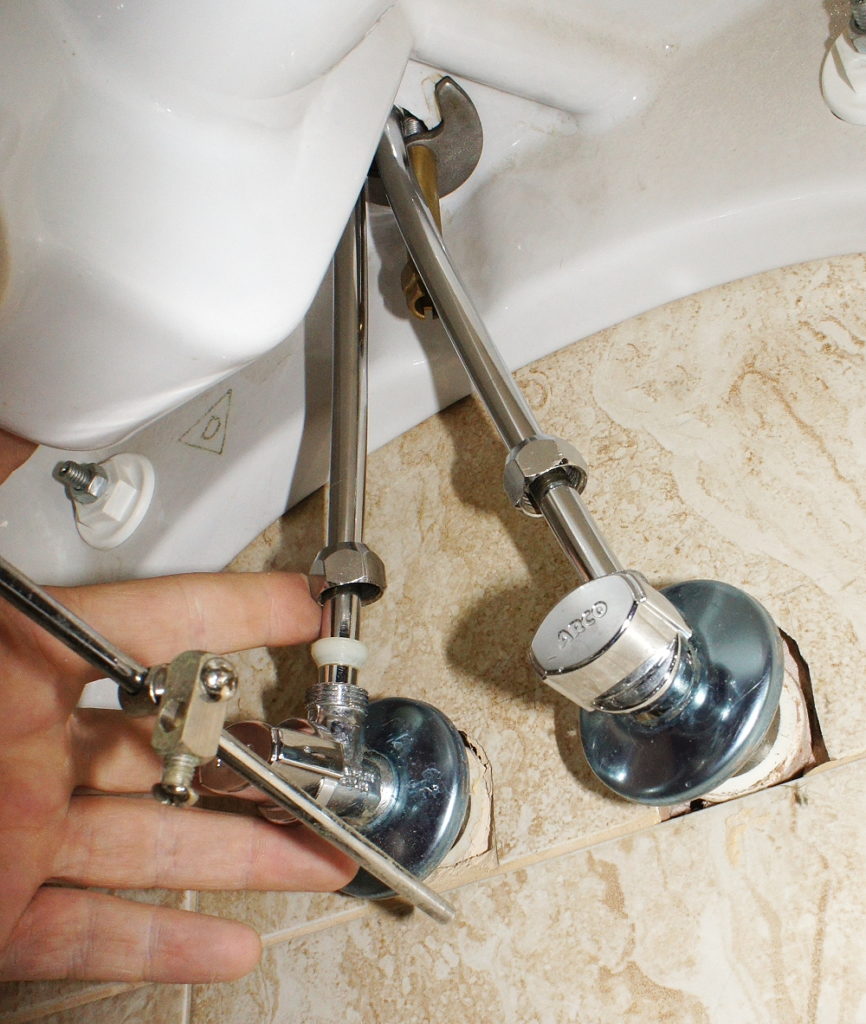
Famous manufacturers make their products so high quality that they can withstand fairly strong water hammer.
Sequence of installation of a mixer on an acrylic bathtub
We install the mixer in several stages. Everything is done in a certain order:
- We mark the place where we will install the mixer.
- Drill holes of the required diameter.
- We install the mixer.
- Let's fix it.
- If necessary, we install other modular elements.
- We connect to the water supply.
Everything seems simple and logical. But this is in words. In reality, this doesn't always work. There are quite a few tricky points that need to be considered before installing anything, and it may well be long before purchasing the mixer itself.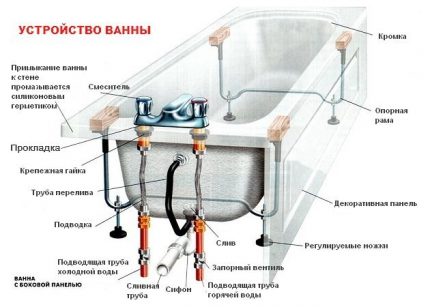
Preparation
In preparation for installation, we go through three stages:
- we buy the necessary mixer;
- We prepare tools and materials;
- We determine the location for installation.
Reference. There are many different options for such mixers in stores. But there are some requirements that must be met. And the first thing is not to purchase cheap equipment.
A low quality product will need to be replaced very soon. It's easier to pay a little more. As you know, stingy... Exactly. Why pay twice when you can only pay once. And you need to buy mixers from those manufacturers who have already demonstrated high-quality work.
You should carefully study the documentation for the product, read the manufacturer’s advice, and read the warranty. If you need to reduce financial costs when purchasing, then it is better to take a faucet with a simple design, but with high quality parts.
The situation is similar with consumables. It's better to pay more, but not lose in quality.
From materials and tools, you need to prepare:
- electric drill;
- core drill;
- screwdriver;
- set of fasteners;
- water liner;
- adjustable wrench.
As a rule, a set of fasteners comes with the mixer. But this is not true in every case. The diameter of the core drill should be the same as the diameter of the device. If your bathtub already has holes, then no drill or drill bit is needed at all.
Reference. Flexible supply hoses can be completely replaced with PVC pipes. Despite the fact that their installation is more complicated, they also last longer.
As a rule, the mixer is placed in the center of the side, at its end or in the corner part of the acrylic bathtub. When thinking about where the device will be placed, remember that some elements need to be hidden. Take, for example, a shower hose. In order to be able to hide it, you need some space. Sometimes it is necessary to make a separate false panel.
An important factor is access to communications. Yes, they are hidden from view for a long time, but... They need to be periodically inspected and preventive maintenance carried out. Everything needs to be organized so that nothing interferes with access to them.
If you make a false panel, then make it removable. You can provide inspection hatches or a decorative screen for the bathroom.
Installation
First of all, we mark out our bathtub. Or rather, the place where we plan to install the mixer. We just take a marker or any other product that is noticeable on the surface, but can simply be wiped off. Now you can drill a hole. We insert our core drill into an electric drill and make holes according to the markings.
After everything is drilled, we sand the edges of the holes with sandpaper. This will remove all burrs, irregularities and make the diameter the same.
Using a gasket, install the mixer in the prepared hole. The gasket is placed between the device itself and the surface of the bath. The gasket not only cushions the faucet, but also creates a tighter fit. If the mixer does not come with a gasket, you can either buy one or make one yourself.
Next, we fix the mixer on the side. For this purpose, the kit includes fastening elements. Either nuts or studs, which must be installed together with pressure washers.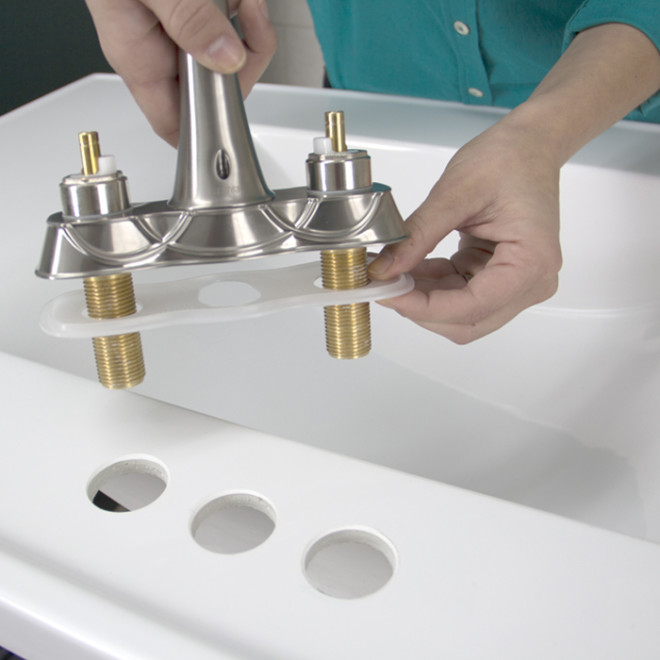
Then we install the remaining elements. Spout spout, shower head, control elements. Details may vary between models, so please refer to your user manual for more details. After the installation is completed, you need to supply water to the mixer.
Usually, to supply water to the mixer, use a flexible hose that has a threaded connection. Be sure to wrap a sealant around the thread. If this is not done, water will leak in such places. There should not be too much sealant.
But even when there is very little of it, this is not very good, since there will be no decent sealing. There is a simple way to understand when the sealant is enough. If your fingers can hardly feel the thread anymore, then it’s time to stop.
It is normal for the seal to protrude slightly from under the nut when it is tightened. The seal should be wound counterclockwise rather than clockwise. Then it won't unwind.