How to make a frame for an acrylic bathtub with your own hands
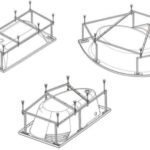
A bathtub frame is not just a beautiful finishing option. It allows you to increase the stability and reliability of the installation. It is easier to hide all pipes, hoses and other plumbing attributes behind it. All this will be hidden from view, and accordingly, the room will look more aesthetically pleasing. At the bottom there is a place where it is convenient to keep detergents and other supplies.
It can be manufactured in a factory, or you can assemble it with your own hands.
The content of the article
Advantages and disadvantages of the frame
There are both positive and negative sides to creating things on your own. Let's try to consider the pros and cons of this design.
The frame allows you to firmly fix the bath. A similar design can be used not only for cast iron options, but also for models made of acrylic or steel.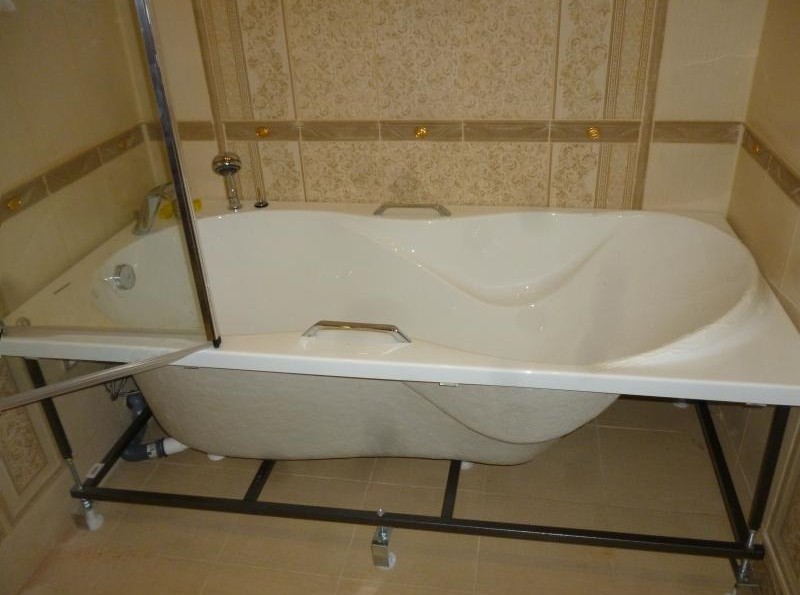
For any bowl options, our own frames have been developed, and a variety of materials can be used. When installing an acrylic bathtub, you will need to stock up on pine or maple slats, no more than five centimeters thick.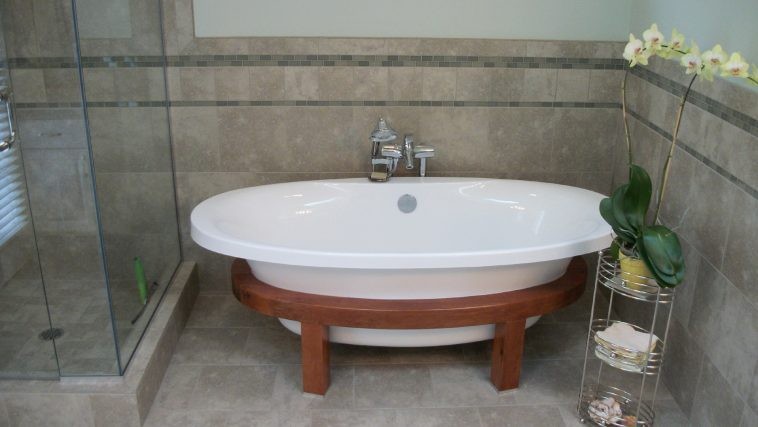
Reference! The wooden base weighs little.However, it is quite reliable and can withstand up to one hundred kilograms. For models made of cast iron or steel, a brick or metal profile is used.

The lower part of the bathtub receives a beautiful design. Drywall sheets can be easily attached to a frame that is strong enough. Tiles are glued onto it.
The main disadvantage is the heavy weight. Basically, it is provided by a massive brick support. In addition, installation is complicated. Before doing anything, you will have to develop a detailed plan that will take into account everything, and most importantly, the dimensions of the room and the dimensions of the entire structure.
Brick frames have already ceased to be made in modern urban high-rise buildings. They create additional pressure on the floors. Most users choose wood or metal.
It is advantageous to use a metal profile as the basis for a frame for acrylic bathtubs. This design weighs little and is durable. In addition, all metal frame elements are coated with a special compound that protects against moisture and corrosion.
Options for a homemade bath frame
What material is most often used to make a bathtub frame? Regular profile for drywall. It is coated with zinc, which means it is quite durable and reliable. And it will last a long time. It can be used under the frame of acrylic and steel bathtubs.
Before starting installation work, you need to level the walls, separate the sewer and water supply pipes.
Let us follow step by step the entire procedure for constructing this structure.
We prepare the equipment and make markings
First of all, turn the bathtub over. We attach the profiles for the legs to the self-tapping screws. For this purpose, the design of the bathtub includes reinforcement of the bottom with a plywood sheet. And now we attach the legs to the profile.Without moving far from the bathtub, we install a drain and overflow system.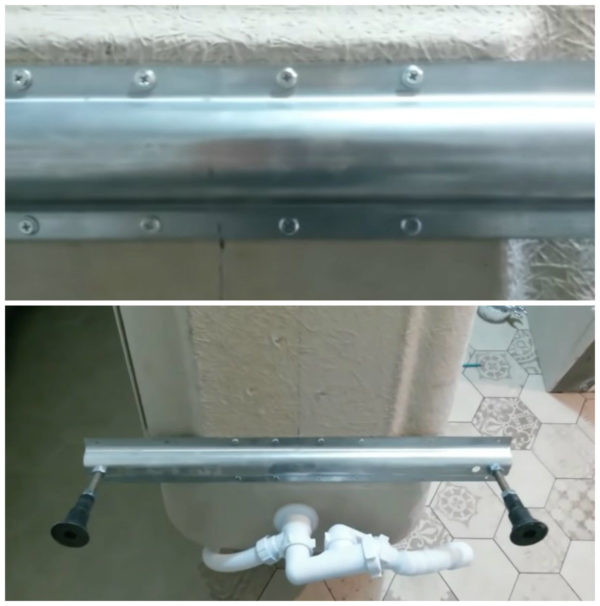
Now you can bring the structure into the room and, after adjusting the legs in height, install it in place. Along the lower edge of the side we apply markings for mounting the frame.
Next, you again need to pull the bathtub out of the room and start assembling the frame.
Frame assembly
To make a frame from a metal profile, it is enough to perform several manipulations:
- Cut the profile according to the marks. Holes are made in the cut pieces so that they can be mounted on the wall.
- Apply sealant to the shelf adjacent to the wall. Next, following the marks, screw the profile to the wall. If the wall is made of brick or concrete, then drill holes and insert dowels. No dowels are needed in the gypsum board; the screws hold perfectly.
- Next you should install the side posts and the bottom guide of the screen.
- Apply sealant to the top of the profiles. Bring the bath back, install and connect it.

Now you need to make a stand on which the bottom of the bowl will rest. You can take brick or cinder block for these purposes. We place them in several rows and secure them with ordinary cement mixture.
Reference! Do not place the bottom of the bathtub on a brick counter. Make a gap of five centimeters and fill it with foam. At the same time, weigh the bath with water. This will prevent it from rising when the foam begins to expand.
After the foam has hardened, we proceed to install the frame under the screen and hide it with a sheet of drywall.
Wood frame
Wood is not as suitable for creating a bathtub frame as metal. In rooms where people bathe: in bathrooms, baths, saunas, it is always very humid. As you know, moisture is the worst enemy for wood.To protect our structure from the destructive effects of moisture, we should take care of protection.
The material must be impregnated with an antiseptic or other protection that will repel water and protect against fungus and mold. We assemble the frame from bars with sides 50 by 50 millimeters. We do this in the same way as assembling a frame from a metal profile. Let's go through the main points:
- We level the walls and prime them, after which you can attach the frame;
- to give additional rigidity, we supplement the horizontal slats with vertical slats;

- as soon as the frame is assembled, we cover the beams with a waterproofing solution; If the walls located behind the bathroom are not planned to be covered with tiles, then it is better to cover them with waterproofing.

When the waterproofing compound has dried, you can install and connect the bathtub. To make it more stable, a support is made from brick underneath it. A foam layer is placed between the support and the bottom of the bowl. Next, the screen and its casing are mounted.
Welded metal frame
Naturally, you can weld a metal frame. A profile pipe is suitable for this design. Essentially, it is a metal rectangular object that does not even look like a pipe. Such a frame can be arranged for an acrylic bathtub, as well as for a cast iron or steel one. Its strength is such that it can withstand any weight. This design allows, in addition to the bath itself, to install a glass screen for the shower.
How to make a frame using welding? Let's look at the main points:
- first you need to take all the measurements and draw a diagram of the future structure;
- cut blanks to the required length;
- connect the base of the frame by welding - these are three supports, with two guides attached to them; the bottom of the bathtub will “rest” on the guides;

- installing the legs - selecting small sections of profile pipe and welding them to the support legs;
- at the lower end we weld a washer and a nut to it, matching the diameter of the screw;
- when all the elements are assembled, the frame can be adjusted in terms of horizon and height;

- Now you need to weld a rack located vertically, and install horizontal crossbars on it, on which the lower part of the side will rest;
- To be able to cover the front side of the bathtub, we weld on the front pillars.

We install the assembled structure in the room, level it and install the bathtub itself. We connect and test the operation of the drain and overflow systems. We cover the frame with a sheet of plasterboard.
Making a frame for an acrylic bathtub with your own hands
Modern bowls are often so far from the usual forms that they cannot be installed directly to the wall. Therefore, the quality and reliability of the frame will determine how long the bathtub will last.
Preparatory work for creating the frame
As an example, let's consider the simplest and most classic option that can be found when opening the door to any bathroom - an oval shape. We use tiles for finishing, but you can easily replace them with another material that you like better and suits the design of the room. 
The technology for installing the structure is not difficult:
- we lay the base of the frame post around the perimeter;
- Next we make vertical supports;
- lay down the boards;
- Above we lay a sheet of moisture-resistant plywood, in which a hole is cut to follow the contours of the bathroom.
Attention! You must understand that not only you, but also your wife and children will wash in the bathroom. It is necessary to carry out the calculation correctly in order to set the height of the support posts that will be comfortable for everyone.
Preparing the base of the frame
We place boards around the entire perimeter of the bath. This will be the foundation. We fasten it with crocodile screws. To make our own work easier, we drill holes in the right places on the floor.
We put the racks, if they fit well to the wall, we fix them. Racks should be placed at each corner and around the entire perimeter, fifty centimeters from each other.
Frame installation
As soon as the corner posts are finally secured, we begin work around the perimeter.
To make the racks easier to attach and to give special strength to the entire structure, we use wooden blocks or metal corners.
Similarly, we fasten the upper part of the frame to the racks, and where there is contact with the wall, we fasten the boards with self-tapping screws.
When the entire supporting structure is installed, we place a plywood sheet on top. The options may be different, the only important thing is that there is high reliability, because almost a third of the total weight of the bathtub will fall on this plywood sheet. We fasten screws along the entire perimeter.
Attention! When choosing plywood, look not only at how durable it is, but also how it can resist moisture. Its thickness should not be less than fifteen millimeters.
Cutting a hole for the bath
Most of the models that are available in stores have an installation template included in their kit. Thanks to him, all markings are done easily and quickly. If you don’t have one, measure it yourself using a tape measure. Using an electric jigsaw, we cut out a hole of the desired shape and specified dimensions.
Installing a bathtub on a frame
When all the work on creating the structure has come to an end, it is time to install the bathtub in its rightful place. You need to act based on the size of the room and in a way that is convenient. There are no special rules, the main thing is to correctly make a tray from cement, which will significantly remove the load from the lower part of the bathtub.
We proceed as follows:
- fill the required space with cement mixture;
- wait for the entire mixture to harden;
- When hardening is complete, we install the bathtub on the frame and connect all communications.
Frame decoration
Finally the frame is assembled and installed. It housed a bathtub, which was even connected and tested. You can almost climb into it and wash yourself. But you shouldn't do this right now. First you need to decorate. The more beautifully and efficiently we handle this part of the work, the more pleasant it will be to be in the bathroom.
First we determine the color and material. We are preparing a substrate that will carry the entire cladding. This can be plasterboard, wood boards impregnated with moisture protection, or plywood.
We secure our base with self-tapping screws. Choose them with a special coating - this will avoid problems with corrosion in the future. The side parts of the base can be completely closed, or they can be made to open. To do this, it is worth providing a special door. This will create an additional place where you can store all your bath accessories. You should not try to make the door yourself. It is better to buy it in a store or on specialized websites.
Having secured the entire cladding, we seal the holes with sealant. It is better if the sealant contains antiseptic additives.
That's all. All our work is completed.If everything is done correctly and carefully, the bathtub will last a long time and will not need repair or replacement. As you can see, there is nothing difficult about assembling the frame on your own. Therefore, you shouldn’t spend money on calling specialists, who will charge a lot for the work and may even mess it up.

