Installing a toilet on a tiled floor
When renovating a bathroom, most people simultaneously replace all the old plumbing fixtures with new models. Considering the fact that the humidity in the bathroom is usually very high, it is most likely tiled. To install a newly purchased toilet on a tiled floor, you can invite a professional worker, or you can save a little on your budget and carry out this work yourself.
The content of the article
Required Tools
To replace old plumbing fixtures with new ones, it is not enough to just go to the store, choose the model you like and bring it home. She will not fall into place on her own. To install the toilet reliably and beautifully, you will have to stock up on a set of tools. It doesn’t seem like a difficult task, but you’ll need quite a lot of things:
- electric drill;
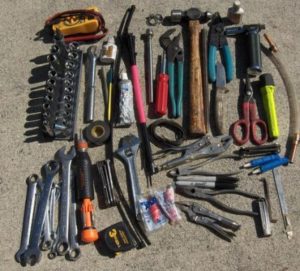
- drills 8–10 mm for stone and tiles;
- adjustable wrench;
- hammer;
- core;
- rubber spatula;
- sealant that matches the color of the tile or toilet;
- marker;
- a set of dowels 8–10 millimeters.
All this is not included with the toilet, you need to look for it yourself.
Fasteners, as a rule, are included in the kit, so you don’t have to pick them up in stores. But you will need to buy pipes and water hoses.
Toilet installation options
There are several options for installing a purchased toilet on a tiled floor:
- Installation internally.
- External installation.
- Fastening with cement mortar.
- Dowel mounting.
- On epoxy resin or construction adhesive.
Preparatory work
All work should begin with preparing the workspace. First you need to start cleaning the place where the installation will take place. We will clear the entire area of dust, sand and soil. If this is not done, then every time there is a need to use the toilet, a crunching sound will be heard.
We thoroughly wipe all tiles. By running your hand over it, you can check whether there are any protruding parts left.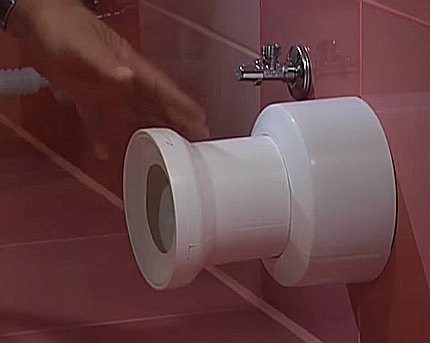
If the floor is rough, you can use sandpaper and rub the surface, and if there are large protrusions, remove them with a chisel. But this is required extremely rarely.
The toilet has such a structure that it must be placed directly against the wall. Accordingly, it is necessary to think about the need to install a sewer system in advance. The toilet drain hole should be located higher than the sewer pipe connection. This ensures unhindered water flow and does not stagnate in the fitting.
Reference! Either plastic products or corrugated pipes are used for the adapter. The best option is to insert the toilet outlet directly into the sewer pipe.
Do-it-yourself toilet installation on a tiled floor
As mentioned above, there are several options to properly install a plumbing fixture directly onto a tiled floor. Each of them has its own pros and cons.Which one to choose is up to each individual, and we will try to tell you more about them.
Externally
If you need to quickly and effortlessly install a toilet, then this method is optimal, but from an aesthetic point of view it is not as good as an internal or closed one. We install the toilet in the place where it should be. Using a pencil or marker, mark on the tile the places where the fasteners will be located.
We place the pencil strictly vertically, because if it deviates from the vertical, the marks will be in a different place and the bolts will not be able to be installed as needed. In addition to the marks for fasteners, we draw the outline of the base. Move the toilet and drill holes according to the marks.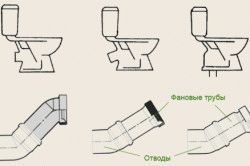
To prevent the drill from walking on the tile, we use a core to make notches where it needs to be drilled. The tiles can be drilled using a glass or ceramic drill. When the tiles are passed, we replace the drill with another one that can be used to drill concrete. We make a hole so that its depth matches the size of the dowels. We clean the holes from dust and pour silicone sealant inside - it will prevent moisture from getting under the toilet.
After filling the holes with sealant, we place dowels in them. Before fixing the toilet, apply sealant to the drawn outline. We install fasteners inside the mounting holes. We close the fastening points with plugs to make the product look more aesthetically pleasing. In addition, the plugs help protect the fasteners from moisture. We remove excess sealant with a rubber spatula or something that is at hand.
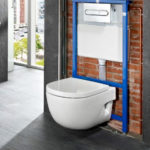
Internal way
Before proceeding with installation, we prepare all outlet openings in order to be able to supply water and a sewer system. We place all holes as close to the toilet as possible.Similar to the external method, we draw the outline of the base and make marks for fasteners.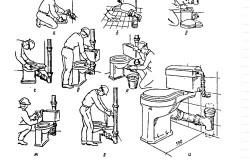
A hidden mount should be installed on the floor and holes in the floor should be made in the same way as described above. Having installed the mount, secure it with bolts. We place the toilet so that the void in its base is above the mount. We insert the bolts into the side holes so that they fit into the hidden mount. We do not immediately tighten the bolts, because it will be necessary to carry out adjustments when the product is connected to water and sewerage.
For plumbing dowels
The simplest and most common installation option is to screw it onto dowels. But even here there are nuances that should be taken into account.
The first step is to make a hole in the tile where the base of the toilet will be located. You will have to work as carefully as possible, since the slightest carelessness can ruin the plumbing.
Reference! Dowel fastening does not imply a large load. If your device is quite heavy, then it would be better to abandon the dowels and use a different method.
We draw the outline of the base and mark the places for fastenings.
Attention! There should be no wobbling of the toilet, even if it is not yet secured. If it wobbles, then you need to make a backing from a dense material, and if the base is even, then clean the base.
When you start drilling tiles, proceed with extreme caution to avoid cracks and chips. You will need to use a drill for concrete and for working with ceramics. Once the tiles are drilled, replace the drill with a concrete drill.
The holes made are filled with sealant and then plastic dowels are installed. The toilet is installed so that the dowels fit into the holes. We install rubber gaskets and tighten the dowels.
Using cement
Frankly, this is not the best way to install a toilet. They resort to it when it is necessary to install new plumbing where the old one already stood or if there are no tools for installation.
To fix the toilet to the tiles without drilling anything, you will need:
- tile adhesive or cement mixture;
- marker;
- hammer;
- two spatulas (one narrow and one medium);
- chisel.
Before installation, we check the joints of all elements, place the product in the required place and connect all the plumbing. We outline the outline of the base. Where the marks are made, we make notches with a chisel.
Important! Working with a chisel requires special care. Be careful not to crack or crumble the tiles. Wear safety glasses when working.
Next, you need to prepare the cement mixture. Mix in a ratio of two to one. But since the cement mixture takes a long time to dry, the best option is tile adhesive. Calculate the solution for four kilograms.
When you have everything ready, apply the composition to where the notches are made. The surface will need to be slightly moistened before applying the adhesive. We also moisten the base of the toilet with water and place it in the right place. We place plastic plates five millimeters thick and fifty millimeters wide under the front and back of the base.
Attention! When placing the plates, make sure that the seat remains perfectly level.
Excess solution is removed with a spatula. After the solution has dried, the linings are removed and the holes from them are sealed. And for five days you will have to go to the neighbors’ toilet.
Fastening with glue or epoxy
Installation can be done using liquid nails, silicone sealant or epoxy resin. If you decide to use this method, you need to know all its positive and negative sides.
When using liquid nails, “painless” dismantling will be impossible. The base will definitely crack.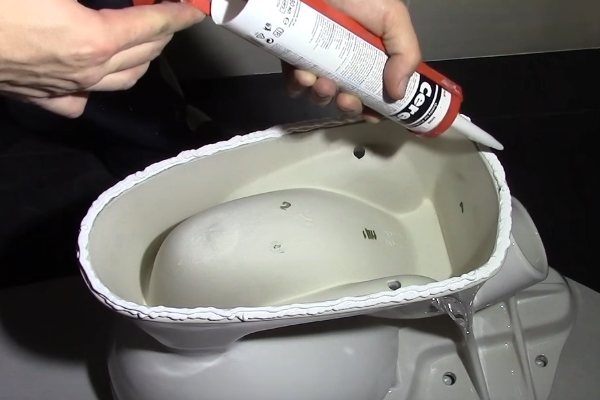
Installation on sealant is quite common, but there is no guarantee that movement will not occur over time. The good news is that it will be possible to dismantle without consequences.
Using epoxy resin is a very safe and reliable method. However, if it needs to be dismantled, damage will be visible on the tiles.
All three options are similar to installation on cement. First, the contour of the base is marked. Next, a degreaser is applied to the tile and to the places where the base will come into contact with it. The composition is applied to the tiles and to the base itself. You will have to firmly press the toilet to the floor and wait until it hardens.
Sewage and water supply connections
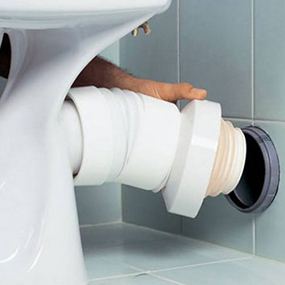 The installed device must be connected to the sewer in order to be able to use it. Usually corrugation is used for this. It’s convenient to set the angle you need, and you can easily stretch it if necessary. The corrugation has a good seal that will prevent water from leaking at the junction with the drain.
One side of the corrugation is inserted into the sewer pipe, and the other into the toilet outlet. The joints are coated with silicone sealant. The tightness of the connections is checked. If no leaks are found during the test run, then the product can be used.