Installing a wall-hung toilet with do-it-yourself installation
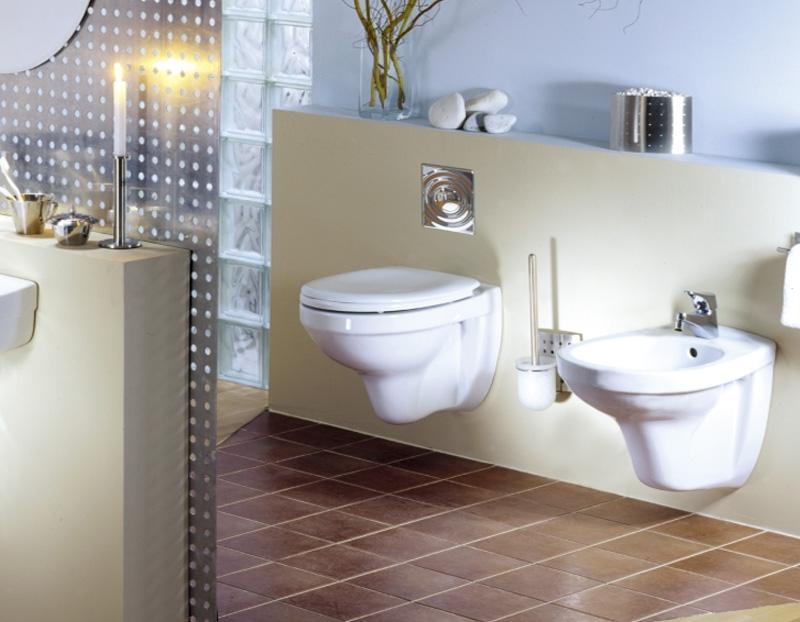
Increasingly, in modern homes, instead of the compact toilet models familiar to the eye, you can simply see a bowl hanging on the wall. The tank itself is located somewhere behind the partition, and all communications are hidden there. What to say? Unusually, it is much more difficult to install, because you will additionally have to mount the partition, as well as decorate it with something, but with this approach, even a small room visually becomes more spacious.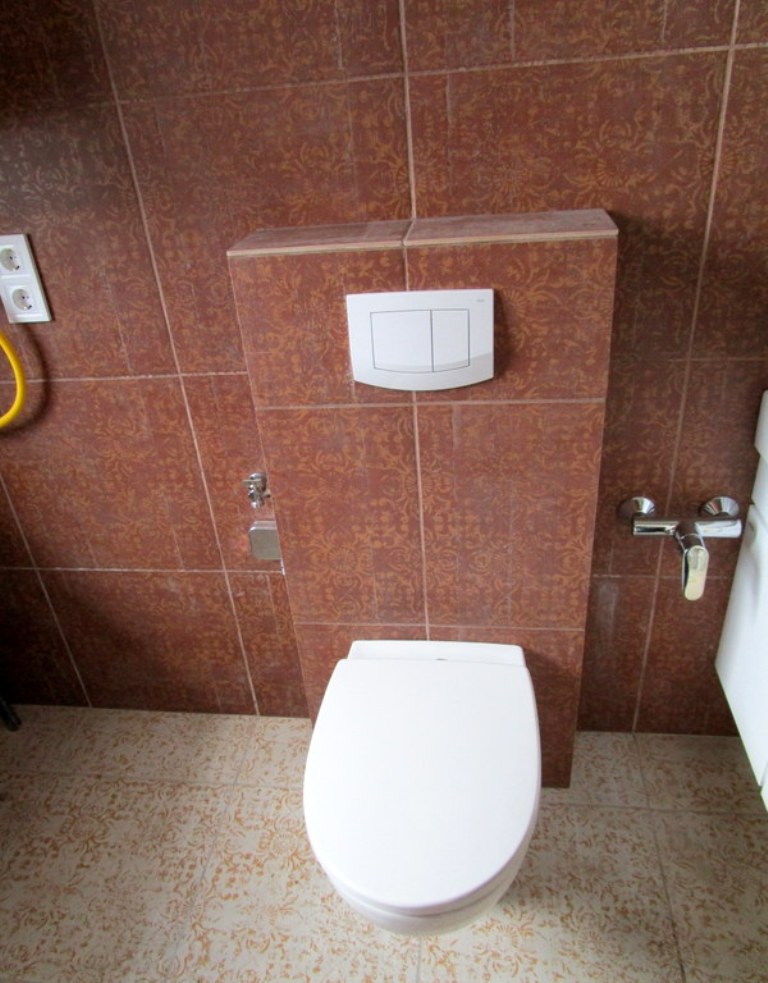
The content of the article
Features of a wall-hung toilet
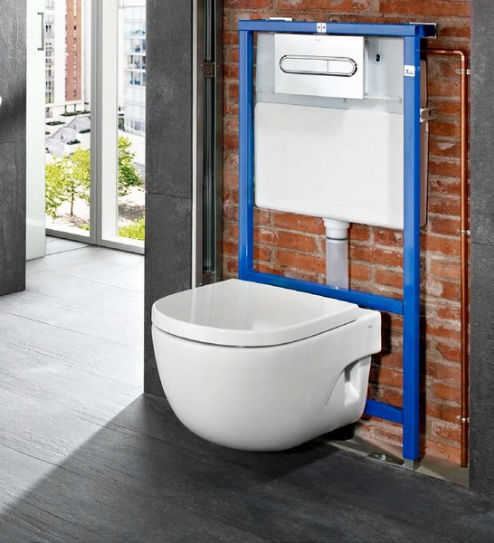
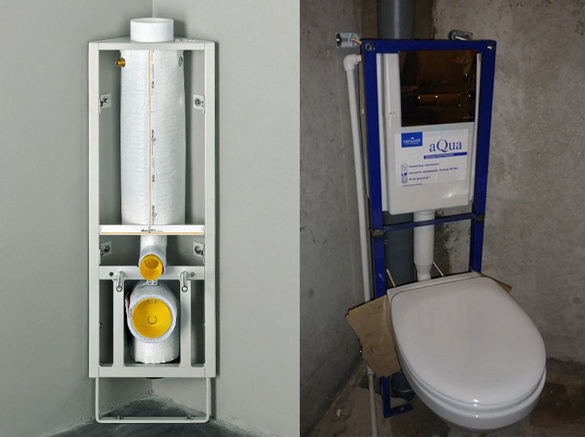
What all toilets have in common is a water tank equipped with a flush button. It is installed in a steel frame. There are also holes to attach the toilet to the enclosing surface, naturally, studs for mounting the bowl, an elbow for flushing and draining. All these designs are divided according to the type of installation:
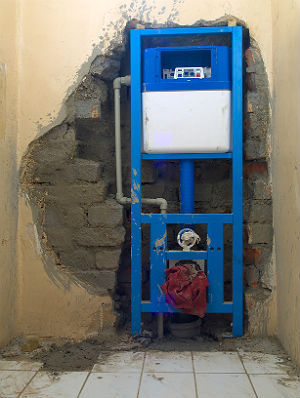
- Block system. The structure is designed for hanging; it is fixed to a load-bearing wall. There is no support in this design. It can be installed in a niche, or it can be attached to the wall. If you are attaching it to the wall, then do not forget that you need to make brickwork from the floor level to the block. This will avoid pushing through the sheathing at the bottom of the box.
- Frame system. This structure is placed near a load-bearing wall or next to internal partitions. The entire load goes to the supports, which are located on the floor. For fixation, the structure is attached to the wall.
- Corner system. One of the types of frame systems. It is installed in the corner of the room. The load falls on the legs. On the back side, the entire structure is attached to the wall.
Pros and cons of installing a wall-hung toilet with installation
Nowadays, built-in plumbing is not as surprising as it was a few years ago. Many people have learned from their own experience both positive and negative qualities. Of the obvious advantages:
- the dimensions are quite compact - visually the room expands;
- it is convenient to keep clean, since all parts are easily accessible;
- you can’t hear the sound of draining water, since the walls allow you to create sound insulation;
- Water is used sparingly, as separate discharge is used;
- this design is durable and reliable;
- does not interfere with laying tiles or warm floors.
Of the obvious disadvantages:
- there is no access to communication systems, because they are hidden by a partition;
- although the system has increased reliability, in case of an unforeseen situation it is necessary to dismantle the ceiling, and this entails additional costs;
- although the assembled system saves space, at the assembly stage it is necessary to expand the space to secure the frame;
- installing a regular toilet does not require much strength from the wall, but block structures require strong walls.
Do-it-yourself installation of a wall-hung toilet
Any installation of plumbing should begin from the place where it will be installed. You should pay close attention to some characteristics of the room. Naturally, these are the parameters of the room. It should be installed where the structure Not will be particularly disturbing. Corner installation is quite a good solution, as it allows you to gain more space in a small space.
The second thing you should pay attention to is how close the communications are located. If you need to expand pipes, therefore, you will have to allocate more space for them. In addition, do not forget about the required slope - for every meter of length one and a half or three centimeters. If the pipes are long, then you will have to hang the device quite high. All this must be taken into account to make it easier in the future to create drainage and water collection points for other equipment.
All installation installation steps can be divided into several stages:
- choosing a location for installation;
- installation and fixation of the structure;
- connection to communications;
- testing of work.
Preparing for installation
At the preparatory stage, it is necessary to put the workplace in order and stock up on all the necessary tools and components.
You will need a hammer drill to make a hole in a brick or concrete wall. Construction level to clearly align the product vertically and horizontally.
In addition, you will need:
- spanners;
- hammer;
- drills of different diameters with carbide tips;
- pliers, screwdrivers.
In addition, you need to have a pencil or marker and a tape measure on hand. When everything you need is at hand, the work will go faster and your nerves will be healthier.
Markup consists of the following steps:
- an axis line is drawn on the wall, which will mark the center of the structure;
- the distance from the wall to the structure is measured - it should not be less than fifteen millimeters, more is possible;
- marks are made under the tank;
- Marks are made on the floor and wall for fastening the structure.
At this stage, you need to be extremely attentive and careful to every detail - this will make further work much easier.
Installation
To install the structure, not only the included elements are used, but also those purchased independently. All of them must have a sufficient margin of safety, since they will bear a significant load:
- In the places where the marks are made, holes are made using a puncher for installing spacer dowels. Absolutely all models are mounted on a vertical plane, as well as horizontally.
- The housing is secured with bolts and nuts.
The entire structure is given the required position relative to the vertical and horizontal. You also need to focus on the fasteners. When displaying the product, use a level.
Horizontally, the structure is adjusted by frame supports, which can be fixed at the desired height.
In the vertical plane, the structure is adjusted with an anchor, after which it is fixed with a lock nut.
Attention! When installing, you need to do everything exactly. And most importantly, record it well. The overall performance of plumbing depends on the reliability of the structure. It’s not particularly pleasant to sit and feel how everything is swaying under you.
Connecting the device
At the final stage, it is necessary to install water and sewerage.
Water supply is usually carried out from the side or through the top. The main thing is not to use flexible hoses, as they are short-lived and wear out quickly. Replacing them will also be complicated by the need to dismantle the partition. The best solution would be to use polymer pipes.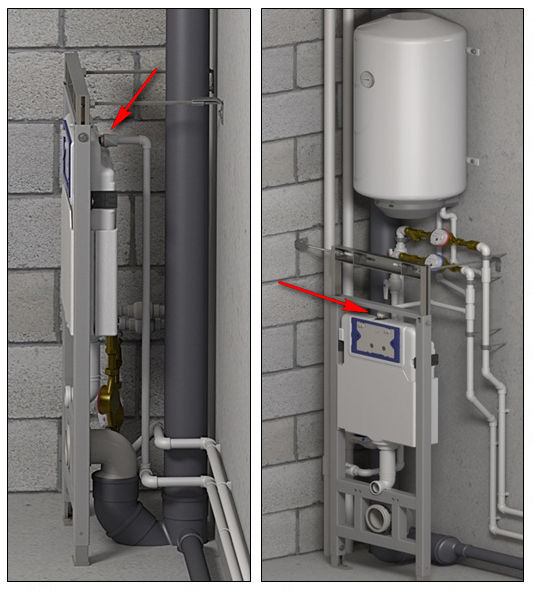
All pipe fasteners should be prepared in advance.We insert the toilet outlet outlet at an angle of 90 degrees into the sewer pipe and fix it to the frame with a clamp.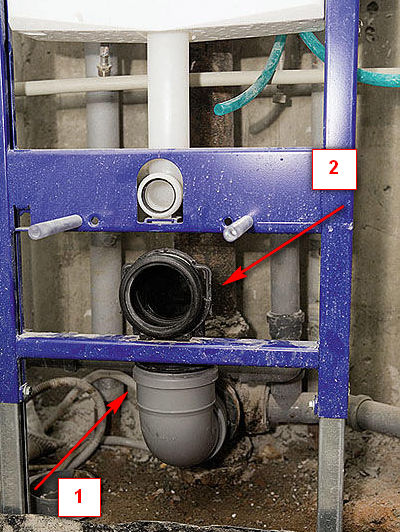
We insert the studs and connect the toilet bowl to them. There are models that are mounted not only on the frame, but also on the wall.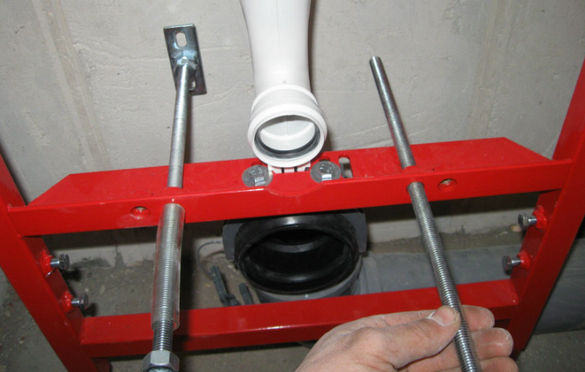
We check the design. We hide the internal elements behind the false panel. It is usually made from plasterboard, onto which tiles are then glued or plaster is applied.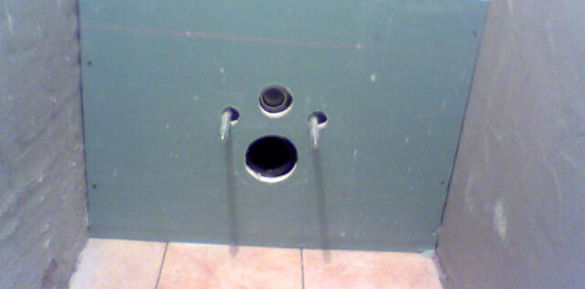
Drywall is also convenient because holes can be easily made in it to connect the structure with the bowl and buttons.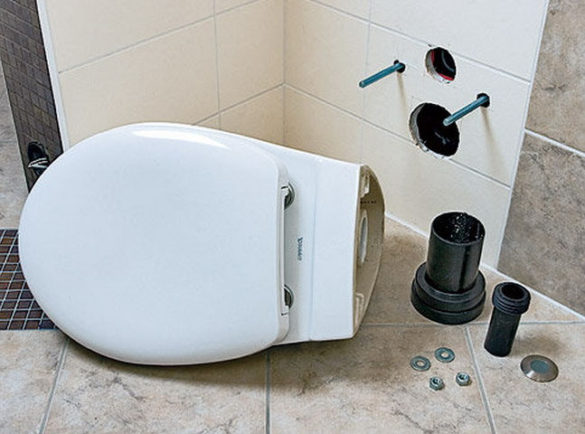
The toilet is connected to communication pipes through pipes. Their length is usually with a reserve. Then they can be cut, taking into account how thick the false panel will be.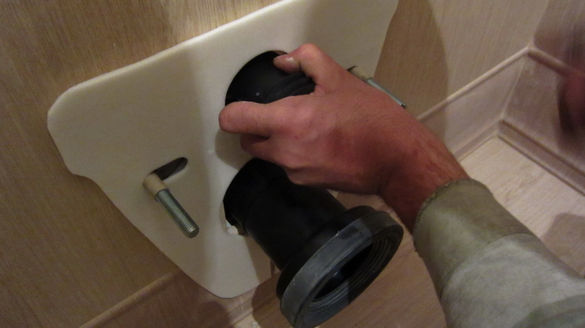
The toilet is fixed to the main structure. To avoid damaging the toilet when tightening the nuts, you must use the plastic washers included in the kit.
All that remains is to install the drain button on the tank.