Why does the toilet flush button stick?
Many modern toilets are equipped with a push-button flush. This mechanism is very convenient and practical, which is why it is very popular among domestic consumers. However, under conditions of intensive use, even it sometimes breaks down, after which it begins to work not entirely correctly. Most often this results in leakage because the valve can no longer hold water in the tank. On top of that, the button starts to stick and jam.
In today's material we will look at why the drain button may break. We will also look at how it can be repaired or replaced (when it is no longer suitable for repair).
The content of the article
Reasons for the malfunction of the toilet cistern button
There are several reasons why a button fails. However, there are only two main ones:
- the elements have worn out and simply become unusable;
- the settings of the fittings are lost - because of this, malfunctions begin in the entire mechanism.
Let's take a closer look at each of the problems. Most often, the drain mechanism is made of plastic. On expensive models it is more durable, so the service life of such a mechanism is not limited to 2-3 years.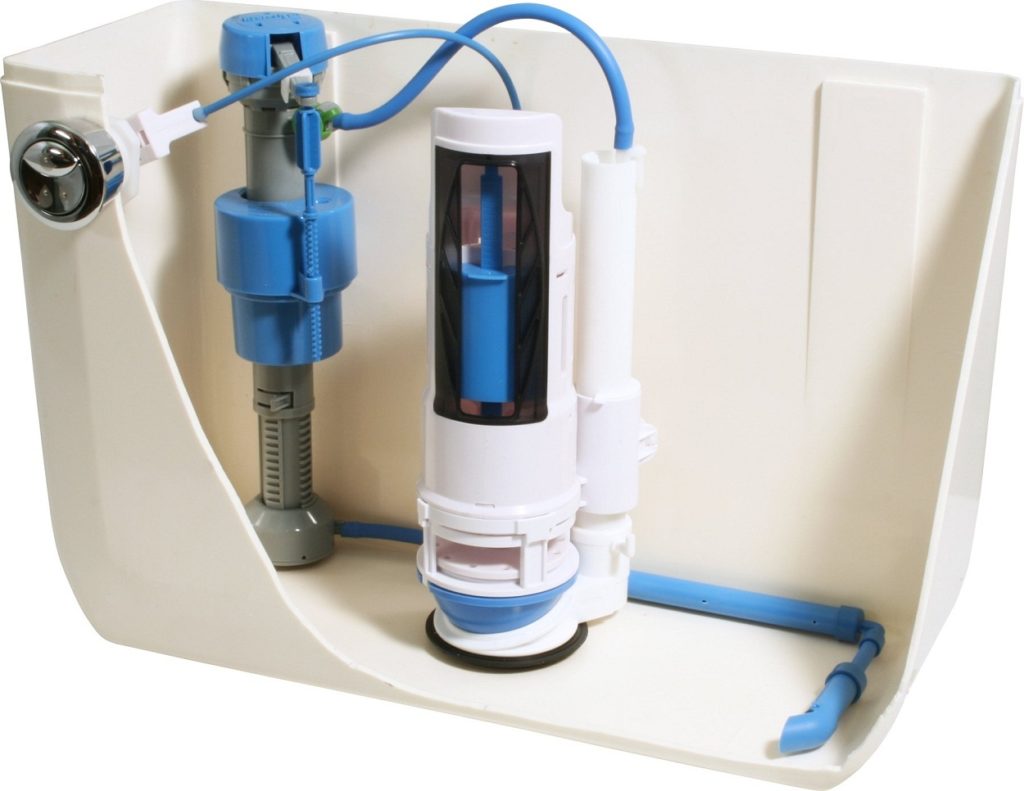
On budget toilet models, the mechanism may fail after just a year of intensive use. Unfortunately, in many cases it will not be possible to fix the breakdown, since the mechanism is simply beyond repair, which means that some elements will have to be replaced. Considering the low cost, it won't put a big dent in your wallet.
Since the drain mechanism consists of several separate parts, you should initially figure out which of the elements broke down, and only then go to the store for new parts.
How to fix a cistern flush button
Sometimes repairs can be done yourself, and they are completed within 5-10 minutes. The procedure, as well as the method of repair, may be different and depend on the type of breakdown.
First, pay attention to what the signs of breakdown are. If a sufficient amount of water is not collected in the drain tank, i.e. the tank is only partially filled, then we will not be talking about repair work, but only about adjusting the system.
You need to adjust the flush using a float. The correct location of this element should ensure the required water level. Experts recommend that the maximum water level be 1.5-2 centimeters lower than the overflow edge.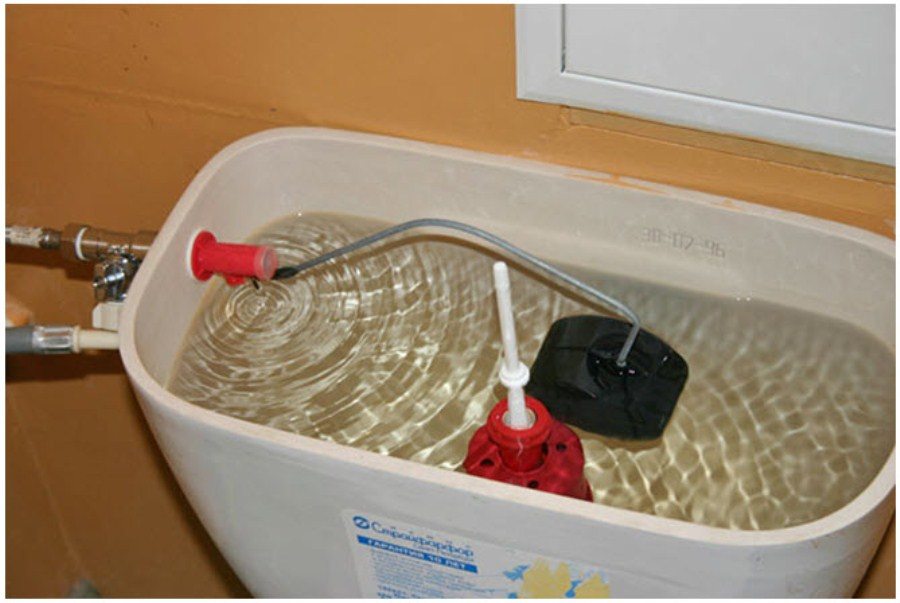
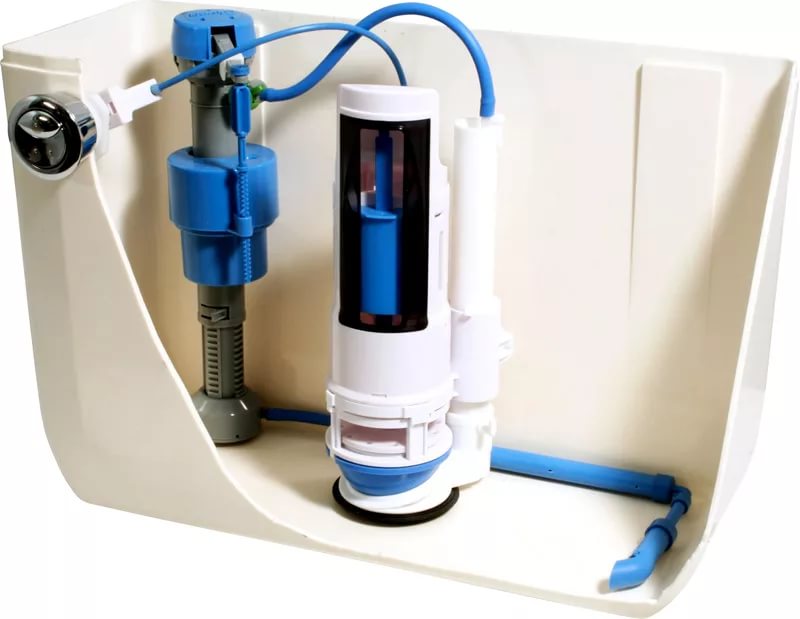
To adjust the float, you need to perform the following steps: at the bottom feed valve, you need to remove the rack rod from the hooks, then move along the guide in the desired direction - down or up. The same manipulations must be performed to adjust the side feed valve. The only difference will be the location of the float.
If it is necessary to adjust the button, the overflow tube is moved, after which the height of the glass is adjusted. To do this, unscrew the nut on the tube, disconnect the rod and move the tube to the correct position. After this, the nut is tightened.Next, press the petals on the glass and move the guides. Finally, the rod snaps onto the lock.
If there is a problem with the button (most often, when flushing, sticking or sinking occurs), then repair work can be carried out only after a detailed inspection of the mechanism and identification of the cause of the breakdown.
If problems start with the button, then adjustments are no longer necessary - it is necessary to carry out a full repair.
If it sticks
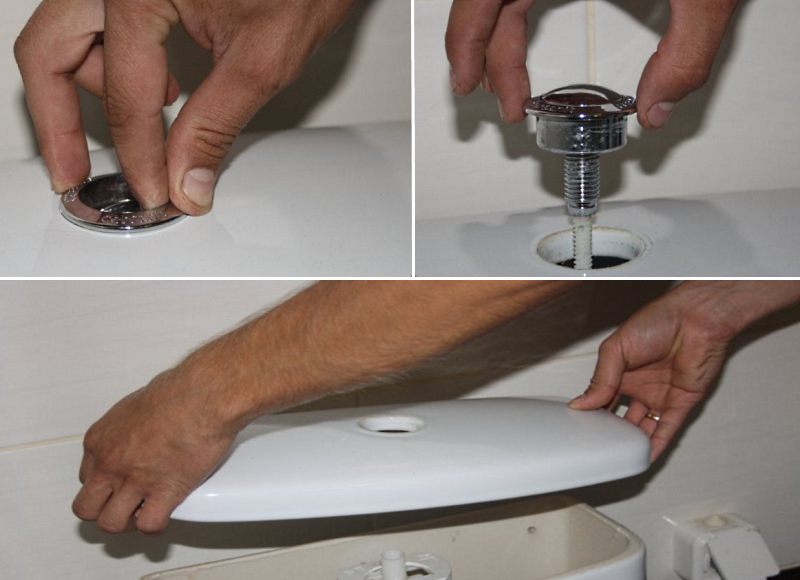
The button gets stuck for various reasons. To eliminate this problem, it is necessary to remove and completely disassemble the fittings. To do this you will need:
- turn off the water;
- unscrew the stopper ring;
- remove the button;
- remove the tank cap.
After this, you can start looking for the problem.
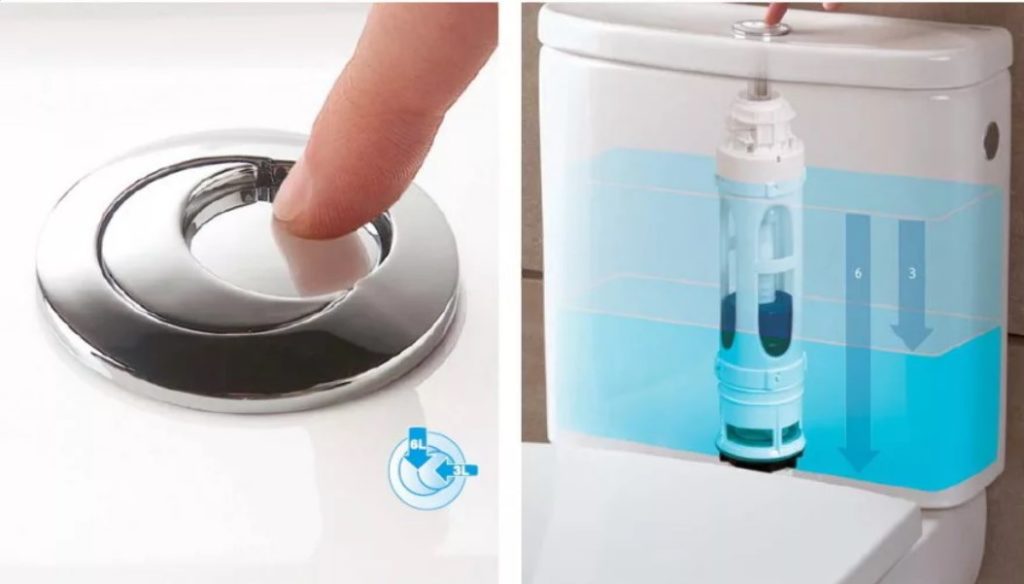
Important! If the tank has a two-button drain system, the dismantling process will be slightly different. First you need to press the big button. Thanks to this manipulation, the groove will open. You need to insert a screwdriver or an awl into it, after which it is taken out, then the larger one is removed. The screw that holds the socket with the button should open under it. By turning this screw, you can easily remove the cover.
If the fittings have been installed recently, then the button may stick for one simple reason - you just tightened it too much. The reason for this is burrs on the surface of the plastic elements, due to which the button locks. If this is the reason, then you just need to clean this area with sandpaper.
Another reason for sticking is the displacement of the pressure lever. Thanks to it, the rod moves, so if it moves or skews, the entire drain mechanism will simply lock. To restore the drain function, you just need to make adjustments and configure the mechanism.
Another reason is that various deposits in the form of debris, dust and plaque have accumulated in the button socket. The problem can be solved only by cleaning this working unit.
If the button sticks due to wear of one of the parts, then it must be replaced. In most cases, you can handle it without calling a technician, since the repair is completed within 10–15 minutes. If you call a plumber, you will have to pay a tidy sum for his services.
If she fails
If the button fails, then repairing this failure will look a little different. One of the main causes of malfunction is that the drain mechanism is incorrectly configured. To make the settings, you must perform the following manipulations:
- turn off the water and drain all its remains from the tank;
- remove the button and remove the cover;
- completely remove the drain fittings;
- adjust the maximum water level;
- configure the mechanism - it is important to take into account that the button in the pressed position should not come into contact with the overflow tube;
- adjust the float.
In addition to incorrect settings, the cause of failure of the push-button mechanism may be a malfunction of the return spring. If the push-button assembly is solid and non-separable, then the entire mechanism will have to be replaced. If it is collapsible, then it is enough to replace the faulty spring.
Replacing the tank flush button
If the button fails, then there is no need to replace the entire drain system; it is enough to just change the button itself. Please note that the new part must be the same model as the old one. Replacement is carried out according to the following plan:
- remove the faulty part by disconnecting it from the cover;
- check the settings of all mechanisms;
- install a new part;
- check the functionality of the drain mechanism.
Important! If the tank is an old model, it will not always be possible to find the necessary parts. Often the entire valve has to be replaced.
Instead of a total
Despite the fact that there are a huge number of toilet models, they all have approximately the same drain systems, and the differences that can be observed in these systems will not create serious problems when carrying out repair work on the push-button unit.
A good article, but the author did not focus on lime deposits, which are mainly the cause of jamming of plastic fittings.



The author forgot one more detail, this is the water itself, or rather what it contains (I didn’t look under a microscope). When you change the water for your pets, you notice that the inside of the container is filled with some kind of garbage. The same garbage settles on the plastic fittings of the drain (if the float is vertical). My float got stuck every morning - I wiped it and it stopped sticking.