How to install a toilet
Many novice craftsmen are afraid to install plumbing fixtures themselves. There's really nothing complicated about it. If you have enough skills to completely shut off the water supply, then you can handle the rest without really straining yourself. Of course, you can also invite specialists who will do everything quickly, efficiently, and then provide a report on the work along with a check. But why waste extra money? Let's figure out how to avoid this.
The content of the article
General recommendations for installing a toilet with your own hands
Despite the fact that installing a toilet is not the most difficult task, there are some points that should not be forgotten:
- If, during renovations in the toilet room, it was necessary to change the height of the floor, then this difference can be removed with ordinary corrugation and a water hose. If the height difference is too great, then more professional skills are needed.
- In case of existing unevenness on the floor, the best option to secure the toilet is to use silicone. Wooden wedges will help a lot, but even here you will need a sealant, since it will be able to distribute the weight of the structure.
- If pipes pass through the floor and not through the wall, you need to use corrugation.
Assembling and installing the tank correctly
As strange as it may sound, installing a new tank is much easier and faster than removing the old one.Here the work is dry, everything around is clean, there is no plaque or sediment. And it’s much more pleasant to create than to destroy.
To work you will need:
- adjustable and open-end wrenches;
- special key;
- screwdriver and gloves.
Procedure:
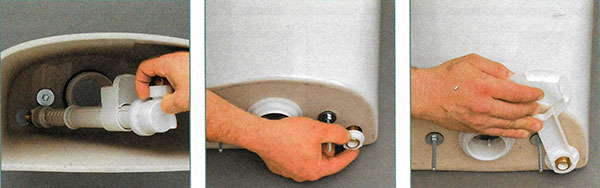
- Unscrew the fastening screws from the tank to the toilet shelf.
- We screw a metal washer onto the screw.
- We put the centering washer on top of this washer until they touch.
- Insert a screw into the mounting hole.
- We put the rubber gasket, washer and nut on the screw.
- Tighten the nut.
- The second fastener is installed in the same way.
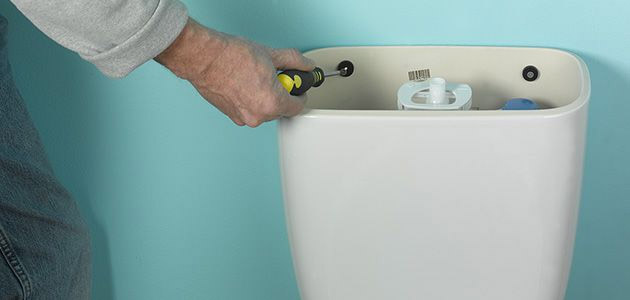
- We install the screw from the drain valve into the hole in the tank.
- By pressing on the tank, we tighten the drain valve.
- Screw the nut onto the screw.
- We tighten it to the limit.
- Remove the protective layer from the sealing ring.
- Glue the ring to the tank.
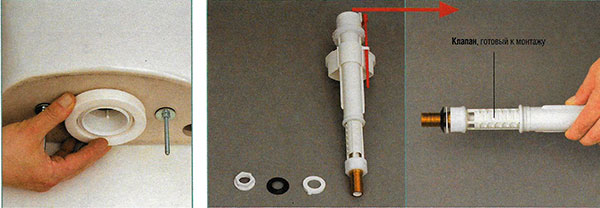
- It is necessary to prepare the valve for installation: put a washer and gasket on it.
- We install the valve in a special hole.
- Let's fix it.
- We tighten the nut - the tank is now completely ready for installation on the shelf.
- We insert screws into the holes in the shelf.
- We put a rubber gasket, washer and nut on the screw.
- We fix the nut.
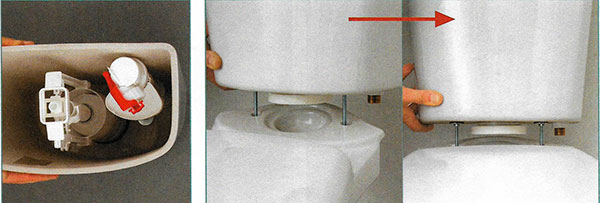
- We put the lid on the tank.
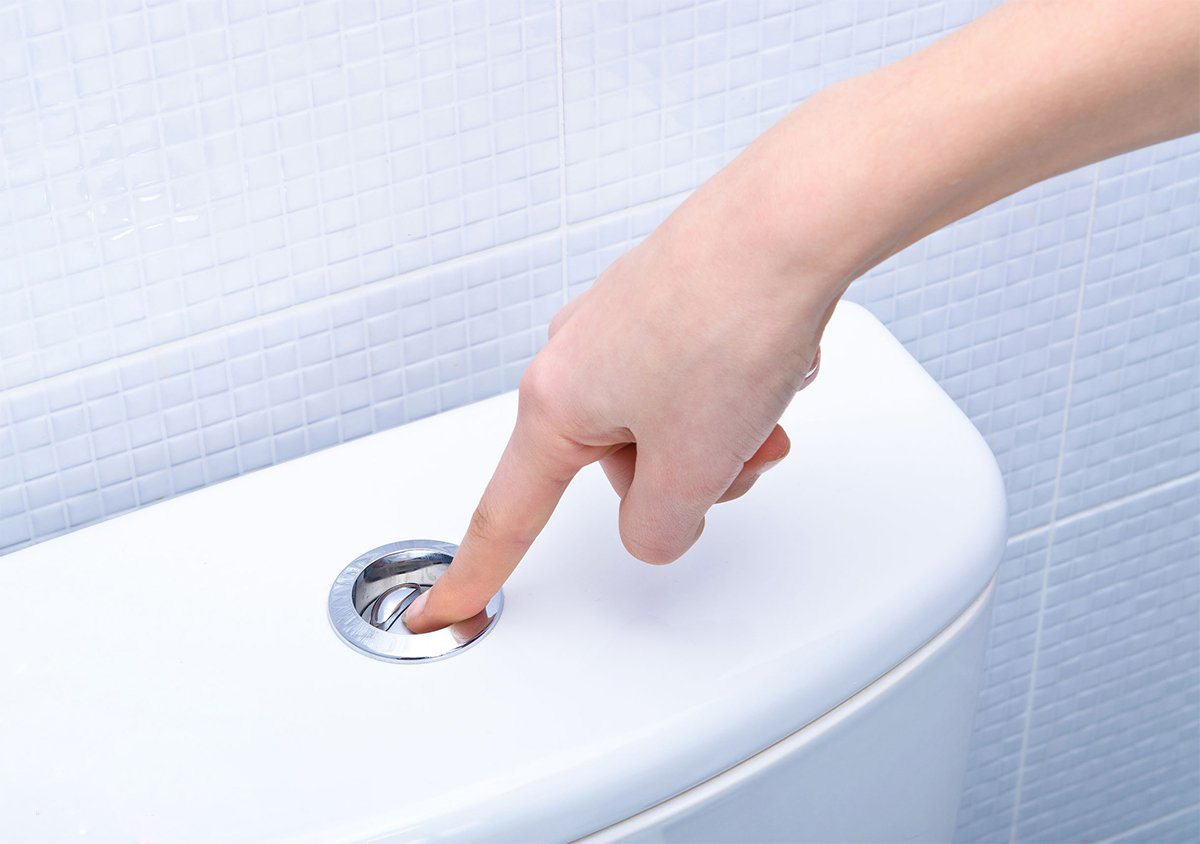
- We install the release button in its place.
We install a toilet with an installed tank
We insert the corrugation inside the sewer pipe and check whether it fits tightly. In most cases, ordinary corrugation is sufficient. If the pipe is made of cast iron, then you will need a cuff of 110 millimeters.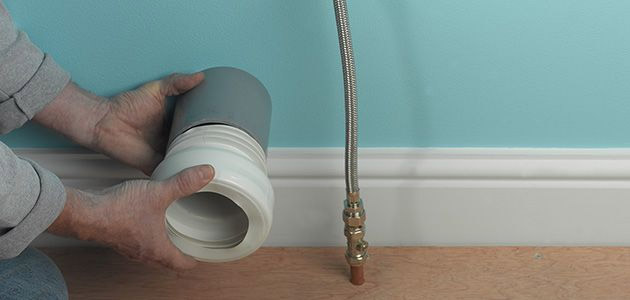
Silicone sealant is applied to the corrugation, after which the pipe is cleaned of contaminants and the corrugation is inserted into it.
Having moved the toilet towards the pipe, we check that the pipe and outlet are level. Usually they coincide, but if this is not the case, and the difference is large, you need to use corrugation.
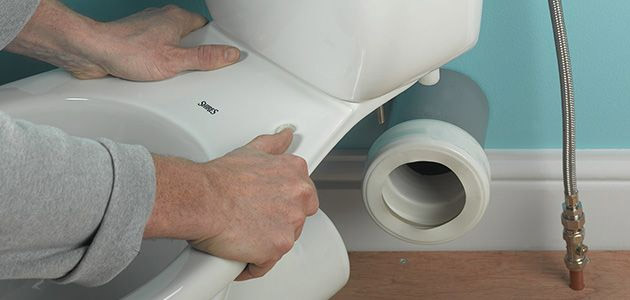
We place the device in its designated place and put on a cuff for release.
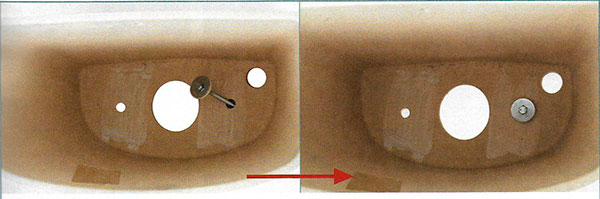
Using a level, check that the tank is evenly seated. Make notes where you will need to drill holes for fasteners.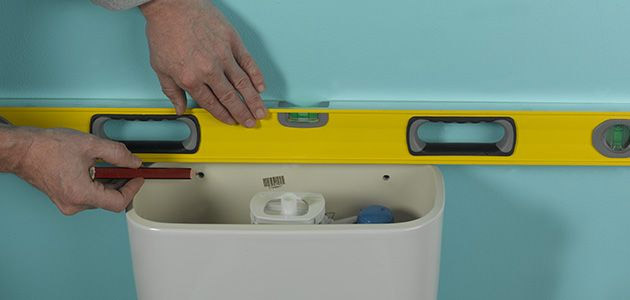
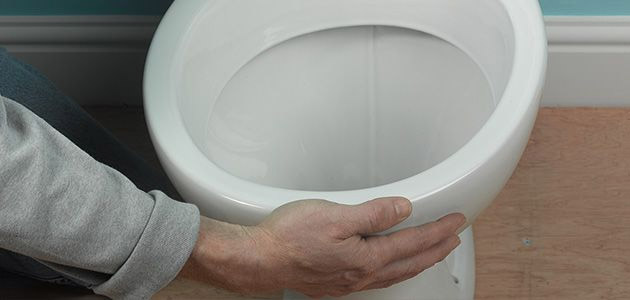
It is also better to check the toilet for accuracy of installation. Being careful, you need to mark the holes on the floor.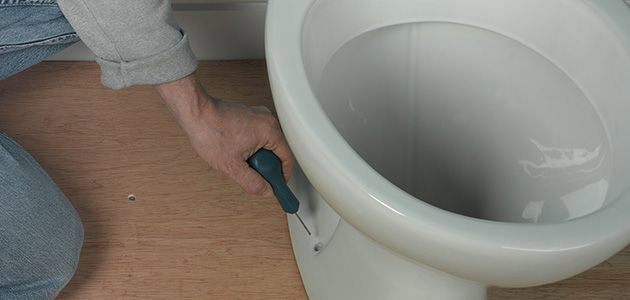
The base of the toilet is outlined with a marker. Such accuracy will be useful when the entire preparatory stage is completed and the time for installation comes.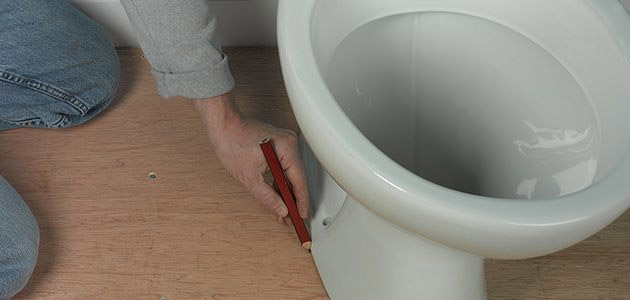
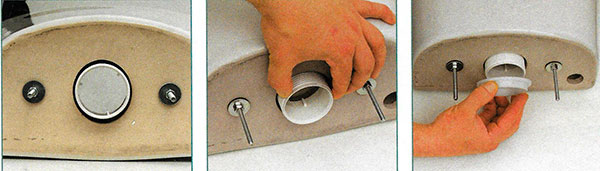
Moving the device aside, drill holes according to the marks. First you need to drill them into the wall. Dowels are installed in the holes.
Next, holes are made in the floor according to the marks.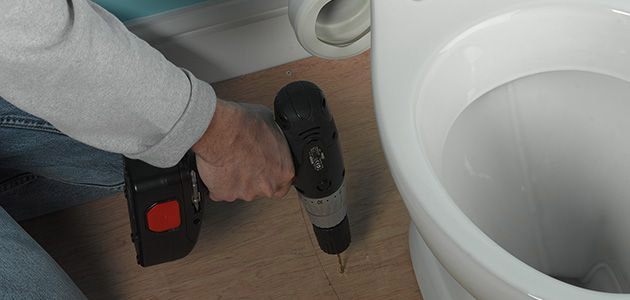
Ceramic tiles are difficult to drill: this requires a hammer drill and a stone drill. When going through the tiles, you don’t need to press hard on the hammer, and then you can increase the pressure. If the floor is not made of wood, then dowels are placed in the holes.
Before installing the toilet, silicone is applied along the marked contour of the base.
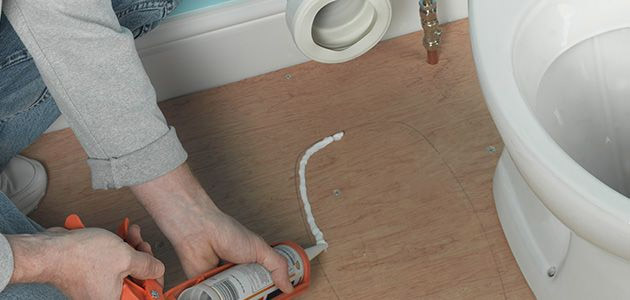
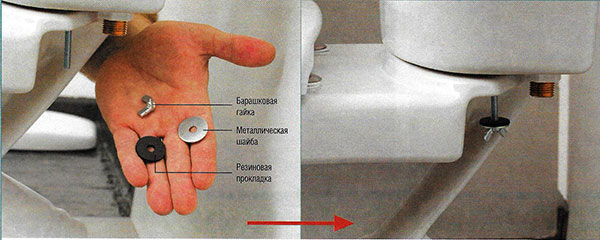
We install the toilet and fix the tank. When tightening it, you do not need to overtighten the screws.
The base is fixed to the floor. The main thing is not to tighten the fasteners too much.
We connect to sewerage and water supply
As soon as the toilet is installed in its place, the drain hole is covered with sealant and a corrugation is inserted into it. After checking the connection for tightness, excess sealant can be removed.
As soon as the sealant has completely hardened, you can begin to use the structure.
Reference! The accumulation of water near the plumbing will be a clear signal to better seal the coupling. A rubber ring is used for this.
It should be clarified that the toilet does not live by the sewer alone. Connection to the water supply system also plays a big role. After all, it is to the water supply system that the tank owes the presence of water for flushing.In order for the pipe to be connected to the tank, there are water sockets.
Connecting the toilet to the water supply is the following procedure.
The first step is to shut off the water supply. You need to put a tap on the water outlet; this will allow you to simply turn off the water in the future, while leaving its supply to the rest of the apartment. You need to wrap sealing tape around the threads. This will allow the connection to fit more tightly and prevent leakage.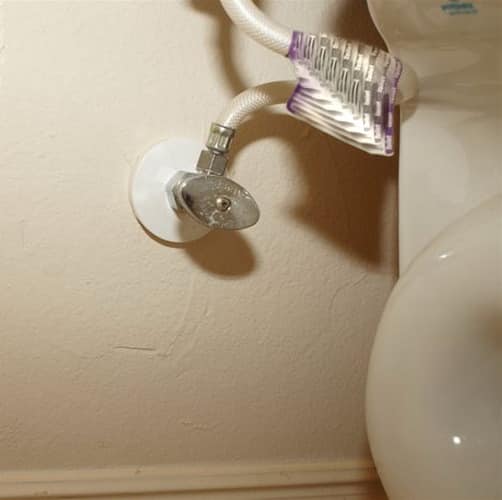
A hose is attached to the tap to supply water to the tank. The hose itself can be in two versions: either flexible or rigid. The thread must also have a sealing tape. Then the nut is tightened.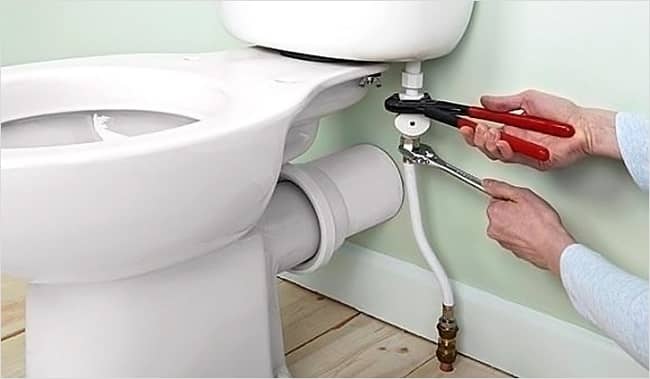
The second side of the hose is connected to the tank nozzle. A gasket, usually made of rubber, must be installed at the joint. This is necessary so that the tank does not leak.
At this point, all work on assembling, installing and connecting the toilet to the sewerage and water supply system can be considered complete. If there is a strong desire to immediately test the assembled structure in action, then there are no obstacles to this. As you can see, the whole procedure is very simple. If you approach the work with care and accuracy, then installing plumbing will be easy, while saving the family budget.