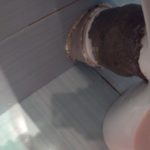
How to install a gasket between the tank and the toilet
Any plumbing fixture, and the toilet is no exception, contains small but very necessary parts - rubber seals. Their mission is very important - they not only connect parts of the product to each other, but also seal it from leaks. However, time treats them mercilessly. Gradually they become unusable and can no longer hold back water. They need to be changed. How to do it? Let's try to find out.
The content of the article
Types of gaskets used for toilet bowls
In fact, all seals used in drain tanks can be divided into those that seal and those that cushion. The second option can be found in expensive models - they allow the upper and lower parts not to contact each other. For manufacturing, either rubber or silicone is usually used; the form itself is quite diverse:
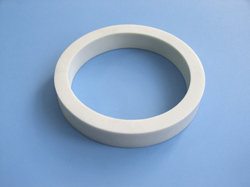
- Round gaskets. Most often you can find this type. The product is thick and comes in black or white rubber. There are also budget options made from foam rubber, but you will quickly go broke on them, since they last no more than three days.
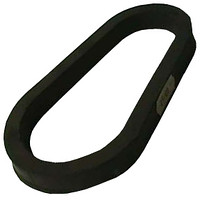
- Oval gaskets. Often installed on older models of devices. You almost never see them in modern versions. This type of seal is made of thick rubber, lasts a very long time, but requires great force to press during installation.
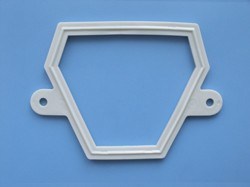
- Trapezoidal gaskets. They are very rare. Their main disadvantage is the need to use screws for connection. But they last a long time and are well fixed.
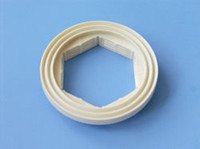
- Universal type gaskets. On the outer edge they have an even texture and smooth surface, but on the inside they have the shape of an equilateral hexagon. Allows reliable fixation, even despite the weak tightening of the bolts.
How to install a gasket between the tank and the toilet
If you need to replace the toilet seal, you must first remove the flush tank. To do this, you need to perform the following sequence of actions:
- Shut off the water supply.
- Remove the cover.
- Drain the water.
- Wipe the tank dry.
- Unscrew the water supply pipe.
- Unscrew the locknut that holds the siphon in the tank.
- Unscrew the bolts securing the tank.
- Remove the tank.
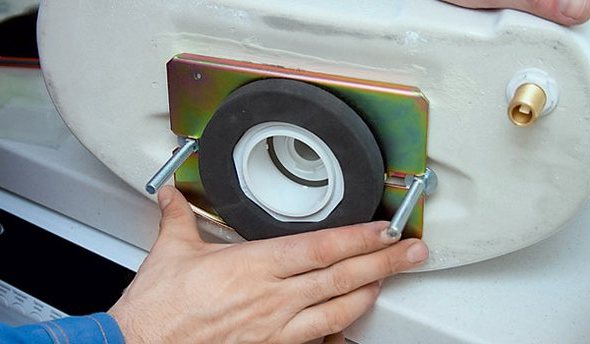
On older models, the toilet and cistern were secured with metal bolts. Metal, unlike modern polymers, is susceptible to corrosion. This leads to difficulties when trying to unscrew them. To make the task easier, you need to spray WD-40 on the surface of the bolts. Kerosene is better at removing rust than this composition. After removing the tank from its place, the following actions are necessary:
- Remove the old cuff.
- We are preparing a place for installing a new gasket. The installation site should be cleaned of dirt and dried.
- We install a new gasket.
- To enhance the tightness, we treat the gasket with sealant.
- We put the tank back and secure it. Tighten the screw slowly so as not to damage the toilet. First, tighten the first screw a few turns, then the second one. If you immediately tighten the screw to full strength, the gasket may move or damage the drain tank.
- We connect the internal fittings of the tank and secure it with a locknut.
- We connect the water supply hose, but do not supply the water itself.
- After two hours, which are necessary for the sealant to harden, turn on the water supply to the drain tank.
- We check if there are any leaks at the connections.
As you can see, there are no questions about replacing the old gasket with a new one between the flush tank and the toilet. The entire work process can be carried out without the involvement of outside forces and using a minimum of tools. It is only necessary to carry out periodic preventive inspections to reduce the risk of leakage.
Attention! As a rule, damage occurs when you least expect it. And the longer repairs are delayed, the more serious damage this can entail. The only option in such a situation is to temporarily fix the problem.
There are several options:
- You need to cut a small strip of fabric and soak it in paint. Oil paint is needed. The drain tank must be lifted (an assistant will be needed here) and, while it is raised, wrap the fabric around the damaged area. For a more effective result, the fabric is secured with a rope or clamp, after which the tank can be lowered. Once the paint is dry, you can use the toilet.
- You can apply a rubber band to the damaged element. You can buy it at the pharmacy. The tape is stretched and applied to the damage. Can be fixed with wire.
When is it necessary to change the seal?
All seals used between the flush tank and the toilet are in most cases made of rubber. Everyone knows that rubber gradually loses its properties when exposed to moisture. It ceases to be elastic and rigidity appears. This means there is a high probability of cracks occurring on the surface. Water will always find its way through these small cracks and give us a signal that it is time to replace the gasket. The main signs of the need to quickly change the seal:
- Traces of water are visible on the floor. If it is not condensation from the tank that forms during cold weather, then most likely it is the gasket that is leaking.
- Upon inspection, damage was found on the gasket. To visually inspect the gasket, you need to remove the tank from its place.
Inspection alone is often not enough - you need to probe the seal. If it is hard to the touch and not elastic, it would be better to change it.

