How to change the flush mechanism in a toilet cistern
A breakdown of the flush mechanism of a toilet cistern is always an unpleasant situation, sometimes accompanied by serious consequences, including complete flooding of the room. Calling a plumber in such a situation is not always possible, but this is no reason to despair - you can often fix the breakdown on your own, having only a minimal set of tools, the knowledge gained from this article, and indomitable enthusiasm.
The content of the article
Tank drain device
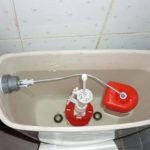
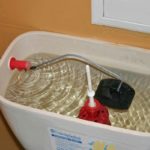
In simple terms, in the design of any tank there are two units: one collects water into the container and regulates its quantity, and the other drains it. The first, so-called set node, consists of the following elements:
- set fittings;
- locking mechanism;
- flexible hose;
- twists;
- float
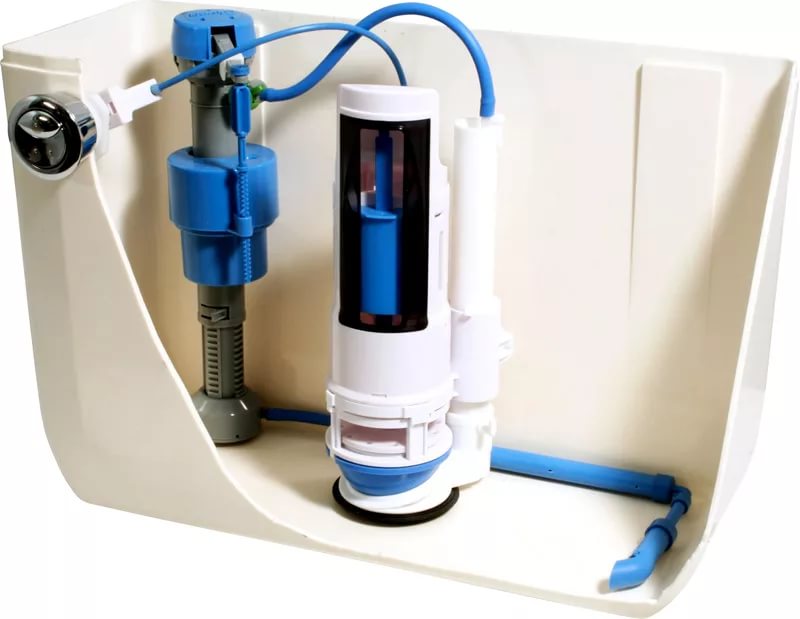
Water flows from the water supply into the fitting of the set through a flexible hose. The fitting valve regulates the amount of water: when, under the influence of the collected liquid, the float rises to the required level, this valve closes, stopping the flow of water into the tank.
If we talk about the drain unit, then there are usually fewer components in its composition. The flush of virtually any toilet is “tied” to a button that flushes the water.Most often, it is connected to a lever that, when a button is pressed, raises the shut-off valve, allowing the water in the tank to drain freely downward under the influence of gravity. When the water level drops, the float opens the fitting valve and the tank begins to fill again.
Reference. Many designs have one more element: the so-called overflow tube. Its main function is to “insure” the tank from overfilling in the event of a breakdown of the fitting valve, float or its lever.
In what cases does the drain mechanism need to be replaced?
Experts in the field of plumbing identify only three most common breakdowns, in which all the “insides” of the toilet flush mechanism must be replaced:
- wear of the float or drain valve (usually leads to the fact that the tank begins to fill with water continuously and does not stop, even when it overflows);
- bending of the twist or malfunction of the ratchet;
- fitting failure.
However, there are many situations in which you can do without replacing the main parts. For example, the cause of a lack of water can be a simple blockage or even a bend in the flexible hose.
In this case, to eliminate the malfunction, it will be enough to turn off the water supply to the tank, unscrew the hose from the tank and put it into the toilet or bucket, and then open the supply: if the water does not flow or the pressure is too weak, you need to blow out the hose with a compressor or carefully clean it with improvised means.
Reference. The shut-off valve may also require cleaning from contaminants that inevitably form during operation. Contamination of this part can be easily cleaned using stiff wire or a knitting needle.
How to replace the drain mechanism
If the breakdown is more serious than those described above, then the need to change the drain becomes inevitable. Next, we will look at a detailed algorithm of actions that describes replacing the drain in a tank of the simplest and most common design.
Preparation
Before proceeding with dismantling, it is necessary to turn off the water supply and prepare the necessary tools. The latter includes:
- a set of wrenches or an adjustable wrench;
- pliers;
- flat screwdriver;
- ruler.
Advice. Some craftsmen advise purchasing replacement parts in advance, but we believe that it is more advisable to go to a plumbing store after disassembling the main unit, so as not to make a mistake with the size and model of a particular part.
Step-by-step replacement instructions
The replacement process consists of the following steps:
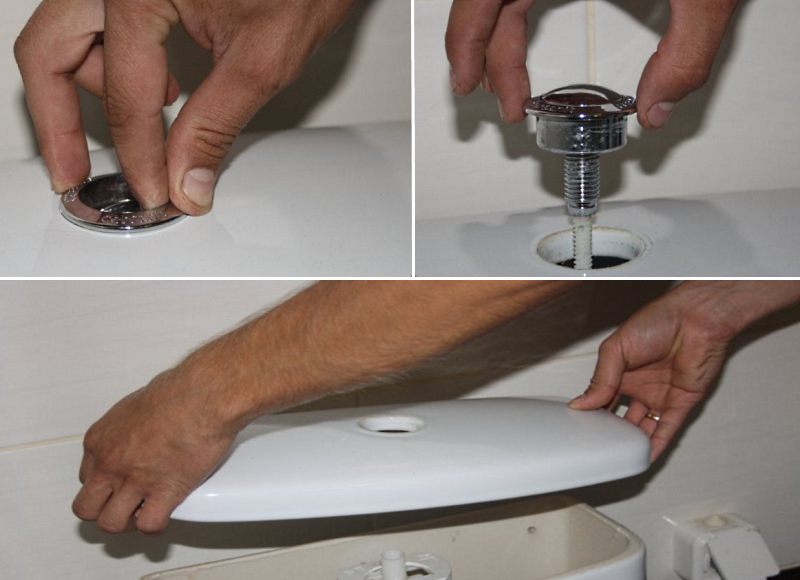
- Step 1: remove the toilet lid. Today, the most common lids are those with one or two drain buttons. In the first case, the ring around the button must be unscrewed (most often it rotates counterclockwise), and then move the device cover to the side and remove the clothespin that serves as its additional fastening. In the case of two buttons, you must first, by pressing one button, find a small hole located in the side of the second button, and then carefully remove it using a screwdriver. After this, you need to unscrew the slotted screw and remove the cover of the structure.
- Step 2: localize the fault. Carefully inspect the unit for mechanical damage and heavy contamination. If the entire system is covered with many years of plaque, then the wear and tear of its main elements is a very expected result, and all of them must be replaced. Before starting work, it is worth draining the water from the tank.Most drain devices are sold only assembled.
- Step 3: purchase and prepare for installation a new drainage system. In order to make sure you don’t make a bad choice, just take the old drainage device with you and ask a consultant at a plumbing store to choose the same one or its equivalent.
- Step 4: installation. When the old system is completely dismantled, the new drain is assembled according to the attached instructions and installed in the tank. The removed tank cover is mounted in the reverse order of disassembly, after which the water supply is connected and the system is checked for functionality. The filling level can be adjusted by the set position of the float, so if water begins to flow into the toilet through the overflow tube, adjust the position of the float relative to the fitting valve. If all system elements have been installed correctly, no problems with the further operation of the device should arise.
Advice. If, instead of draining into the toilet, excess water from the tank is directed directly to the floor, the problem is most likely in the overflow pipe that is too high. It can be shortened, but do not overdo it: a tube that is too short will simply not allow the device to draw the required water level and will have an extremely negative impact on the performance of the metering devices.
And finally: if possible, it is better to give preference to a drain device made of brass rather than plastic. Brass structures are more reliable and wear out much more slowly, which means that such a tank will bother you much less often.

