How to make a “Rose” floor lamp with your own hands
Flowers made of insulation are a real work of art. Easy to use, isolon looks nice and does not melt. This property is successfully used by craftswomen in the manufacture of elegant lamps or entire compositions, and they decorate balustrades and shop windows with them.
Today I will tell you how to make a lamp in the shape of a rose.
REFERENCE: Isolon is polyethylene foam, has high elasticity, and is used for insulating rooms.
The content of the article
Selecting materials and tools to create the “Rose” floor lamp
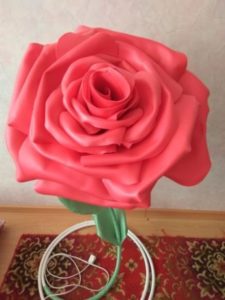 First you need to select materials for making the product:
- Izolon is the base of the flower (can be purchased at any hardware store). We will need 3 meters, 2–3 mm thick. Material of any color is available for sale, so plants can be colored.
- Tailor's scissors (some use a cutting knife) - for cutting material.
- A construction or regular hairdryer with several modes - to give the petals shape.
- Glue gun with heating elements and temperature change mode - for joining parts.
- A stapler (it’s better to take a construction one), threads - for fastening the elements.
- Paints - you can take acrylic or in a spray can.
ATTENTION: when bending the isolon, cracks form (you need to be careful when working and using it), it is held together using hot glue (you can use threads or a stapler). White color turns yellow from sunlight, so it is better to use it for products that will be in the shade.
Additional materials: wire, electrical cable, colored pot, cartridge, LED lamp, metal tubes, masking tape.
Creating parts of a rose
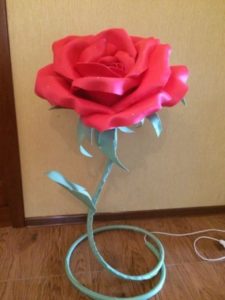 Before you start making a lamp, you need to decide on its dimensions. The larger the bud, the more stable the base on which it will be located should be.
TIP: it is good to make miniature parts from isolon up to 3 mm thick. And large ones - from 3 mm and above.
Before starting work on creating a large “Rose” floor lamp with your own hands, you should make stencils on which the parts of the floor lamp will be cut out.
Making a flower
 The first stage of work: preparing the petals. For the core of the flower, you need to cut out a circle and cut it in half, leaving a few centimeters. We twist one edge into a tube, then bend the second half, and glue it to the first half with glue.
Next, cut out the petal. Then we curl the edges and fix them with a hairdryer. Then the element is stretched a little and the middle of the base is glued together.
TIP: if you want to make a flower more realistic, look at how the rose buds are arranged, where the petals are bent, how the edges are bent. This is very important when working!
If you purchased white material, you can paint the plant. It is more convenient to do this from a spray can.
How to make a “Rose” floor lamp with your own hands? After all parts of the bud are ready, you need to assemble them into one whole.For the base, you can take cardboard, cut out a circle and make a hole in the center (for wires and mounting the cartridge). It is better to attach the lamp socket right away. It can be fixed with the corner of a plastic tube. Connect the wires to the socket.
IMPORTANT: before installing electrical parts, you must read the assembly instructions or ask an electrician for help!
You can fix the elements together with glue or a stapler.
Making the stem
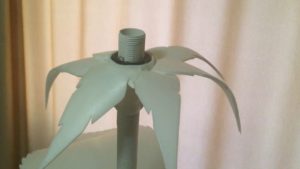 The stem, also known as the flower holder, is made from a metal or plastic pipe. The diameter depends on the massiveness of the bud.
TIP: Determine the height in advance. Metal pipes are not easy to cut at home, so you can specify the length in the store and they will cut you the required size.
The pipe is installed in a pot and fixed with concrete (or other material). The wires are hidden inside the pipe and lead out of the pot. The pot can be decorated.
The base is wrapped with green wire. This option is beneficial for attaching leaves.
How to make leaves
 Leaves are made by analogy with petals. Using glue, veins are made and the wire is fixed. The leaves can be made rounded, straight or slightly curved. Then paint the parts with paint. Next they are attached to the stem.
Connecting a cord with a switch and a socket
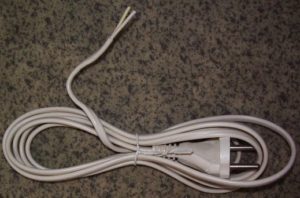 We considered one option for fastening the wire and cartridge during work. But there is another way: parts of the wiring are connected. A plug is attached to the wire, and the whole thing is mounted into the bud.
For the lamp it is necessary to leave additional space in the center of the structure. It is original to use an LED strip, fixing it on the inside of the bud elements. The tape is selected according to the color of the isolon.
It is connected to the cord in the same way as a cartridge.You just need to use an adapter with multiple connectors. Information about assembling electrical makers can be found on the Internet.
The pipe parts are connected by coils. If the flower looks up, one pipe is enough.


