Making an ECO lamp from corrugated cardboard
If you love eco-friendly materials and handmade lamps, then this life hack is for you! You don't need any special knowledge or equipment to make a lamp from corrugated cardboard at home! Creating a device does not require great care or strict adherence to the stages of lamp manufacturing.
The shape of the lampshade is a dodecahedron (from ancient Greek - “twelve” and “face”), consisting of many pentagons that are connected together. Putting this together is not as difficult as it may seem, but you will need a lot of patience and time to cut all these parts by hand. You can use a sketch like this to work on your crafting skills. And in the future, dream up new ideas for the next lamps made of corrugated cardboard with your own hands.
The content of the article
Selecting materials and tools
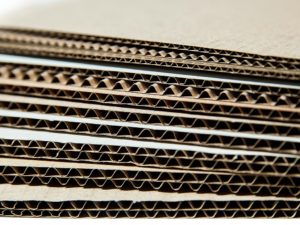 The best thing about working with cardboard is its easy availability and cost-effectiveness. Even if something goes wrong and you ruin the sample, finding a new packaging box will not be difficult. In addition, cardboard is biodegradable and recyclable. Therefore, it is a fairly environmentally friendly material to use and will give the product a very original, modern look.
What you will need:
- Packaging cardboard;
- Cutter;
- Ruler;
- Pencil;
- Hot glue with a gun;
- White glue;
- LED light bulb with socket.
To make a geometric lamp with your own hands, it is better to use thick five-layer corrugated cardboard. But it can also be thin, because it is easier to cut by hand. The main thing is that the lamp is LED and not incandescent. This is important because it won't burn the cardboard.
Correctly cutting cardboard
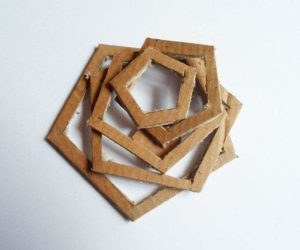
- The first step is to draw a pentagon of the correct shape on a piece of cardboard. All sides of the pentagon are equal and can have a length of 7 cm or more. For a table lamp, up to 10 cm on each edge is sufficient. The thickness of each part will be about 1-2 cm. The main thing is that all pentagons must be equal. Try to be as accurate as possible!
- Then cut it and use it as a stencil for the remaining ten pentagons. There should be 11 of them in total (the lampshade will be attached to the base from below). Thus, drawing shapes is much faster than re-measuring all sides with a ruler each time.
- Now inside each pentagon draw 5 smaller pentagons for each of the 11. They should be about 6mm apart.
- All you need to do is measure 6mm from the sides and trace the line. These pentagons should be one smaller than the other so that you get 5 pieces of different sizes (from 7 to 4.6 cm). When you have finally finished drawing them, very carefully cut all the parts along the lines using a cutter. This is the longest process of the rest, but not the most difficult.
We carry out the assembly
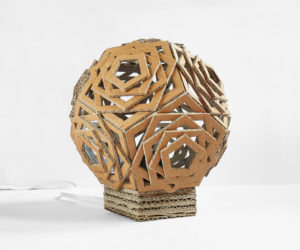 So, for the lampshade we will need to make 11 pentagonal parts. First, place the large piece on the table (or something that holds it level).
- Apply hot glue to the middle of all its sides and glue a smaller pentagon to each of them so that the corners are exactly in the middle. You will notice that they need to be turned slightly on their axis to make contact.
- Finish with the first two and continue the same with the 3 smaller pieces. You will get something that looks like a bowl. The composition also somewhat resembles a star.
- All that's left is to glue the remaining pentagons on top, for a total of 11. You can use white glue or hot glue for this, it doesn't really matter.
- When the preparation of the parts is completed and the glue has dried, you can make the lampshade. Place 2 pentagon bowls on the table. Apply hot glue to the 2 adjacent sides and glue them to each other, making sure the two vertical sides are touching tightly. You'll notice that you have to lift them up a little to touch them.
- Finish the first round by gluing 3 new pentagons for the left side of the lampshade. Add a new piece on top of two of them, gluing the 2 adjacent sides to the two pentagons.
- Do the same around the “bowl”, gluing the remaining 4 pentagons. All 5 pieces of the second round should also touch each other on the sides: to do this, you need to place them as if you were covering a "bowl" to create a ball. Turn the “ball” upside down: your lampshade is ready!
Making a base for a lamp
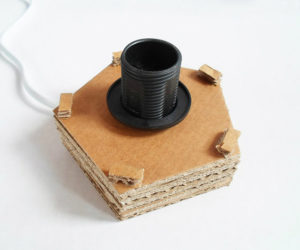
- Draw about 8 new pentagons on the cardboard, just like the ones you made in the first step. The number of pieces needed for the base depends on the thickness of your cardboard and the thickness of the lamp holder base. For this reason, be sure to give it a few tries. You may have to remove or add some details.When you are sure of the number of pentagons you need, draw a smaller pentagon in each one about 1cm apart from the border.
- Cut everything off using a cutter, removing the center section. What you get are new equal pentagons.
- Glue them one above the other with white (or hot) glue, making sure they match up on the corners and sides this time.
- The next and final piece will be the one that will hold your chuck. So, draw another pentagon on the cardboard like the previous ones and draw the outline of the lamp holder in the middle. Cut out both the pentagon and the outline you drew. Remove the center piece so that the round hole is clear for inserting the lamp holder. Glue this new pentagon piece on top of the rest of the base, always matching the sides and corners.
Collecting all the elements
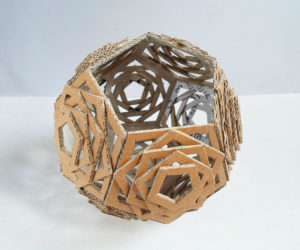 Finally, turn the base upside down and cut a thin section at the bottom of one side to allow the cable to pass through. All that remains to be done is to place the cartridge inside the base and insert the cord into the hole. At the end, you need to tightly glue the lampshade to the lamp so that the structure is stable, identical on all sides and does not collapse.
All that remains is to connect the lamp
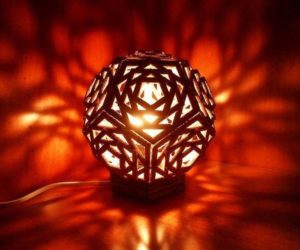 All you have to do now is insert the lamp socket through the hole in the base and finally place the lampshade you made on top of it! Light up your new corrugated cardboard lamp and enjoy the impressive lighting effects it creates!


