Digital noise reduction on TV - what is it?
 Modern TVs are significantly different from older models. Now this is not just a device for watching TV shows, but a full-fledged multimedia center with a large number of different functions and settings.
These include:
- Screen resolution. This is one of the most important characteristics of TV receivers, which is responsible for the quality of the transmitted picture. The most common value is 1920x1080 HD, but there are models with Ultra HD screen resolution of 3840x2160.
- Frame frequency. Affects the quality of movement of objects on the screen.
- Smart TV. A function that significantly expands the capabilities of TVs. Thanks to the ability to connect to the Internet, the user gets access to a huge number of media files.
All models also have a wide range of different settings. These are picture or audio quality settings that can be adjusted based on personal preference. For example, digital noise reduction.
The content of the article
Purpose of digital noise reduction
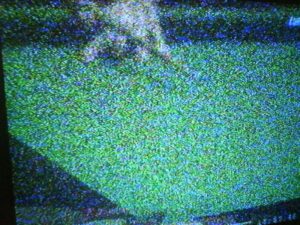
Modern TV models allow you to view videos from both external media and  Internet. As a rule, so that they do not take up too much space and load faster, they are compressed to a small size. This leads to a deterioration in the quality of the transmitted picture and the appearance of so-called noise. Noise appears in the form of “snow”, a blurry image or a grid.This is especially noticeable when viewing a digital signal.
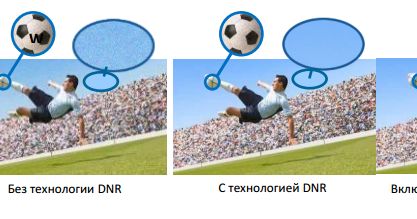
REFERENCE. Noise reduction technology, DNR or its more modern versions DNR 2D and DNR 3D, help to cope with this defect.
Types of noise
The most common types of noise are:
- "Salt and pepper". They are called that because in the image they look like spots of white and gray.
- Pulse. There are white spots in the picture.
- Gaussian. The image is blurry and unclear.
Noise reduction methods
Television receivers use different methods of noise suppression.
DNR
The method is based on temporal analysis of the video signal. It analyzes only those objects that are in close proximity to the camera.
REFERENCE. The technology mixes frames, due to which noise is suppressed.
The background remains unchanged.
DNR 2D
Image analysis occurs in the spatial domain. However, the time direction is ignored.
This method has a significant drawback. Signal processing causes the image to lose its clarity.
DNR 3D
The method combines comparison and mixing of frames and reduces spatial noise. This technology analyzes each frame and eliminates all existing artifacts and other defects. Due to this, the contrast and clarity of the image increase. Moreover, each frame is processed several times.
REFERENCE. The technology allows you to process all the information about the picture, which gives it the ability to eliminate noise from both static and moving objects.
The DNR 3D method combines all the DNR and DNR 2D noise reduction methods and does not have their disadvantages.
How to set up digital noise reduction

To configure DNR, you need to enter the image settings using the remote control. Then perform the following manipulations.
- In the settings you need to find the DNR item and select “Noise Reduction” in it.
- Using the “up” and “down” buttons on the remote control, select the required value. In order for the picture to have optimal quality, it is advisable to set it to the lowest value.
IMPORTANT! If your TV is set to PC Picture or Game Mode, the Noise Reduction setting feature will not be available.
Using simple settings, you can eliminate existing noise and get an image of excellent quality.


