TV backlight repair
 For many users, TV has become an integral part of life. This device often serves as the main source of information. and even if someone prefers to receive it on the Internet. The TV device is still used to watch movies or TV series on the big screen. TV breakdowns are often very difficult to fix at home. This is caused, first of all, by the technically complex design of the device itself.
In the era of microchips, the difficulty of repair lies in the impossibility of replacing most parts. That is why, when faced with a broken device, users are forced to purchase a new one or take the broken one to a service center. However, this article will describe how to fix a fairly common and complex problem in the form of a broken TV backlight.
The content of the article
Why does the backlight break?
For most TVs, the image begins to disappear only after several years of continuous use. For budget models, the service life without breakdowns may not even reach a year. Then, in order to continue watching movies on the TV, repairs are needed. True, replacing any part on an LED TV will not be cheap.
 Most modern models provide images with LCD technology with LED backlighting. To begin with, we should say a few words about the liquid crystal technology itself.It lies in the ability of crystals to change location under the influence of electric current. Due to the change in location, the light passing through them is refracted, resulting in different brightness contrasts. Then the filters create the color scheme that the user sees on the screen.
The most common reason for the loss of images on such TVs is the breakdown of the LED panel, which is special LEDs. Troubleshooting this type of lighting requires the user to have basic electrical skills and specialized knowledge.
REFERENCE! If he does not have the necessary skills, there is a risk of only aggravating the breakdown, which can make the cost and complexity of repairs many times higher.
Can I repair it myself?
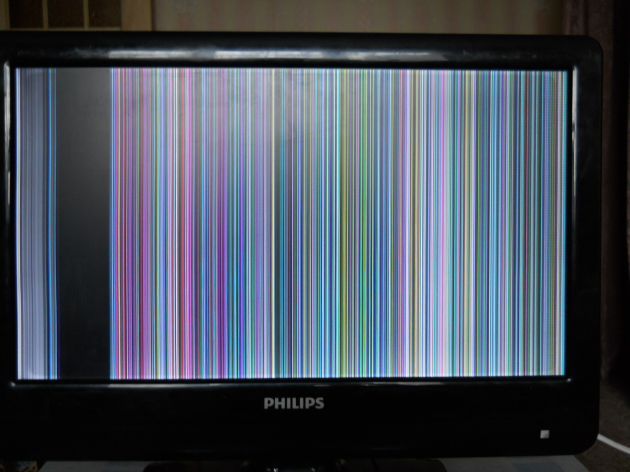
The first step for the user is to accurately diagnose the problem. If the image suddenly disappears on the screen, but the sound is reproduced in full, it is quite possible that the problem is in the backlight. In order to exclude other options, you should shine a directional light on the screen when the TV is operating. With the presence of external light, an image should appear on the screen. If this does not happen, then the problem lies elsewhere. If a picture appears on the display from the light of a flashlight, then the problem is a malfunction of the backlight.
 Failure of the LED display backlight has two main causes.
- Malfunction of LEDs due to short circuit or broken contacts. In this case, the entire circuit will be powered by the rated voltage, however, the diodes will not be used due to their breakdown or violation of the integrity of the wiring.
- Problems with backlight control.This problem is characterized by a lack of power supply to the lamps, which is why they do not light up.
Once the problem is detected and diagnosed, the user is faced with a choice: try to fix it himself or call a technician for repair work.
If the user has extensive knowledge in the field of repairing this type of equipment, he can try to fix the problem himself. However, if he does not have the skills and knowledge, as well as special tools, it is better not to attempt troubleshooting, but to use the services of more competent specialists.
How to adjust the backlight
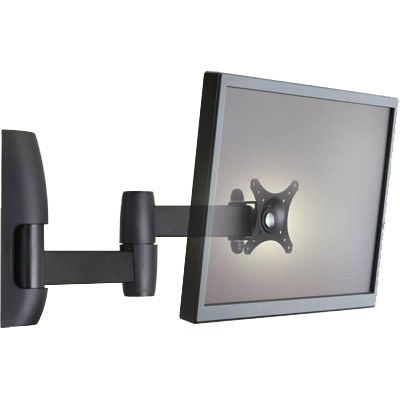
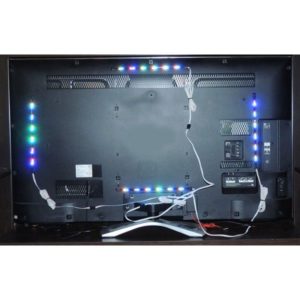
First of all, you should start disassembling the screen. To do this, unscrew the bolts located around the perimeter of the housing. After removing the back cover, the user will see the main boards of the TV device. There are three in total:
- PSU – power supply unit. It also contains the backlight driver.
- Main board.
- Control board.
Next, an experienced user needs to dismantle the boards. During this process, it is very important to be careful and careful, since one sudden movement can damage the TV device, and the cost of repairing it will increase several times.
IMPORTANT! Dismantling should be done with clean hands, as contamination of the matrix can lead to image deterioration.
- The first step is to remove the T-con, for which you first disconnect the cables and unscrew the bolts. When disconnecting the cable, be careful and maintain its shape. Since the cable inside has very thin wires, any bending or twisting can damage the conductivity of this part, which will render it unusable.
- The next step is to remove the protective structure from the decoders.It is a metal body bolted. The user must carefully unscrew the bolts and remove the protection.
- Remove the front frame of the TV device. In order to do this, you need to unscrew the bolts around the entire perimeter and carefully disconnect the fasteners.
- Remove decryptors. To dismantle this device, you need to turn the TV over, while carefully holding the matrix. The decoders are located on special rubber mounts. They need to be removed. Without damaging the fasteners, otherwise reassembly will be impossible.
- Removing the scattering film. It is located on special plastic latches, which you just need to snap off and then remove the film.
- Remove the reflector and retaining clips.
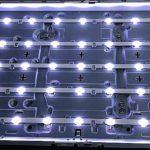
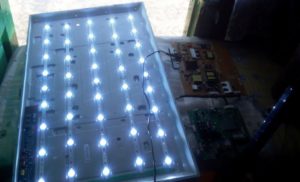
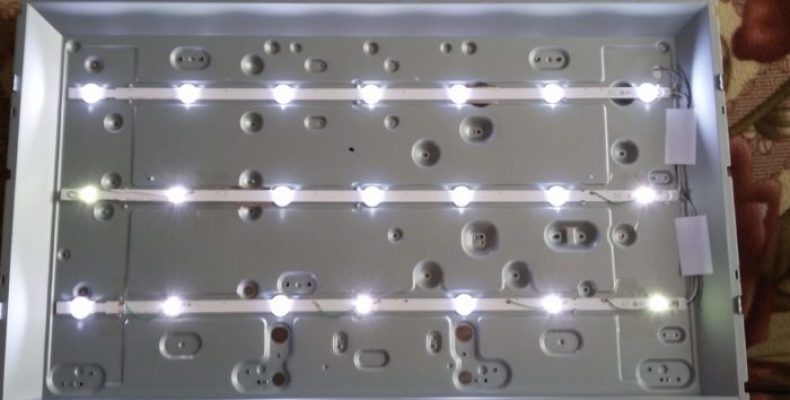
 After the user has managed to get to the backlight, the breakdown should be specified. To do this, the first thing you need to do is inspect all the LEDs. Often, due to the fact that several light bulbs have impaired their functionality, the entire circuit does not work. Most often, the light bulbs simply burn out. A burnt-out LED is visible to the naked eye. It is often discolored and may have a charred surface around it.
REFERENCE! If a breakdown cannot be detected by eye, you should begin diagnosing all LED bulbs.
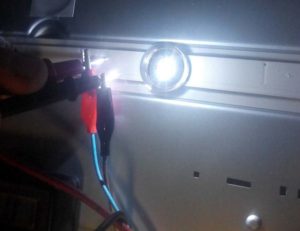
In order to detect the location of the fault, it is necessary to connect LEDs to each line. Whichever line does not light up is where the problem is. Once the broken line has been identified, you should begin searching for the broken LED. Usually there is one or several of them. In order to detect them, the user should connect power to each light bulb in turn.Once non-working diodes have been detected, they should be removed. A soldering iron should be used for this operation. After eliminating the non-working part, a new LED should be soldered in its place.
After the malfunction is fixed, the user should check the functionality of all the backlight, and if everything suits him, proceed with assembly. The TV should be assembled in the reverse order, therefore, first the reflector is installed, then the scattering film, then the decoder, frame, protective structure, T-con and the TV body itself.
What not to do to prevent it from breaking
 In order not to damage the TV device during “repair”, you should follow simple rules.
- Assembly and disassembly of the device should be carried out carefully, without using brute force. Often, all devices can be removed by simply pressing or using a fastening mechanism. If the part cannot be dismantled with light force, it means that the user either did not unscrew all the bolts or did not remove the fastening mechanism. Excessive use of brute force can lead to additional damage that can render the device unusable.
- All operations with the matrix should be carried out with clean hands. Since any contamination, even dust, can disrupt the operation of this part.
- If the user does not have experience and knowledge in this area, it is better not to start repairs on their own.