Digitizing videotapes using a TV
Once upon a time, video cassettes were a technical novelty and were in great demand. But about 20 years have passed, global brands have released new devices, and former new products have become history. However, many families have preserved family stories recorded on cassette tapes. Many would like to pass on footage from their lives to their grandchildren and great-grandchildren.
The content of the article
What do you need to digitize a tape using TV?
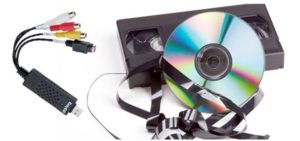 Video cassette tapes do not last long. To preserve your cherished footage, you need to transfer the content to digital media. The transfer process itself is called digitization. First you need to prepare the necessary devices. To digitize a videotape, the following equipment is required:
- TV (any global brand will do).
- TV remote.
- VCR (preferably from well-known manufacturers).
- Flash drive (DVD).
- Videotape.
- Cable, RCA Video drive.
- Video player.
When all the necessary tools are prepared, you can get down to business. Digitization is not overly complicated. Therefore, it can be carried out not only by a master, but also by an ordinary person who is somewhat familiar with the procedure and safety precautions.
How does the device connection process work?
Digitizing videotapes using a TV works like this. All devices must be connected in the following order:
- A TV antenna is connected to the VCR;
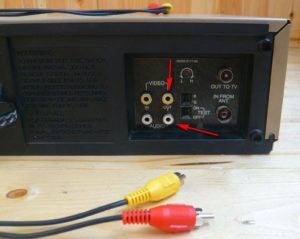
- an S-video cable is used to connect the TV to a VCR (the plugs are inserted into the antenna “sockets”);
- they are connected to white and red “tulips” (Audio/Video connectors);
- the VCR and video player are combined with white and red “tulips” (Audio/Video connectors are used);
- A SCART cable is used to connect the video player to the TV (the connector is also called SCART).
How to record
 A blank DVD is inserted into the player. The cassette is in the VCR. The TV remote control turns on to enter the Menu. Here are some settings:
- The source is set to “Antenna”.
- “Auto Configuration” starts. Analogue channels".
- The “Play” button on the VCR is pressed.
- The “Scan” command is activated here.
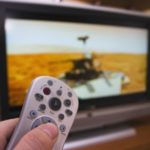
- There is a “Record” button on the TV remote control and it starts.
If necessary, you can stop and rewind frames. It’s just that later you’ll have to press the buttons again: “Play”, “Scan” and “Record”. The “Start” button is also launched on the video player.
Upon completion of work, it is advisable to process the video. This could be color correction, frame processing. Frames from the DVD are copied to a flash drive. Now you can watch movies on any PC. It will be stored for as long as the author himself wishes.
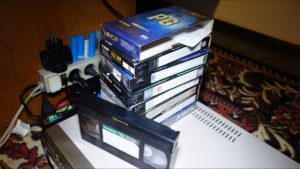
If you have a large archive of videotapes with a variety of contents, then it is advisable to digitize them. Otherwise, there will be no complete guarantee of the safety of such a video library. History always has many surprises that would be nice to share with future generations. We are still seeing fascinating footage of such legendary artists as the Beatles, Marilyn Monroe, Charlie Chaplin, Lyubov Orlova, and the Queen group.And it will be interesting for the little great-grandson to see his great-grandfather and great-grandmother very young...


When digitizing video tapes, I don’t understand how all the devices are connected to each other. Is it possible to depict this schematically?