DIY Ambilight for TV
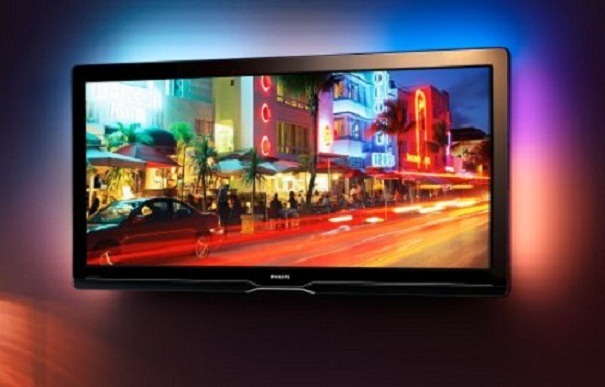
Ambilight technology is a dynamic background lighting of the wall behind the TV. It is patented by Philips and creates a unique effect while watching TV shows and movies. This also applies to video games. The gaming experience in this case becomes unforgettable. The strain on vision is significantly reduced by reducing the contrast in lighting between the wall and what is happening on the screen.
The content of the article
Making your own ambilight for TV
The Philips patent prohibits other manufacturers from using the technology in their products. But fortunately, this does not affect ordinary users. For your needs at home, you can easily make such a backlight for your TV. And if you take into account the low cost of Chinese components and the ease of ordering them via the Internet, this will not require large financial investments.
Implementation options
There are several ways to implement this project for a TV. The choice of option should be based not only on financial capabilities, but also on other equipment-related factors:
 Backlight using PC. A Windows box or another computer installed next to the TV will do this task perfectly.
- Using an Android console.This option can be a little problematic due to the need to use the Kodi media player, which does not work with all equipment.
- Using a microcomputer and video capture device. This option is the most universal and is capable of providing backlighting from any video signal source.
How to make embilite
The simplest way to create an Ambilight is to use an Arduino microcomputer. The device itself for such illumination is very simple, but it requires the presence of a PC through which the video signal passes and is processed.
Accessories
To start working on the project you will need some components. You can easily buy everything you need in specialized online stores. To organize a high-quality embilite you need to buy:
- Addressable LED strip. The length of the tape is equal to the perimeter of the monitor.
- Power unit. With a standard voltage of 5 volts and a power of at least 2 amperes. But more is desirable.
- One resistor 350–500 ohms.
- Microcomputer Arduino Nano.
The cost of these parts is quite insignificant (about 1 thousand rubles), especially considering the resulting effect.
LED strip testing
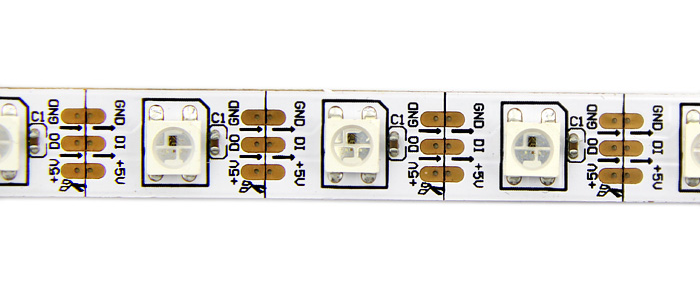
The LED strip plays a vital role in this project, so its selection must be taken with the utmost attention. The density of the diodes determines the quality and smoothness of the lighting. For Embilite, you should choose from 30 to 60 elements per meter of tape (more is possible, but a more powerful power source will be required).
The presence of a self-adhesive coating is also a fairly important factor. In this case, installation will be greatly simplified. For our purpose, a tape marked WS2812B or WS2811, which you can easily find on Aliexpress, is perfect.
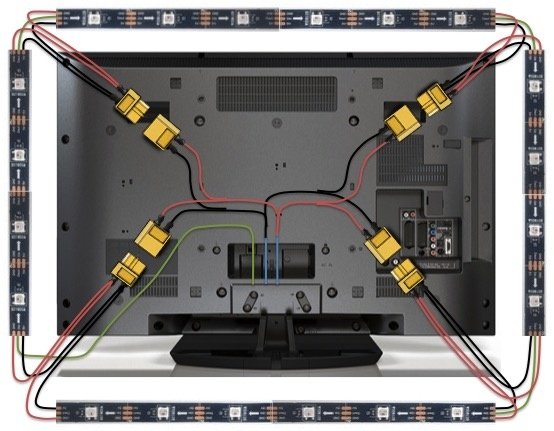
Connection diagram
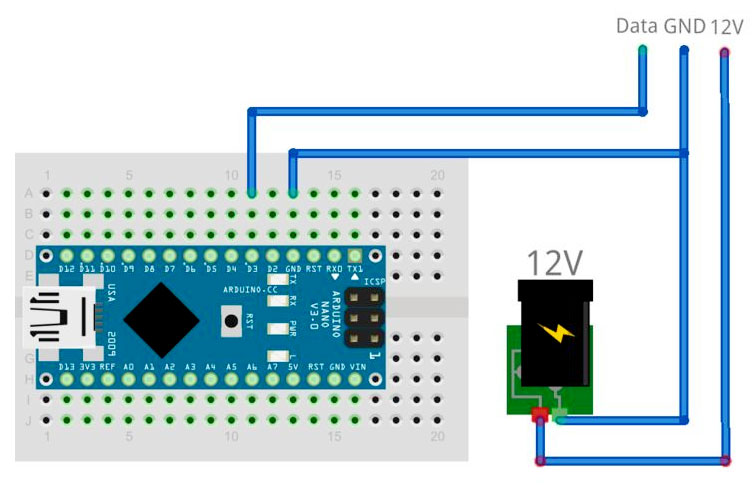
The connection of all components is quite simple and requires minimal skills in working with a soldering iron. Connect the tape to power and Arduino according to the following diagram:
- The strip's ground pins (labeled GND) are connected to the negative terminal of the power supply and microcomputer.
- The pin marked “D1” is connected to the Arduino to pin 6 via a resistor.
- The power supply of the tape itself is connected to the positive contact of the block.
This completes the connection of the components, and the next step is their installation on the screen.
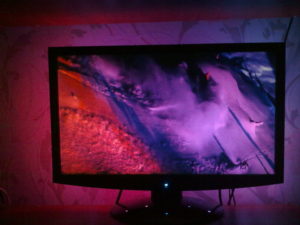
Ambilight installation
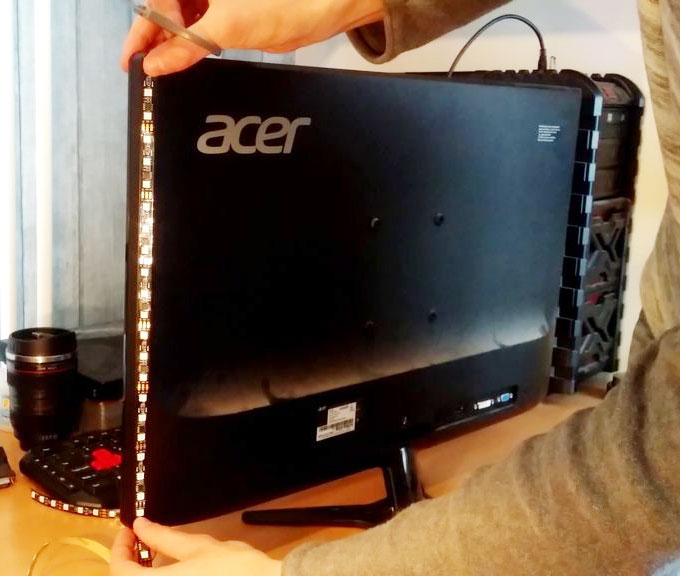
To install the LED strip, if it does not have a self-adhesive coating, you should use double-sided tape. Apply carefully around the perimeter of the screen, starting from the lower right corner. If you select a tape with a high diode density, you will need to cut it at the corner joints and solder it with wires.
It is advisable to place the microcomputer in some kind of plastic case, but this is not necessary. Use double-sided tape to attach it to the TV.
Software setup
After installation, all that remains is to configure it correctly, and the dynamic ambilight backlight is ready for use. The first thing you need to do is install the Adalight.ino firmware on the Arduino.:
- Download Arduino IDE and Adalight.ino from the Internet.
- Place the Adalight.ino sketch in the folder you created earlier (at Documents > Arduino > Adalight).
- Connect the microcomputer and launch the IDE, open the sketch.
- In the NUM_LEDS field, enter your number of LEDs.
- Make sure the PIN field matches the pin on the board where the tape is connected.
- Select the COM port in the settings (“Tools” > “Port”). The one you need will be there.
- Click the "Download" button.
On the PC that will control the backlight, install the AmbiBox application.Here in the settings you will also need to specify the port, the number of LEDs and the frame rate. In addition, this program has fine adjustments for capture zones and others, by experimenting with which you can achieve the desired result.
After all these simple operations, you will be able to feel new sensations from watching your favorite television series and films. In addition to the fact that such lighting will decorate the room with bright colors, it will significantly reduce eye strain in the dark.