DIY pirate chest
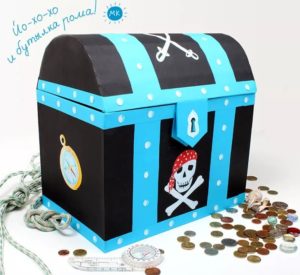
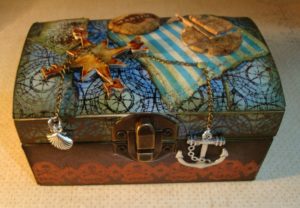 Do you have an idea to make a pirate chest with your own hands? It's not as difficult as it might seem at first glance. If you have children in your house, you should definitely build such a treasure chest for them, they will be immensely grateful for it. This paraphernalia can be used for daily games, or you can make it for the New Year or on the eve of a child’s birthday and arrange an exciting quest game, and the main element, of course, will be a pirate paraphernalia. This work is quite extensive and requires some time and creativity, but if you think that the chest is made for one game, you are mistaken. It can be used later. You can store jewelry in it, you will agree that it will turn out very colorful. In a children's room, toys can be stored in it; the child will certainly like this very much, and, perhaps, will even encourage him to put the toys back in their place sooner and more often. An interesting solution is to fill the chest with various sweets, including chocolate coins.
The content of the article
What can a treasury be made from?
Previously, chests were made of heavy materials, they were massive and heavy, today a chest can be made light and beautiful, and the necessary materials are most likely available in your home. Let's list what materials you will need to make a chest with your own hands:
- The base will be a cardboard box. The size of the required box will depend on the shape and size of the product; you probably still have packaging from equipment or shoes at home.
- Prepare regular stationery and decorative cardboard, it is better if it is metallic in color, simply colored and ribbed. This material will be required for the manufacture of decorative elements, namely: hinges, locks and others.
REFERENCE. If you don't have a suitable box, use regular cardboard, apply a pattern to it and cut it out.
- Colored and white paper. You will use it to cover the inside of the chest. You can use leftover light-colored wallpaper.
- Paints, markers and pencils - these will be necessary for decoration.
- For decoration, prepare different ribbons, ribbons or fabric.
- If you want your product to turn out more realistic, you should stock up on furniture fittings, namely: handles, locks, loops and others.
- To work, you will need ordinary office supplies, including: scissors and a stationery knife, glue and tape for paper, brushes and wire.
REFERENCE. If you don’t want to bother with making the base itself, but want to make a chest for a child, look in the appropriate stores for a blank box of a suitable shape. All you have to do is decorate it using coins, shells and paints. In this case, you can quickly make a very durable chest.
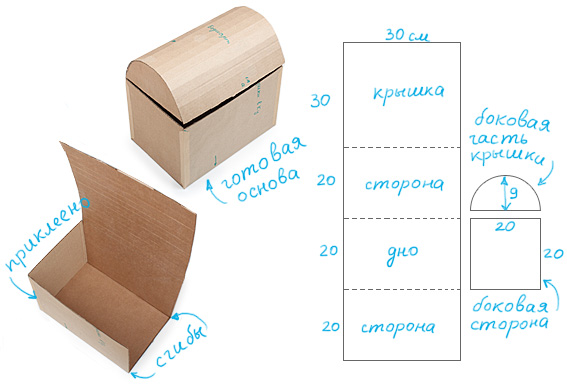
Manufacturing instructions
Before you start making, you need to decide what kind of chest lid you will make. It can simply be flat - this is a simpler and faster option, or you can make it rounded. As we are used to seeing with real chests.
To create such a lid, you need to conditionally divide the box into three thirds; draw the rounded end of the chest on the section of the upper third of the section. It is recommended to use a template for marking; in this case, you will get a neat and even part.
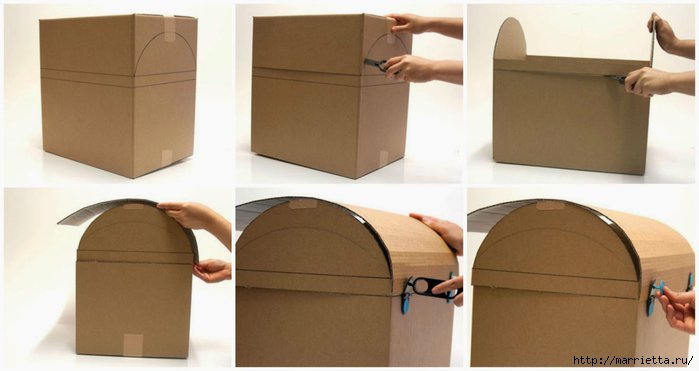
Next, you will need to cut out the round ends, as well as part of the walls. Cut a rectangle out of thin cardboard and glue it on top. So, in fact, you have assembled the lid of the chest. For strength, the seams of the structure can be covered on both sides with tape, or they can also be glued with paper.
The base is simply rectangular. All that remains is to prime the product. This can be done with PVA glue. Next, paint the chest in the desired color or lining if using colored paper.
We decorate the product
This stage is considered the most interesting. If you want, you can enlist the help of your child, you will certainly have a fun time together. Give free rein to your imagination. After all, you yourself determine what your chest will look like.
Consider a decor option that you can also apply:
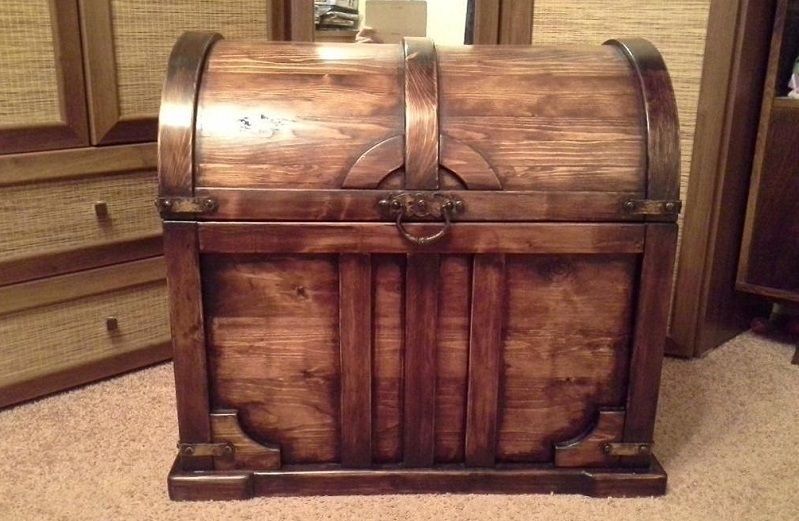
- The color of the product can be any, but for realism it is better if it is something close to the color of metal or wood. Cover the inside with black or blue paper.
- For decoration, you can use printed images, you can use the decoupage technique to apply them to the surface. Excerpts from old maps will look very colorful. To achieve the effect of antiquity, the edges of the picture must be torn off; it is better to do this when the paper is wet and age it by soaking it in coffee.
- You can decorate the chest with acrylic paints and draw pirate attributes.
- To add structure, you can cover your pirate chest with pieces of cardboard.
That, in fact, is the whole process of making a chest; all that remains is to come up with a quest and hide the treasures.
