Electric trimmer repair
An electric trimmer has replaced a regular scythe. Today, most city residents do not even know how to properly use this “rare” instrument. Modern man doesn’t need this, because he has an electrical analogue. But if a regular scythe had to be sharpened from time to time, then with a power tool things are more complicated. The equipment requires some maintenance, and if a malfunction occurs, repairs can lead to large expenses. However, it doesn’t always make sense to take a broken tool to a workshop: you can often deal with the breakdown yourself.
The content of the article
The structure and principle of operation of the trimmer
To understand what exactly can break in an electric scythe, you first need to understand how it works.
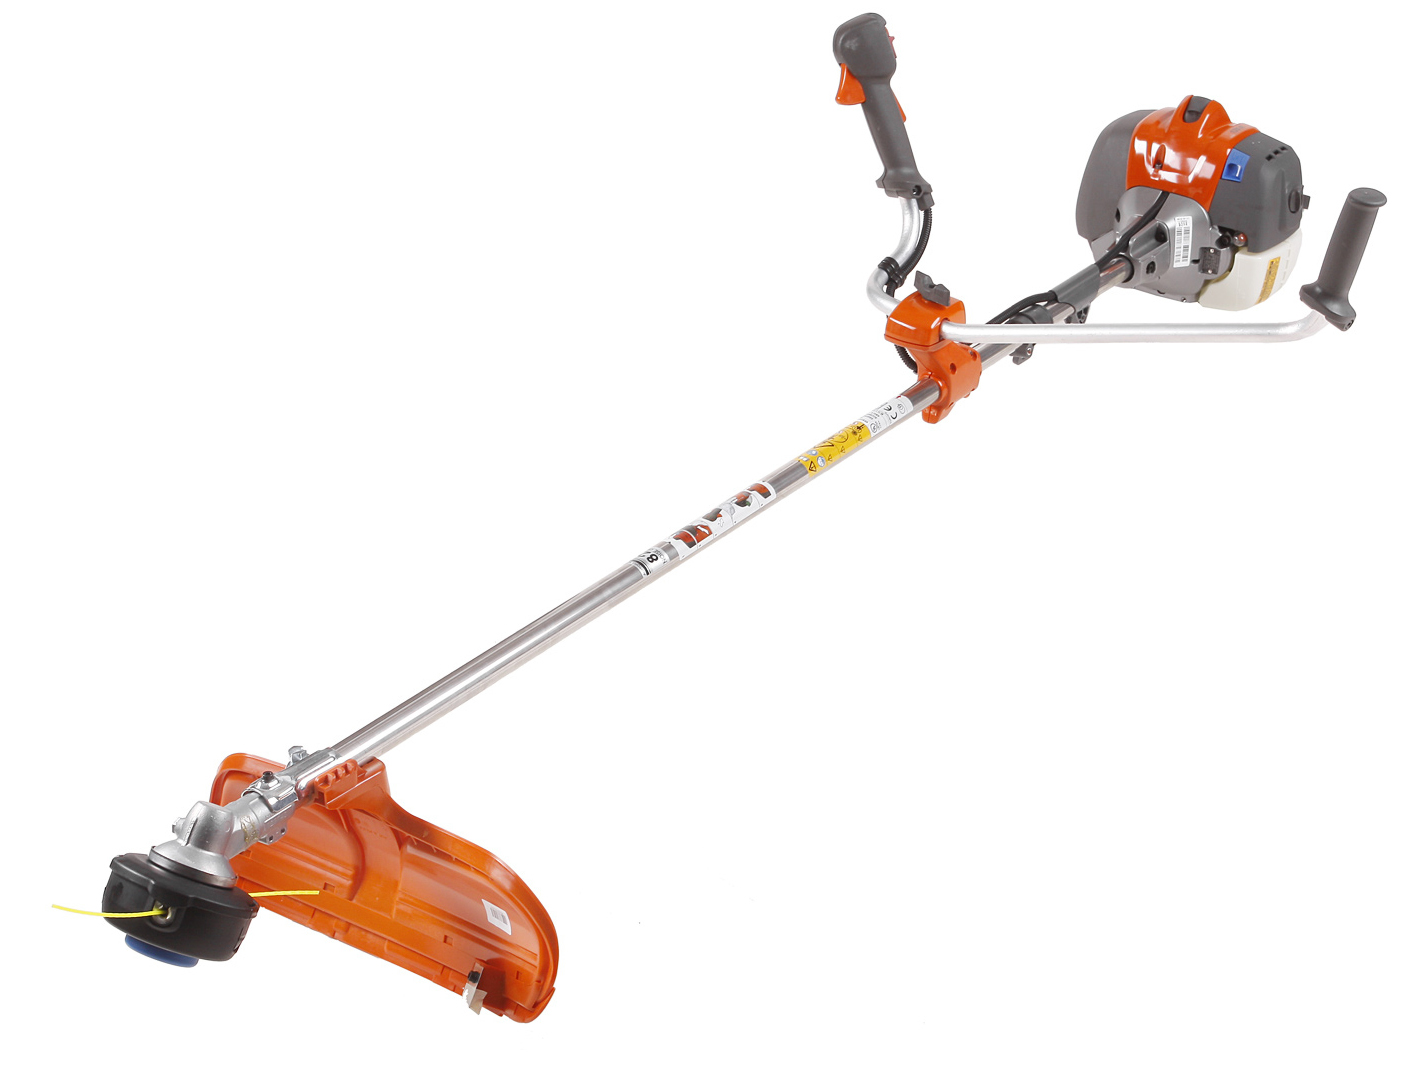
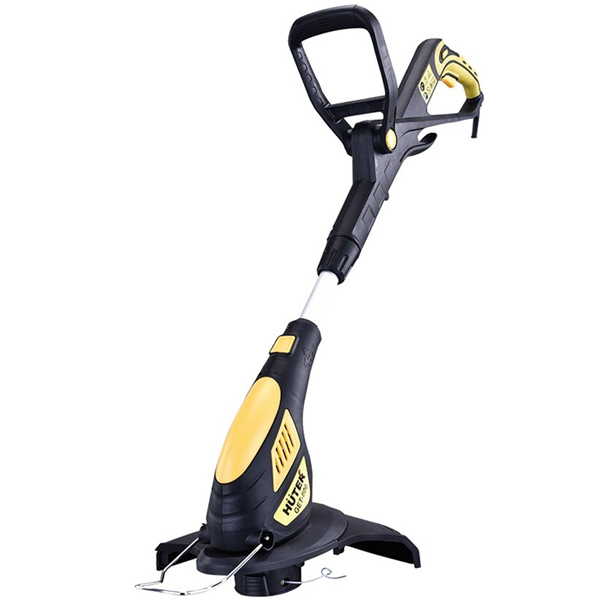
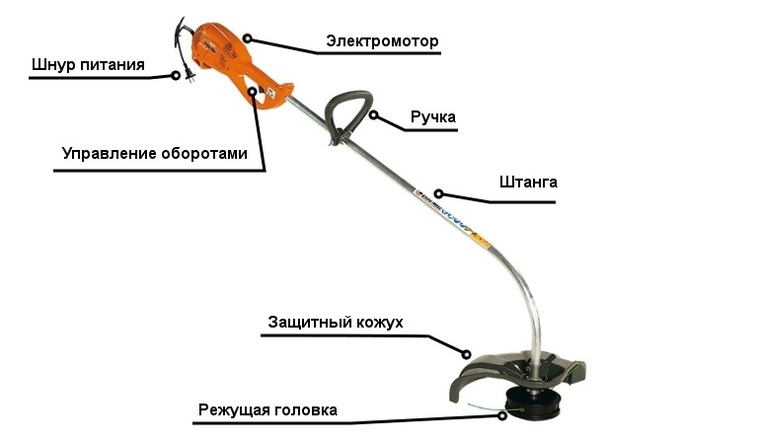
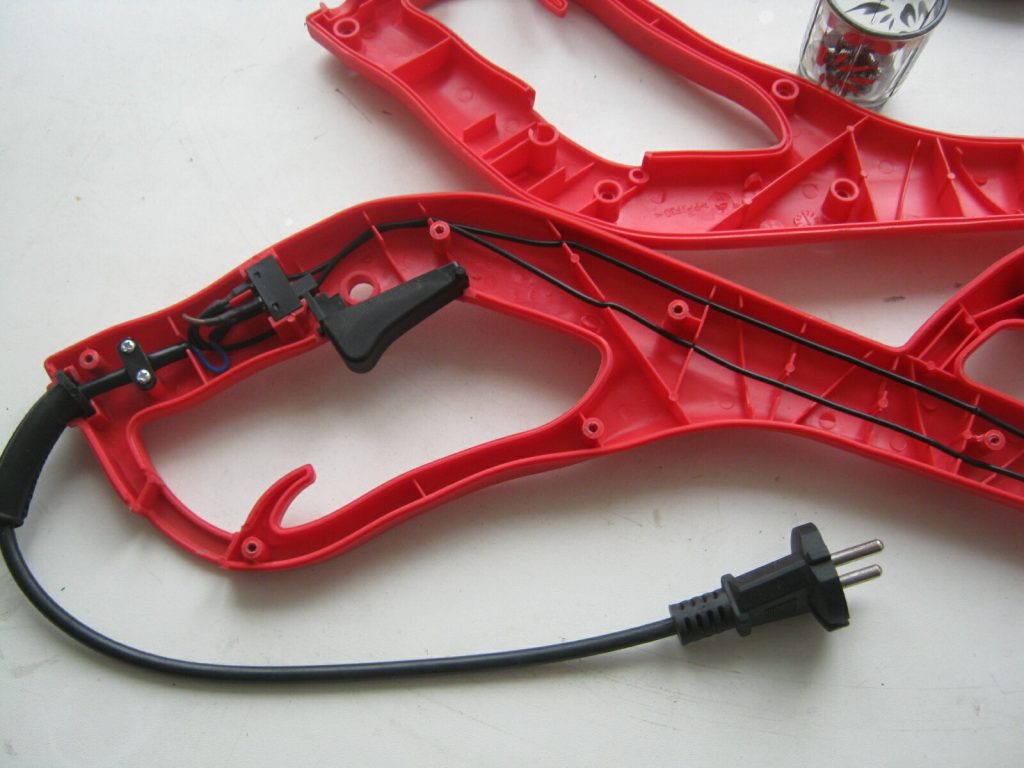
An electric trimmer usually consists of the following elements:
- housing with engine inside;
- detachable rod;
- coil with protection;
- shoulder strap attachment.
Current is supplied to the power unit through a connector on the housing to which the cable is connected. The rod is hollow inside - it acts as a protective shell for the flexible shaft that transmits torque from the motor to the trimmer coil. The handle located on the body has a button, when pressed, the device turns on.
The described design is considered classic.However, there are versions of the tool in which the motor is located in the lower part near the coil, as well as battery versions.
Do-it-yourself electric trimmer repair: common causes of breakdowns
One of the scenarios in which the tool fails is mowing a very neglected area. In this case, the equipment is subject to increased loads and the power unit often fails. It is also possible that the bearings or coil may fail.
And when work is carried out in rainy weather, electrical equipment may simply short out. Also, do not forget about the certain resource of individual tool components, which are not designed for constant use. The device requires timely inspection and replacement of worn parts.
In some cases, repairs can be carried out independently, without the involvement of third-party specialists, the cost of which is often considerable.
Start button repair
If the tool does not react in any way to attempts to turn it on, there are two possible problems: a broken cable inside the handle or a failure of the power button.
Important! Make sure the device is unplugged if it is a stationary type. In the case of the battery version of the tool, you should first disconnect the power terminals, and only then proceed with repairs.
In order to understand what exactly the breakdown is, you need to disassemble the handle.
Having gained access to the inside, you should, armed with a multimeter, measure the resistance of the button. If it is missing after pressing, the button must be replaced.
You also need to check the contacts connecting the power cable to the contact group. Often there is no need for such a measurement, becausea break can be detected with the naked eye. In this case, it must be eliminated by soldering.
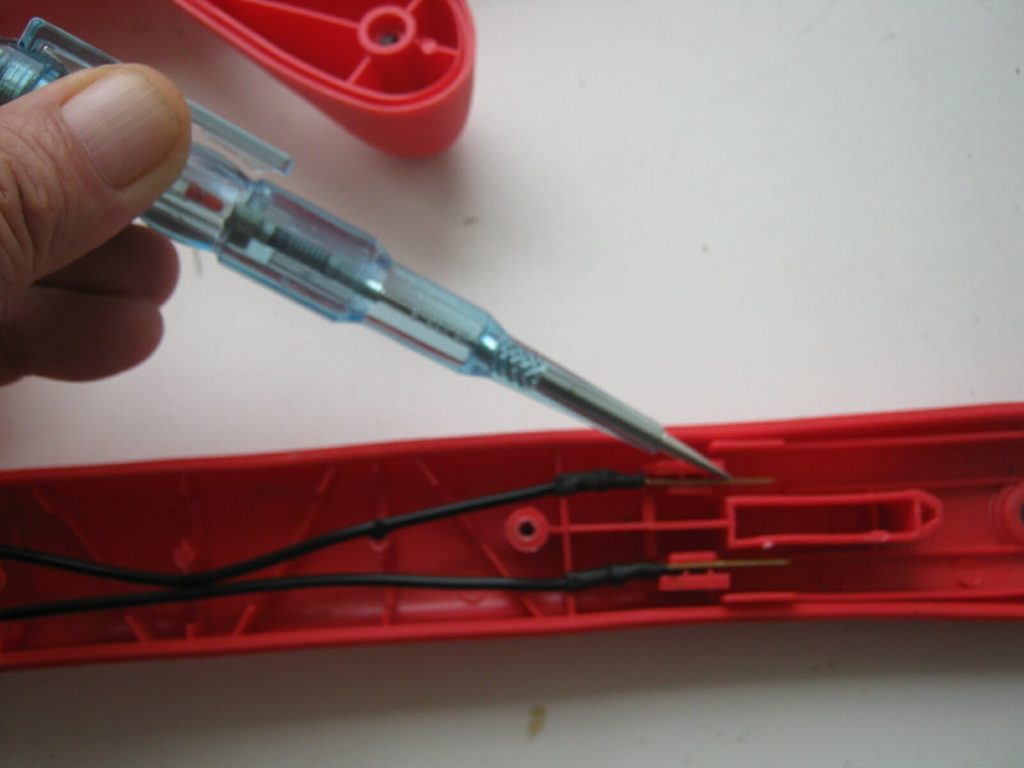
If you don’t have a multimeter, the same work can be done using an indicator screwdriver. To do this, after disassembling the handle body, connect the power cable to the network and use a screwdriver to check the presence of phases before and after the button. If the button receives a zero, the plug in the socket can be turned over and the measurements taken again.
Attention! You should be very careful when checking for phase presence in this way. There is a risk of electric shock!
Checking the electric motor
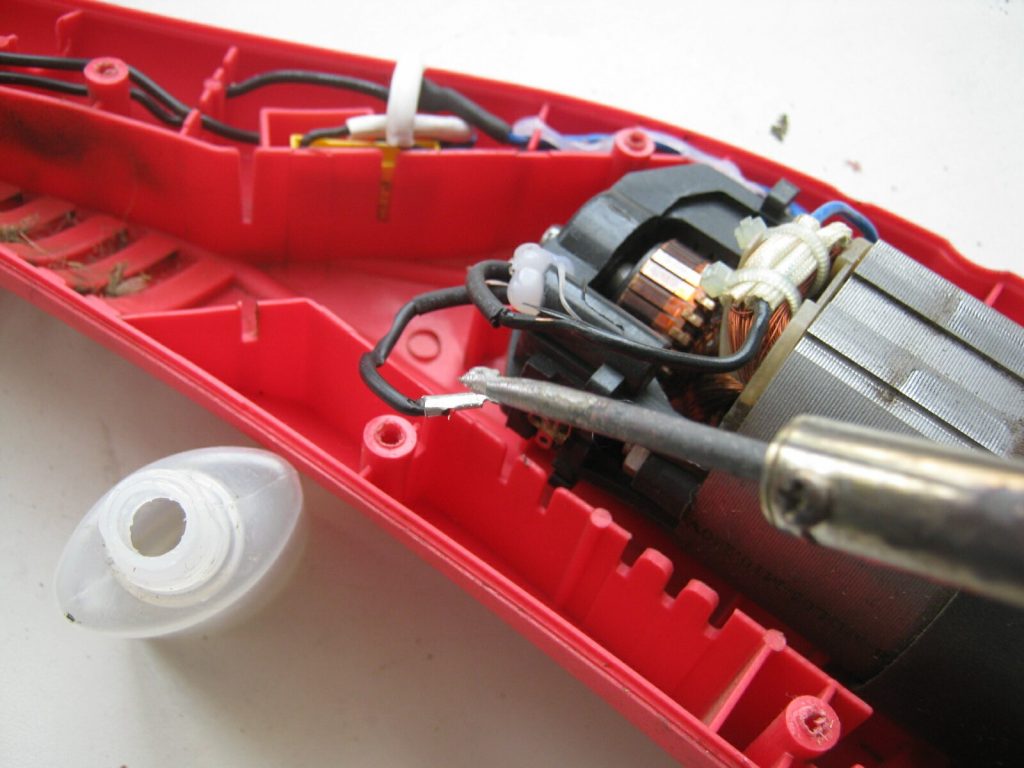
If the button and cable powering the tool turn out to be in good condition, you should proceed to diagnosing the power unit. To do this, you need to disassemble the housing in which it is located. Usually you just need to unscrew a few bolts or screws and remove the cover.
The first step is to check the condition of the commutator brushes. Wear of this unit can lead to unstable operation or complete engine shutdown. If the brushes are in satisfactory condition, you should check the motor winding for a short circuit.
For this operation, it is necessary to completely remove the engine, and then check all the collector plates for breaks. The device should not show significant deviations in measurements.
The second check is to “ring” the rotor winding to ground. To do this, you need to connect one contact of the multimeter to any collector plate, and the second to the “ground” of the rotor. In this case, the resistance measurement mode must be greater than 1 Mohm. If there is no short circuit, the device will show a very high value.
If, based on the results of these checks, all parameters are normal, you need to measure the resistance of the stator winding.The readings should be similar as in the case of the rotor. If not, then the fault lies in the stator.
If there is an interturn short circuit in the engine, it will not be possible to diagnose it in this way. However, this problem can be identified by observing the trimmer in action. An indirect sign of such a malfunction will be a decrease in operating power and overheating of the equipment.
When, as a result of diagnostics, it becomes clear that the engine is “burnt out,” it will be easier to spot it with a new one. In the vast majority of cases, repairs consisting of rewinding will cost the same as a new power unit.
If a thermal relay is installed on the engine, it will cut off the power if it overheats. If the problem is a malfunction of the relay itself, this can be identified using the same multimeter or tester. When the engine is cold and in good condition, the relay should pass current.
Mechanical problems
This type of problem includes a break in the flexible shaft. This is easy to recognize - the motor is running, but the reel with fishing line is not rotating.
The cause of the breakdown is inappropriate care of the tool, which consists of timely lubrication of the inside of the rod. Without the correct amount of lubrication, the shaft will be subject to excessive friction and breakage will be a natural result.
This damage can be corrected by replacing the shaft, which can be removed by disconnecting the upper part of the trimmer from the rod. If the second part of the shaft cannot be removed, the lower part may also need to be disconnected.
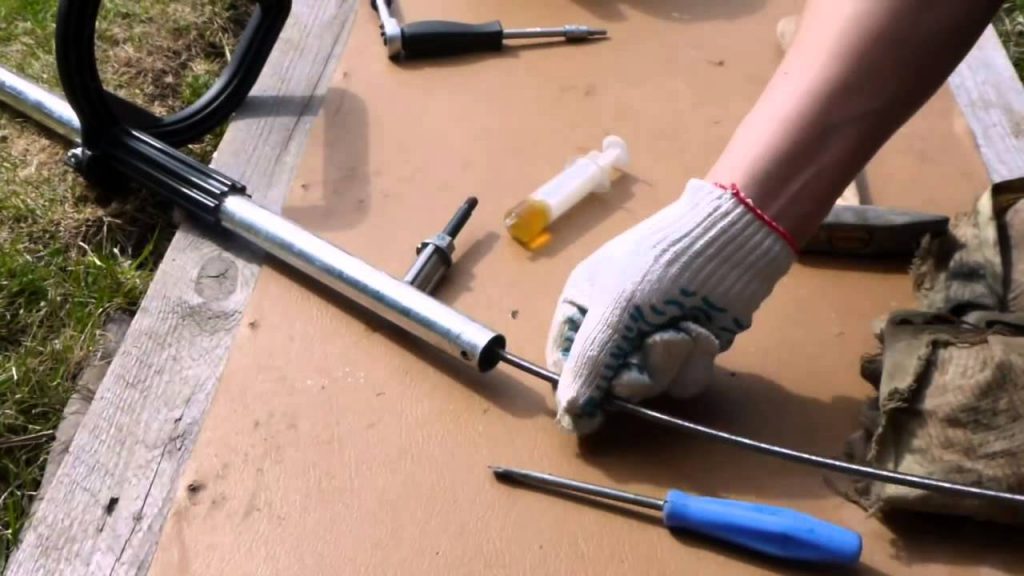
When installing a new shaft, it should be pre-lubricated.
Such a malfunction can only occur with a classic arrangement of parts. In devices where the power unit is located at the bottom, there is no flexible shaft.However, with this arrangement, the role of the transmission mechanism is played by a bearing located on the motor shaft closer to the point of torque transmission. In this situation, the bearing simply needs to be replaced with a new one.