DIY brakes on a walk-behind tractor
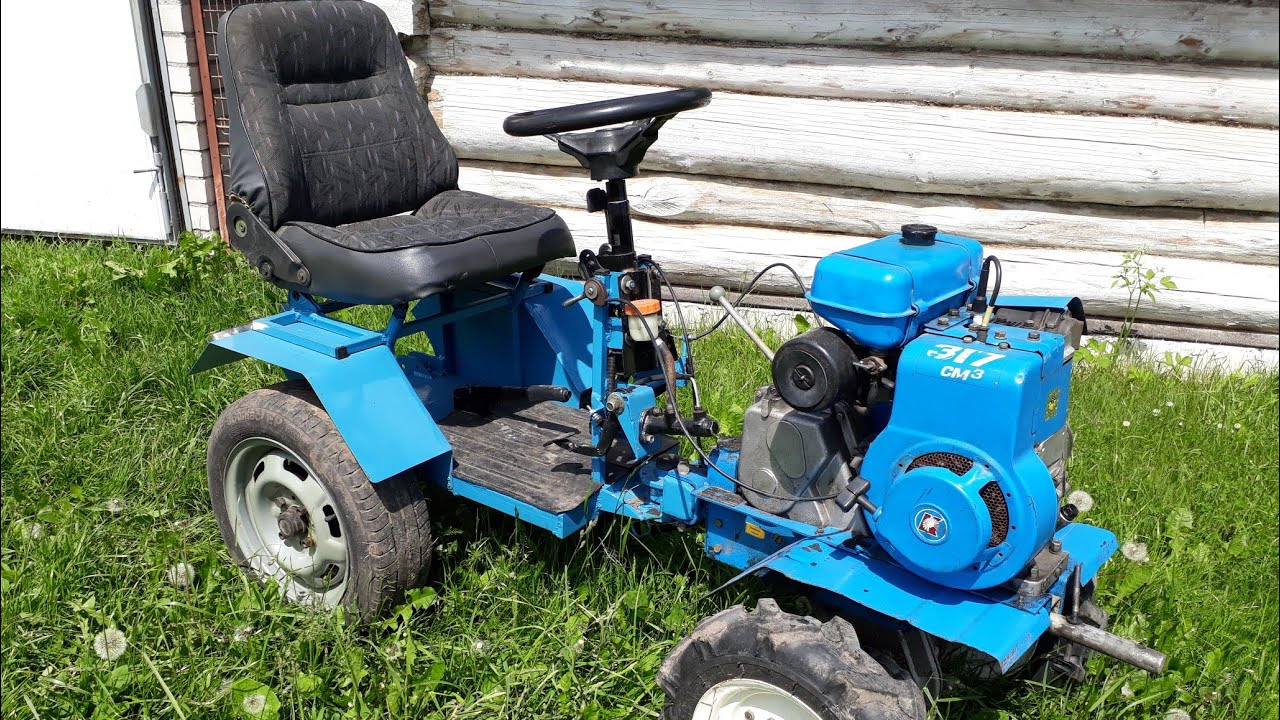
Walk-behind tractors are used by owners of farmsteads of various sizes. This is not surprising, because such units can perform a wide range of tasks: from transporting goods to complex agricultural work. In addition, such units do not require expensive maintenance. The only significant drawback of the walk-behind tractor is its inconvenience in operation.
To fix this, they use adapters - cart-type devices that allow you to work while sitting. To simplify and facilitate work with the adapter, a brake system is installed on it. In addition, installing brakes will ensure safe operation. You can buy it in the store. But this is often very expensive. Anyone can make a brake system with their own hands. This does not even require special technical education.
The content of the article
Brake system selection
Before starting work, you should choose which type of brake will be most preferable and suitable in your case. You should immediately stop using band brakes. Their capabilities will not be enough even to carry out simple tasks, let alone transport heavy loads. You can use a car parking brake, the efficiency and reliability of which will be much higher.But the process of dismantling it and then installing it on a walk-behind tractor is an extremely labor-intensive process that requires much more time.
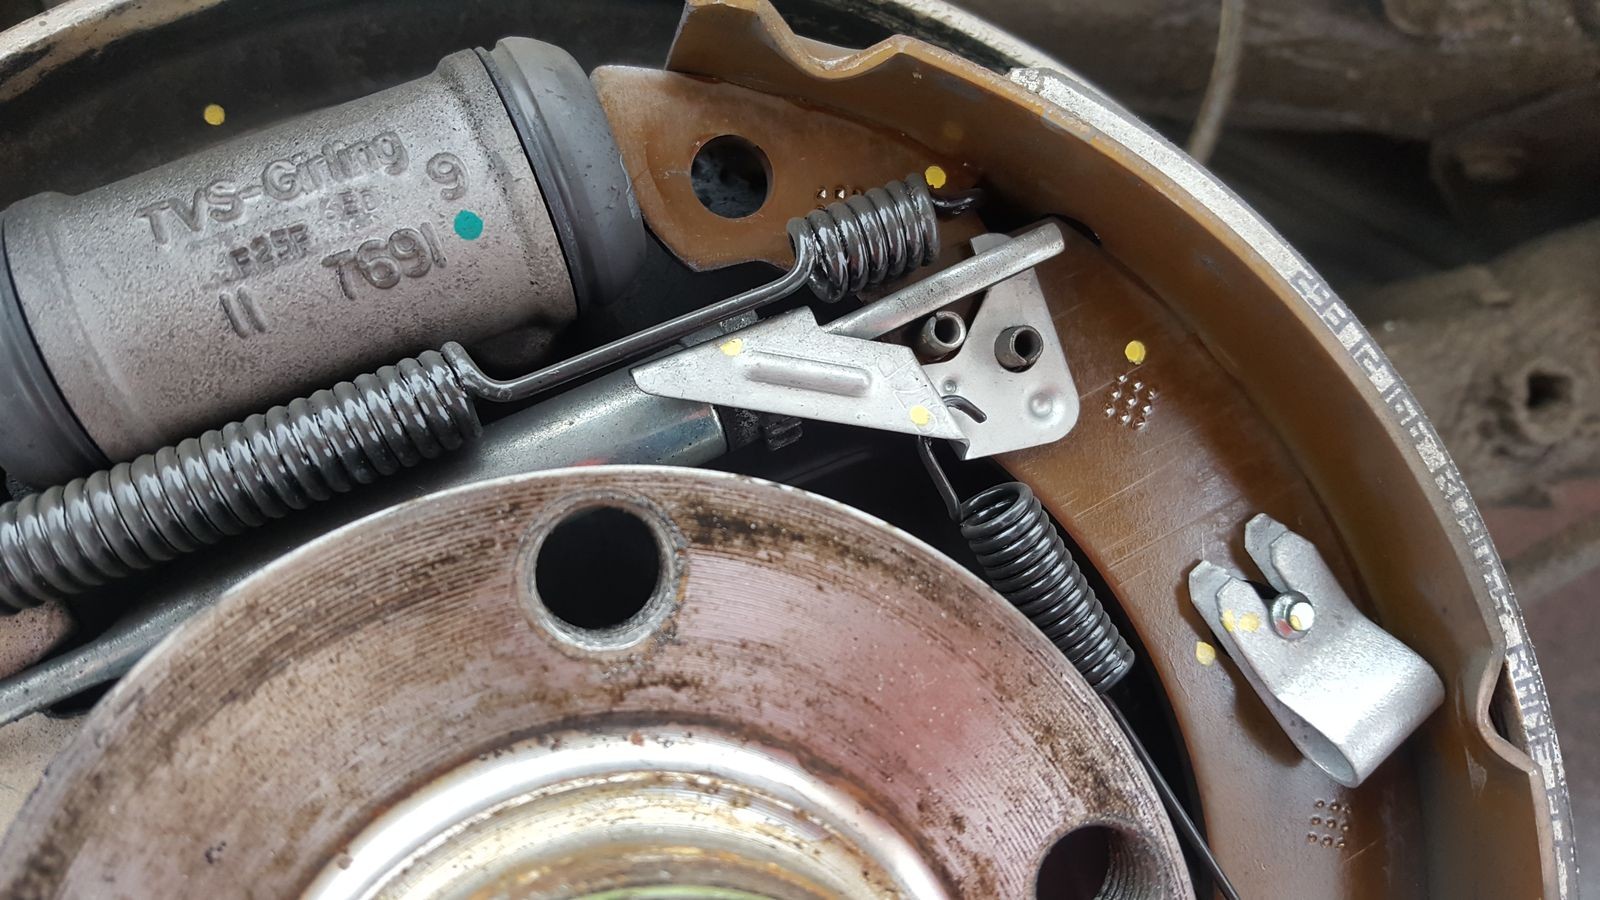
The ideal option is to use drum brakes from a motorcycle or small car. It wouldn't hurt to use brake pads and spokes from a motorcycle.
Tools:
- welding machine;
- file;
- drill;
- spanners.
Materials and details:
- brake drum;
- control system (motorcycle or car);
- wheel spokes;
- brake cable;
- pads;
- other accessories.
Preparing to create
To make your homemade product as good and reliable as possible, use drawings of the brake system that will be used in the design. The drawing should more accurately reflect the structure of the future structure. Since the system includes many parts with a complex structure, you need to be extremely careful and avoid miscalculations.
Each unit and element must be manufactured and installed in accordance with the drawing. For maximum efficiency of the future braking system, install brakes on each wheel. This will make it possible to stop even at high speed, and will also help to avoid unwanted U-turn during sudden braking.
Process of creation
After preparing everything you need, you can begin manufacturing.
- Stage 1. Installation of the drum mechanism. It is necessary to install the existing drums on the hubs. Make sure both mechanisms are in good working order and ready for use.
- Stage 2. Installation on the axle. Once you are sure that it is working properly, attach the resulting mechanism to the axle using a bushing. The connection must be stationary, since displacement of the structure during operation is unacceptable.
- Stage 3. Fixing the axis. Weld the part to the axle for more reliable fixation of the brake.A metal pipe of small diameter and size or a corner is perfect.
- Stage 4. Fastening the cable. In order for the brake mechanism to function, the brake cable must be stretched. It must reliably connect the drum to the control system.
- Stage 5. Creation of a management system. As a braking control system, one from a motorcycle or car is suitable. If you have technical knowledge, you can make it yourself from available materials.
Further operation
You have assembled a brake system for your walk-behind tractor. If necessary, adjust the operation of individual components. Over time, some parts will wear out. For example, pads or cables. They need to be changed in a timely manner.
I hope this article helped you achieve your goal: to make a brake system for a walk-behind tractor. You should not dwell on what is given in the article. Continue to improve your walk-behind tractor, customize it for yourself, so that working with it becomes as easy and efficient as possible!