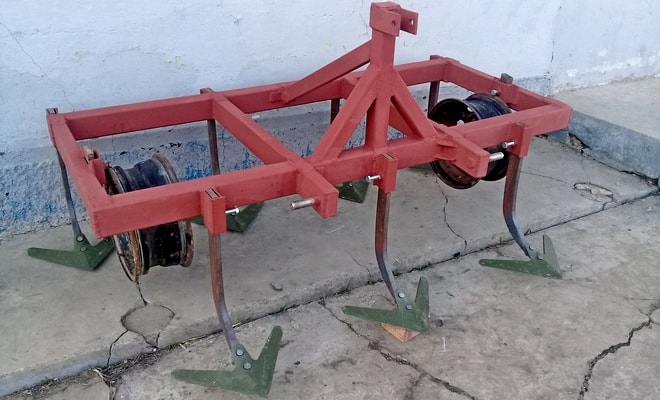
Do-it-yourself cultivator for a mini-tractor
The cultivator is used for cultivating soil in garden plots. We are talking about an attachment for a mini-tractor, which allows you to loosen and plow soil layers without disturbing the fertile soil layer. This element of agricultural machinery can be made with your own hands. Homemade device will be no less effective than something bought in a store, but at the same time it will have a much lower cost.
The content of the article
What you need to create a homemade cultivator for a mini-tractor
Let's prepare a set of necessary materials:
- steel pipe 2 meters long;
- bolts and nuts - 20 pieces;
- square plates - 20*15;
- rectangular plates - 15*15.
To work you will need tools:
- grinder with a set of metal discs;
- welding machine with electrodes;
- drill with a set of various drills;
- emery machine;
- wrench, screwdriver, pliers.
The cultivator comes into contact with the soil, which accumulates a lot of moisture, so the components of the future device should not be afraid of rust. They need to be strong enough to effectively dig up soil layers.
How to make a cultivator for a mini-tractor with your own hands
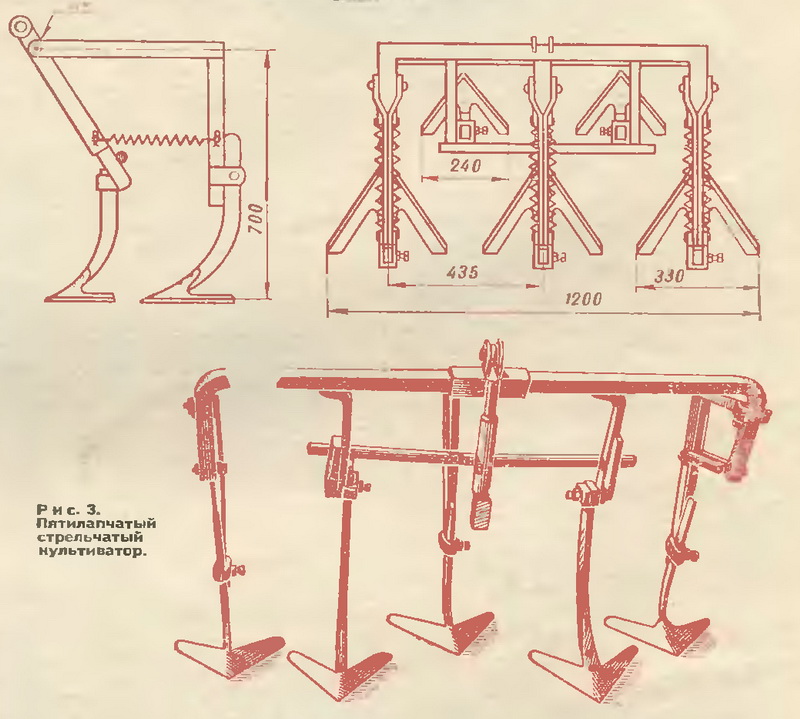
Before starting work, you need to draw up a diagram of the future device. It is necessary to accurately observe the proportions, indicating the dimensions of all parts.
Work process:
- We make holes in each metal plate.
- We place a rectangular cutter on each side of the square base. We fasten them with bolts.
- Drill holes in the center of the plates. They are needed to combine cutters with a metal pipe.
- We cut the steel pipe into two equal parts.
- We string the finished parts onto it.
- To secure the structure, we use bolts and nuts or a welding machine.
- We drill holes on the mini-tractor shaft and in the pipe with cutters.
- Aligning the holes. We fasten the pipe using bolts and nuts.
Upon completion of work on the homemade device, we check the strength of each connection. After that we test it.
What attachments can be equipped with a homemade cultivator?
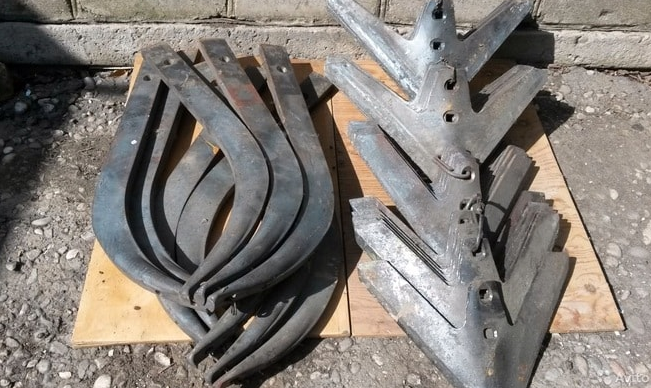
The working parts of the soil cultivation device are replaceable attachments or paws. Several types of them have been invented, designed to perform various tasks.
Crow's feet are divided into chisel-shaped, lancet and one-sided:
- Chisel-shaped. Designed for simple loosening of soil at a depth of up to 15 cm.
- Lancet. They can be universal and flat cutting. The difference between them is the grinding angle. Universal ones have a crumbling angle of 25–30 and are suitable for continuous and inter-row plowing. In flat cutters it is reduced to 12–18. The working width is the same.
- One-sided. Used to destroy large weeds.
Other types:
- Harrows. The soil is treated between the rows and in protective zones.
- Feeding knives. Used for laying fertilizers between rows.The maximum depth of the soil layer is 16 cm.
- Needle discs. Destroy the surface earthen layer. Processing is carried out at a depth of 4 cm.
- Hillers. They cut ridges up to 25 cm long and help get rid of weeds. Works at a depth of up to 16 cm.
- Arychniki. They have a funnel for adding mineral fertilizers. Prepare the furrows for irrigation. The possible soil depth for inter-row cultivation reaches 20 cm.
Any of them is bolted to the cultivator stand.
Caring for the nozzle includes clearing stuck weeds and protecting it from excess moisture that remains in the ground after rain.
Recommendations for assembly and operation
Following the advice will help you avoid problems with your homemade cultivator. There are a number of rules that are useful to follow during assembly and during operation of the device.
All materials for the manufacture of the cultivator should be treated with anti-corrosion liquid. If this is not done, the metal will quickly rust upon contact with wet soil.
A loosening or weeding paw should be used if there is a need to level the furrows. Irregularities remain after tilling the soil with feeding knives.
When determining the dimensions of the metal plates, you should focus on the dimensions of the mini-tractor to which you plan to attach the manufactured device. It is also necessary to decide on the type of fastenings on which the unit will be supported.
It is advisable to connect the working elements of the cultivator, that is, plates and cutters, with bolts. In this case, it will have high strength and will be able to withstand work on hard soils. If you apply a welding seam, the tool will be suitable only for soft black soil.It will be unsuitable for processing clay and rocky soil types.
The cultivator is often attached to the MTZ and Dong Feng techniques.
Advantages of a homemade cultivator for a mini tractor
A device made at a factory costs more than a hand-made one, which is not always justified. Homemade equipment can be better adjusted to your needs at minimal financial cost.
Using available tools and materials, you can make a simple design that is not inferior to store-bought products. Correct drawing up of the diagram will allow you to create a device with the required coverage when digging and sufficient depth.
The use of a cultivator in agriculture allows you to get a good harvest. This gardening unit is much more convenient than a shovel or hoe. He carefully and efficiently processes land plots, spending a minimum of time on it.
A mini-tractor cultivator allows you to perform many farming tasks. These include loosening the soil, hilling land, moisture conservation, and weeding. The soil dug up using this unit becomes soft and loose, and its layer is leveled. It is quite difficult to achieve a similar effect without using a cultivator.