Fokina flat cutter: how to use?
Recently, gardeners have acquired a large number of mini-garden equipment, which helps increase the speed and efficiency of processing the site. But this does not mean that they refuse to use conventional hand tools.
The content of the article
How to use a Fokin flat cutter correctly?
The use of this simple device often remains a mystery even to experienced gardeners. More often, gardeners use a flat cutter for only one specific purpose, forgetting about multifunctionality of the device.
A flat cutter is an improved model of a hoe that solves several problems at once when processing beds.
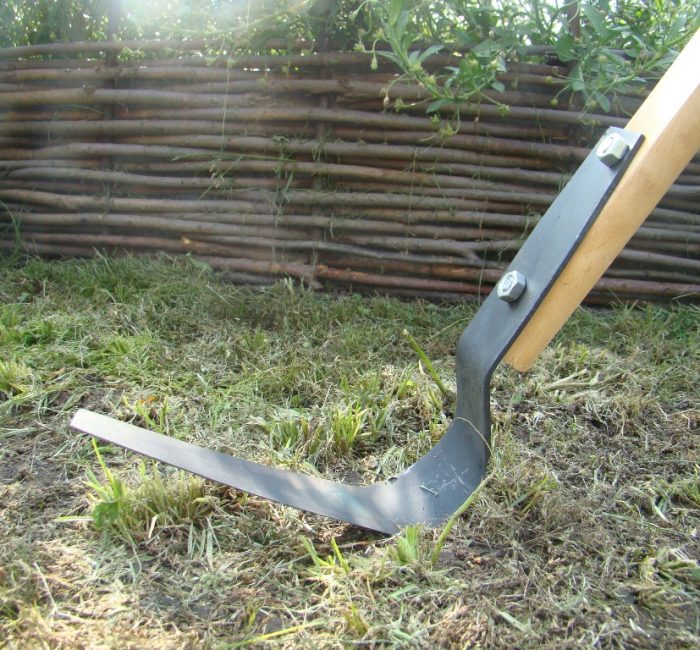
Appearance of the tool
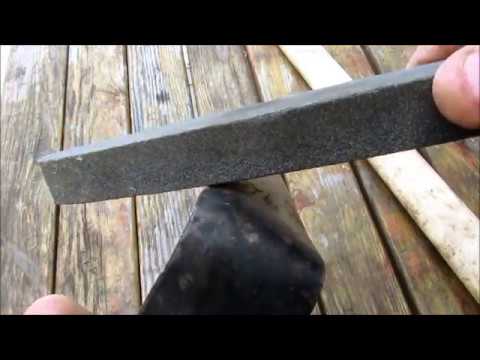
It is a metal bracket made of high carbon steel. It is bent at a certain angle and attached to a wooden handle. All three sides of the working surface are sharpened. This helps to quickly and easily remove weeds and loosen the soil.

Purpose
The main purpose of the tool is to loosen the soil and remove harmful weeds. In addition, the device is used for the following purposes:
- forming a furrow when sowing seeds;
- sealing the ridge after planting the material;
- weeding between rows;
- hilling potatoes and other plants;
- crushing large clods of soil;
- cleaning up grass clippings or fallen leaves.
Some gardeners use it instead of a shovel, digging up the soil before planting, and also for mowing grass if the cutter is sharp enough.
Instructions for use
Depending on the task that the tool performs, it is used accordingly:
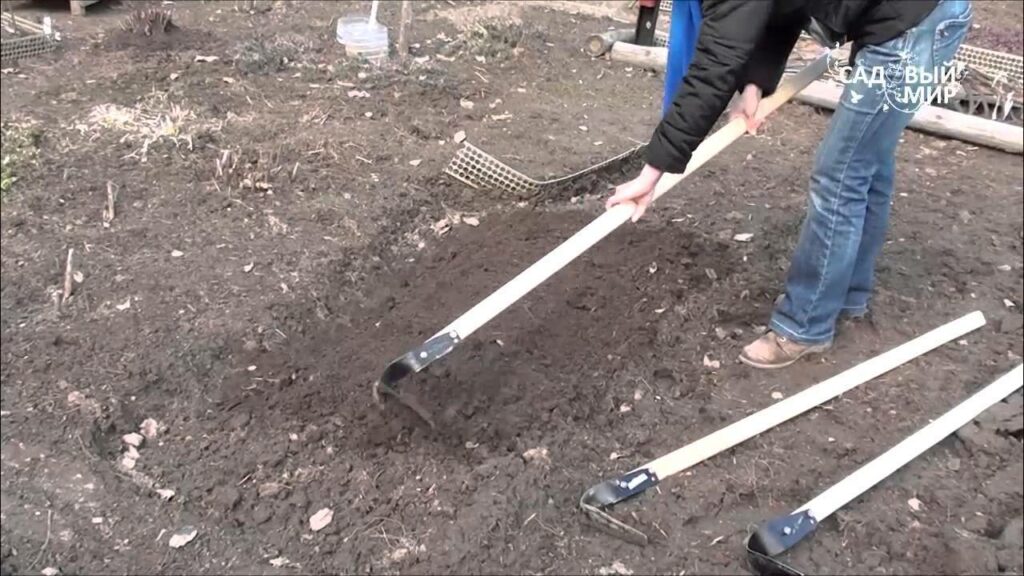
- For digging up soil. The blade of the flat cutter is driven into the ground at a slight angle to the turning point. Then make a slight rotational movement to loosen the soil. The depth of loosening is about 10–15 cm, while the soil layers do not turn over, as when working with a shovel.
- Leveling the ground. This method is rarely used, since rakes are more effective in this case. But still, if you place the flat cutter on its side on top of a loosened area of soil, and move it quickly back and forth, the clods will break, and the bed will become level.
- Forming watering circles. Drive the blade into the soil at a slight angle and, with a slight movement away from you, make sides to retain moisture near the root system.
- Thinning of plantings. The edge of the flat cutter is placed perpendicularly to the thickened area, and the tool is passed to the right and left through the row, without lifting the plane from the surface. In this case, the “heel”, when used correctly, is displayed on the other side of the ridge.
- Weed removal and loosening. Having laid the flat cutter flat, bury it 3–5 cm into the soil and carry it out without removing it from the ground. Rooted herbs are removed using a sharp blade.
- Formation of holes. The sharp, narrow part of the flat cutter is stuck into the soil and a planting hole is made in a circle. It is recommended to bury it after laying the seeds using the method used to form watering circles.
- Sowing. Using a sharp edge, furrows are made along the entire length of the bed, seeds are filled in and the ground is leveled, covering the planted crops with soil.
This is a convenient and inexpensive tool that will become the best assistant for a gardener.