DIY clay tandoor
One of the ways to prepare not only tasty, but also healthy food is to use a tandoor. You can also make this roasting oven yourself. Of course, it cannot be said that the manufacturing process is easy and fast. However, with the right choice of raw materials and following the production stages, you can get a tandoor that will last a long time.
The content of the article
What clay is it made from and how is it prepared?
Directly in the homeland of this device, that is, in Asia, clay of local origin is used to create a brazier oven. For those who live in other zones, it is permissible to use light gray or light yellow kaolin. The fireclay version has good thermal conductivity and thermal insulation, Therefore, it is optimally suited for a roasting oven.
Initially, the clay powder is sifted and filled with water to rid the raw material of foreign impurities. They float up during the soaking process and are removed by draining the water.
The clay is kneaded and left for 2-3 days in the shade. Periodically it is necessary to mix the raw materials and drain the water when it appears on the surface.
After three days, you need to achieve greater viscosity of the clay.To do this, the solution is supplemented with river sand and fibers. Animal wool (sheep, camel), straw and sawdust are used as the latter.
Reference. During firing, the fibers burn out. Thanks to this, the finished product becomes light.
Fiber and clay are taken in one part, sand - two. The substance is aged for about a week. During this period it needs to be mixed several times. As a result of all manipulations, you will obtain raw materials whose consistency is similar to plasticine. It is used to form strips up to 5–7 cm thick.
Their length should be approximately equal to the circumference of the future roasting oven. Since the device tapers towards the top, some of the plates are made shorter. They are left for 2–3 days in the shade.
What else is needed to create a tandoor yourself?
The list of required tools for constructing a furnace that need to be prepared includes:
- shovel - for digging a hole under the foundation;
- container - for diluting and mixing raw materials;
- mixer;
- a machine designed for cutting bricks (a grinder is also suitable).
Directly for tandoor, in addition to the clay mixture, you need:
- sand and crushed stone - to fill the hole under the foundation;
- moisture-resistant cardboard - for the molding cone;
- fireclay brick - needed when laying the base;
- reinforcement and concrete - used to form the foundation.
Stages of constructing a tandoor with your own hands
The classic creation scheme looks like this.
Formation of the foundation
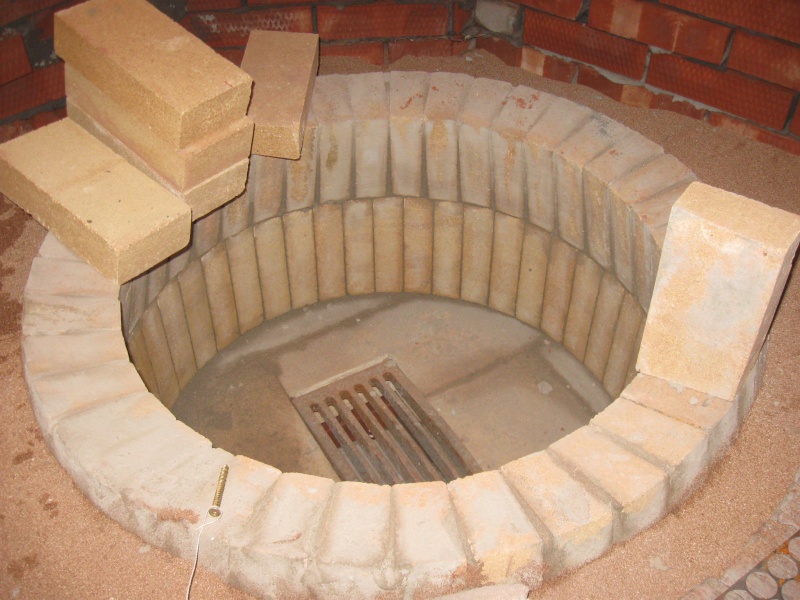
To do this, dig a hole - round or square - to a depth of about 20 cm. Its size should be 15 cm larger than the base then constructed. The hole is half filled with sand, on which crushed stone is laid. Now the formwork is to create a foundation above the surface of the earth.Then the reinforcing mesh is attached and the concrete is poured.
Laying out the base
It is necessary to accurately determine the location of the tandoor by making markings. If the shape of the stove base is round, then the most convenient way to mark is to use twine or slats. One end of it must be fixed in the center. Fireclay bricks need to be placed in this circle.
Initially, the layout is done without mortar, so that adjustments can be made if necessary.
When the position of the bricks is finally formed, the seams between them are filled with prepared clay. It is permissible to use a special solution intended for laying stoves.
Installing a cone for building walls
For convenience, you need to create a template. For this, moisture-resistant cardboard is used. A device in the shape of a truncated cone is made from it. The diameter of its lower part is larger than its upper part. To achieve stability of the device, sand is poured inside.
Creating walls
The prepared clay strips are laid out on top of the cone. The joint areas are smoothed out. The entire surface should become uniform, without the slightest cracks. When the walls are equal in height to the template, it is necessary to make a hemisphere for the upper part of the stove.
To do this, more sand is poured in and the desired shape is made from it. Place wet newspapers on top. Clay is applied to them. It needs to be the same thickness as the walls. After drying, which lasts a week, the resulting lid is cut off.
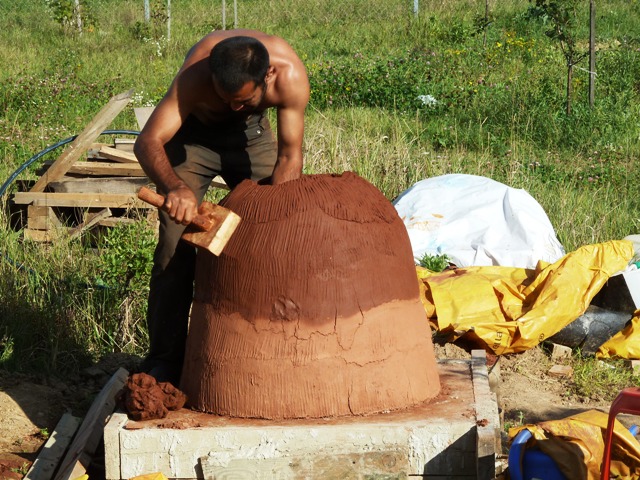
Reference. You can use a bucket as a mark for the top of the stove.
After this, the template for forming the walls and the newspaper must be carefully removed: they have served their purpose.Closer to the base you need to cut a hole - 10 by 10 cm or a little more. It is intended for blowing.
Drying and first firing
The period lasts at least a week, or even two, depending on the climate. After the drying process is completed, the inner surface of the oven is lubricated with oil. It is ideal to use cotton.
Thanks to this treatment, the surface of the frying pan becomes smooth. This is done so that later the cakes cooked in the oven do not stick.
After lubrication, it is necessary to carry out the initial firing. To do this, a fire is lit inside the brazier. Wood chips and brushwood should be used. The fire is maintained for several hours. Then firewood is placed in it. Firing may take a day - during this time the device will completely warm up.

Heating and cooling should be smooth. If this condition is met, very few cracks will appear. Those that form are covered with a mixture of clay and sand in a ratio of 1:4. Then they are fired again.
Finishing
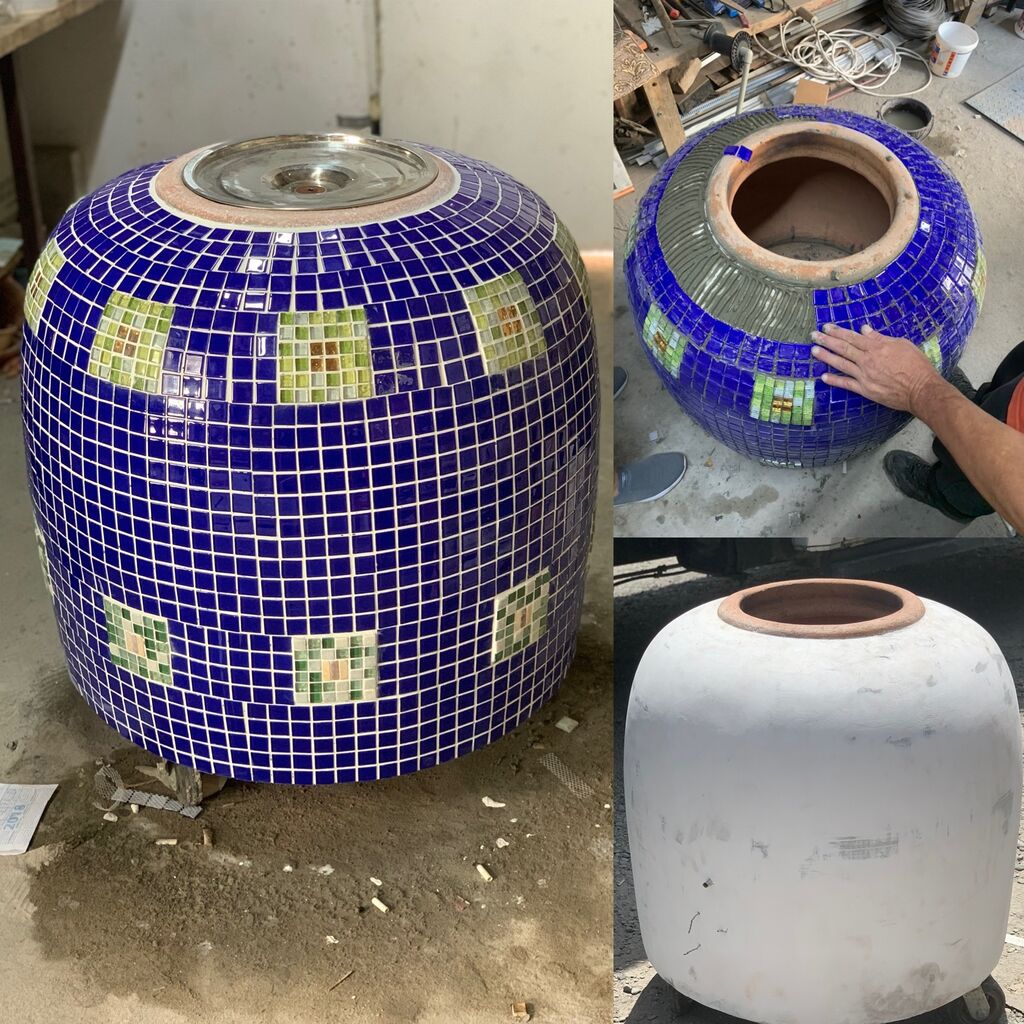
The resulting bowl is not everything. It is necessary to lay out a second layer of bricks and place insulation between the two walls. Ordinary sand can play its role.
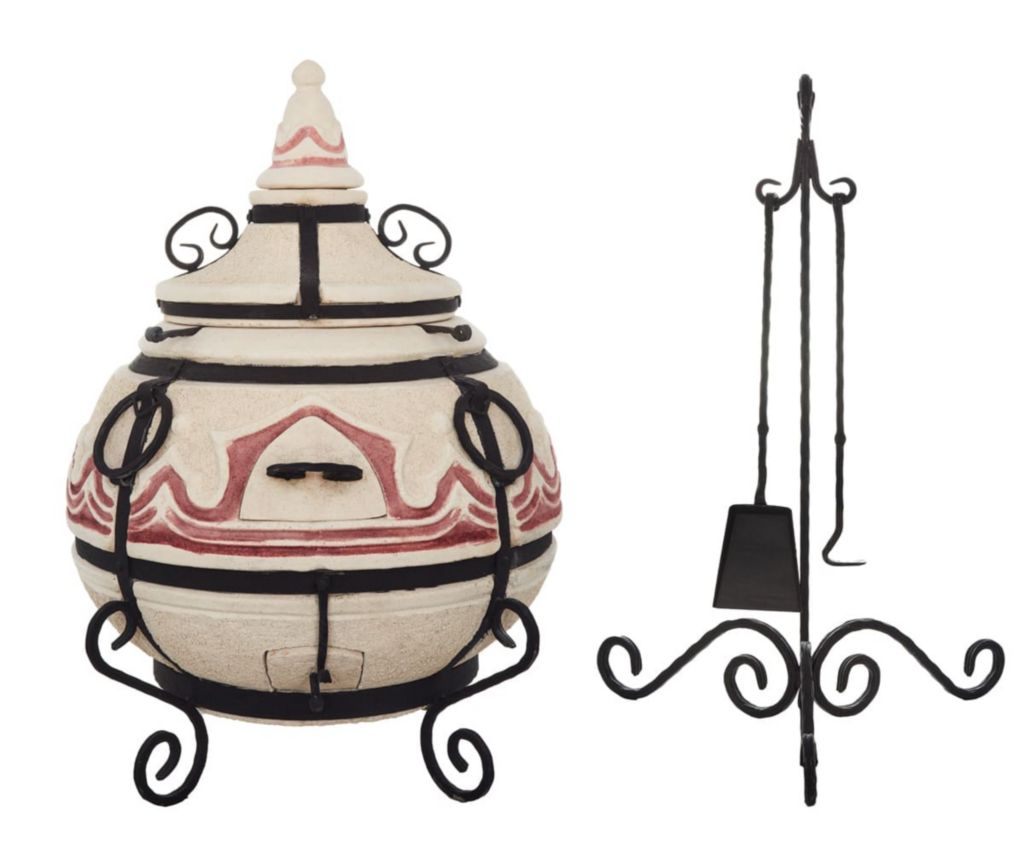
The outer surface of the roasting oven can be decorated. This is done through plastering, using tiles, painting techniques or mosaics.
What can go wrong and how to fix it
The construction of the brazier oven takes place in the open air. If during the manufacturing process the weather turns bad and it rains, the walls that have not been fired will blur. This will ruin all your efforts. To avoid such a situation, it is necessary to take care in advance of constructing a waterproof canopy over the clay device.