Leveling walls with plaster with your own hands: how to level correctly
Leveling walls with plaster is carried out to eliminate various voids from 2 to 50 mm. The main difficulty lies in the correct installation of beacons, which are mounted according to marks obtained using a laser level. Step-by-step instructions and professional advice can be found in the presented article.
The content of the article
Checking wall unevenness
Before you level the walls with plaster yourself, it is important to assess how uneven the surface is. Normally, finishing is carried out with a maximum difference of 2 mm over a length of 2 m or more. But such smooth surfaces are quite rare.
Therefore, before you understand how to level walls with plaster, it is important to find irregularities and evaluate them. To do this, proceed as follows:
- Take the rule (length 250 cm) and apply it to the wall, directing it vertically. You need to do this several times until a gap appears. It is measured with a tape measure.
- When understanding how to level walls with plaster, you need to perform similar actions horizontally and diagonally in all directions.
- However, checking the differences on the plane does not allow you to fully understand how to level a wall with plaster with your own hands. To get a complete picture, you need to additionally use a building level. It is placed on the rule, which is also applied to the wall.
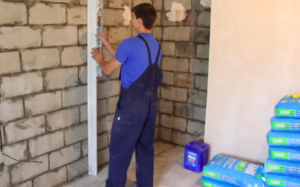
- Next, change the position of the upper and lower parts of the rule until the bubble in the level is perfectly centered. Leveling the plaster can begin after it is clear where there are gaps and deviations of more than 2 mm.
Materials and tools
For finishing, leveling plaster or conventional varieties are used. Any composition allows you to eliminate even significant differences of up to 50 mm, i.e. 5 cm. Plaster is also valuable because it is inexpensive, easy to apply and practically does not take up space after finishing.
Considering different ways to properly level walls with plaster, choose compositions based on cement or gypsum. The first are universal, since they can be used in any room, even with high humidity (bath, kitchen).
The gypsum composition is used only in dry rooms, for example, in the bedroom, living room, nursery. Both types of plaster make it possible to eliminate almost any defects, including significant differences that appear after using beacons. Thanks to this, you can learn how to properly level walls with plaster.
Moreover, the necessary tools and materials are pre-prepared:
- rule (2-2.5 m);
- construction level;
- drill (you can also use a hammer drill);
- Laser level;
- cord for marking;
- set of spatulas;
- mixer for kneading;
- masking tape;
- brush or roller;
- fastening element (drill, hammer drill);
- primer;
- bucket;
- the actual plaster.
Step-by-step instruction
Now you need to figure out step by step how to level the plaster. First, beacons are placed - the main stages of work are as follows:
- Prepare the surface by removing dust, peeling and dirt.The primer is applied with a roller, having selected it in advance depending on the type of surface.
- Plastering uneven walls must be done using beacons. A laser level is used to accurately install them. But such a tool is not always available in the house, so in a pinch, you can use a cord.
- Mark the installation points for the beacons so that the interval between them is 20 cm less than the length of the rule. The batten is applied to the wall, starting from the corner, placed parallel to the floor plane and 2 marks are made, retreating 10 cm from each edge of the rule.
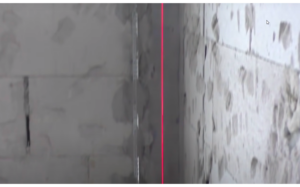
- Vertical straight lines are drawn for each mark, determining the correctness of the level. Marks are placed on adjacent walls, at a distance of 5 cm from each corner. A laser level is placed at these points.
- Having figured out which plaster to use to level the walls, you need to put marks above and below the rule, retreating 4 cm from the edges. To protect the instrument from scratches, use masking tape.
- Now you need to understand how to level plastered walls. To do this, mix a small part of the solution and apply it, moving along the designated vertical lines.
- The beacons are cut to size, applied to the mixture and pressed using the rule until the 4 cm marks coincide with the line of the laser level.
- Next, you can understand how to plaster an uneven wall. The excess volume of the mixture is first removed and the guide is secured. Then they check the accuracy using the rule and install all other beacons in the same way.
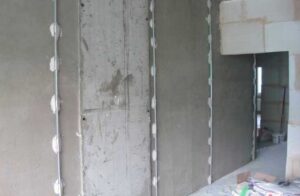
Now you need to level the plaster, i.e. start the main stage of work. The sequence of actions is as follows:
- Pour clean cold water into the container and add the required amount of dry mixture according to the instructions.
- Stir with a mixer, first at low speed, then at high speed. Regardless of which plaster you choose to level the walls, this stage of work will take 5 minutes, after which you let it stand for the same amount of time and stir again.
- The technology for leveling walls with plaster involves applying the composition with a spatula or a construction ladle. It is constantly smoothed over the surface and the work is controlled by the rule that is applied to the beacons. The tool is carried out, moving upward, and the remaining mixture is removed.
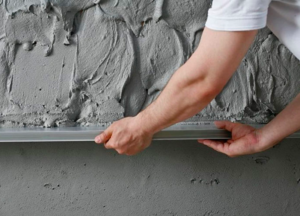
- When the plaster of uneven walls, made with your own hands, sets, the beacons must be removed immediately - then this will be much more difficult. The voids are sealed with the remaining composition using a spatula.
- At the last stage, you need to go over it with putty - then the wall will turn out almost perfectly smooth.
Now it’s clear how to level the plaster after drying. In fact, you can do all the work yourself without using special equipment. The main key to success is the accurate installation of beacons. To do this, it is best to use a laser level, which is useful for various types of construction work.

