Leveling walls with plasterboard without a frame with your own hands
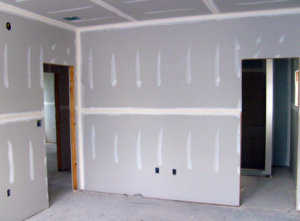
Leveling walls with plasterboard is one of the best ways to get a truly high-quality surface. If the differences on the wall do not exceed 4 mm, finishing is allowed without constructing a frame, which significantly simplifies the work. This method has its own characteristics, strengths and weaknesses that need to be taken into account in advance. The pros and cons, as well as leveling technology, are described in detail in the presented material.
The content of the article
Pros and cons of the method
Leveling walls with plasterboard without a frame is carried out in cases where appropriate conditions allow:
- the walls are fairly even, and differences do not exceed 4 mm (checked by building level and rules);
- the room has a low level of humidity - bedroom, living room, hall, children's room;
- the wall has a standard shape and size, so the sheets do not need to be cut - it will be better if you glue them entirely.
If the surface has large differences (from 4 mm), then you will have to install a frame, i.e. go with classical technology. It is clear that the method “how to level walls with plasterboard without a frame” is simpler. But it can be implemented only in individual cases.
Along with simplified installation, this technology has other advantages:
- high speed of work - you can level the walls with plasterboard in a few hours;
- affordable cost of materials, especially compared to plaster;
- minimum “wet” actions - no need to knead the mixture;
- even if we level the walls with plasterboard without special skills, we can get a perfectly flat surface on which all that remains is to seal the seams;
- leveling the walls with plasterboard with your own hands allows you to lay any communications in the space between the rough surface and the sheet;
- In the same gap, if necessary, you can lay thermal insulation, but for this you will need to build a frame.
When figuring out how to level walls with plasterboard with your own hands, you need to keep in mind the disadvantages of this technology:
- low strength of sheets - areas need to be sheathed in 2 layers;
- the space of the room is partially reduced, although this is not very noticeable;
- Heavy shelves and other bulky structures cannot be hung on plasterboard walls.
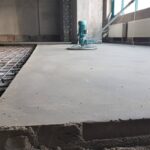
Preparing walls, tools and materials
It is quite possible to level the walls with plasterboard without a frame, but this requires preliminary cleaning, as well as the preparation of all the required materials and tools. The main stages are:
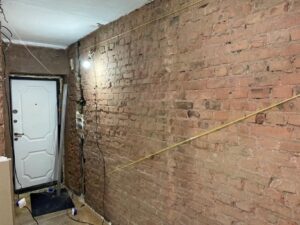
- Before leveling the walls with drywall begins, the walls are cleared of remnants of old plaster with a chisel and hammer or hammer drill.
- Remove dirt, oil stains, plaque. To do this, use oily clay and a metal brush. If you need to remove mold, use a scraper. To wash concrete and brick walls, use a 9% vinegar solution and then rinse with plenty of water.
- The walls are primed using deep penetration compounds. This could be, for example, “Typhoon Master” or “Betonokontakt”. Treat 2 times, with the second layer applied only after the first has completely dried.
- Determine the depth of the differences using a tightly applied rule. To evaluate the vertical deviation, apply a building level to the rule and move both tools until the bubble is centered.
Next, you need to figure out how to level the walls in an apartment with plasterboard. To do this you will need the following tools and materials:
- hammer drill or drill with impact option;
- plumb line;
- roulette;
- 2 m rule;
- electric jigsaw;
- fishing line;
- marker or construction pencil;
- building level;
- roller;
- bucket;
- plasterboard sheets;
- glue;
- fastening elements (screws, dowels);
- polyurethane foam.
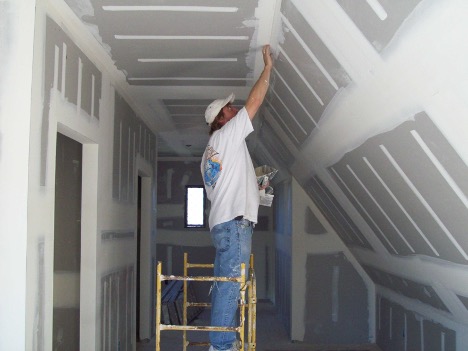
Instructions for fastening sheets
There are several ways to level a wall using drywall. For this you can use, for example, polyurethane foam or special glue. But first you need to prepare the sheets themselves:
- Take measurements and cut the sheets so that their edges are 1 cm shorter than the wall dimensions (otherwise cracks may occur due to shrinkage).
- Finish the edges with a plane.
- Mark with a pencil holes for sockets, switches and other structural elements. Cut them out with an electric jigsaw.
Fixation with polyurethane foam
One of the common ways to level drywall is with polyurethane foam. To do this, proceed as follows:
- Several gaskets are attached to the prepared wall surface under each sheet in one plane. These are kind of beacons that are used in a similar way to plastering.
- Prepare the sheets and apply polyurethane foam with good adhesion to the inner surface.
- Immediately after this, the sheet is applied to the wall along the marked lines. This is the main stage of the instructions on how to level walls with plasterboard.
Fixation with glue
There is also another option for leveling a plasterboard wall. In this case, use gypsum glue, putty or dry plaster. The algorithm is as follows:
- Dilute the mixture according to the instructions.
- Linings up to 15 mm thick are laid on the wall surface.
- Glue is applied to the inside of the sheet, as shown in the photo.
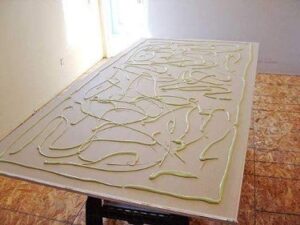
- The method of applying gypsum putty is with smears along the edges and in the center.
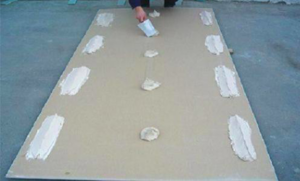
- To understand how to straighten drywall, place a sheet on the pads and hit it several times with a rubber mallet. They do this until it becomes even across the entire plane.
- It also happens that after fixation, a bulge forms in one of the areas. To ensure high-quality leveling with drywall, more glue is spread under the first sheet.
Thus, you can get a flat surface even without constructing a frame. There is no need for a profile to level the walls, so the work is completed faster and will cost less. But it is worth considering that if the differences exceed 4-5 mm, it is better to carefully prepare the surface and still install the frame. It will not only allow you to get a flat wall, but also attach heavy structures to it, for example, metal shelves.