Do-it-yourself plaster on beacons: how to level walls
Do-it-yourself plastering on beacons is done at home. This is the most effective technology for obtaining a flat surface. To achieve maximum quality, you need not only to install the beacons correctly, but also to choose them wisely. How to do this is described below.
The content of the article
How to choose beacon plaster
When learning how to plaster walls using beacons with your own hands, it is first of all recommended to consider the rules for choosing the mixture and the beacons themselves. Today, manufacturers offer the following types of plaster:
- Limestone – affordable, retains its integrity for many years, but only in conditions of moderate humidity.
- Cement – durable, withstands almost any temperature and even high humidity levels. At the same time it costs more.
- Plaster – environmentally friendly composition, suitable for residential premises with moderate humidity.
Before you figure out how to align walls with beacons, you need to familiarize yourself with the types of beacons. There are 3 main options - metal, plastic and steel. Each type has its own characteristics, pros and cons. So, metal beacons have the following advantages:
- easy to use;
- affordable;
- you can choose any size;
- if necessary, you can accurately adjust the height by cutting off excess parts with metal scissors - this will help in how to align the walls according to the beacons.
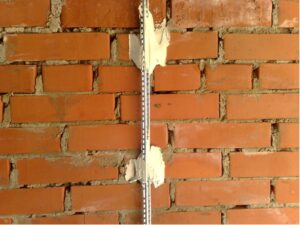
As for the disadvantages, first of all you need to pay attention to the following points:
- Often there are crooked products on sale;
- in the process of metal oxidation after laying the wet mixture, traces of rust may appear on the wall;
- Usually the products are made of aluminum, which is highly deformed, so the base must first be poured.
When considering how to align walls with beacons, you can also consider plastic models, which have the following advantages:
- easy to use and transport (light weight);
- do not bend, keep their shape well;
- A significant plus is that they are not subject to corrosion.
But if you plan alignment using plastic beacons, you need to pay attention to the disadvantages:
- they can only be used for interior work;
- they cannot withstand heavy loads and may break;
- If you place it incorrectly and follow the rules, the base may become deformed.
Steel lighthouses do not have all the described disadvantages - their advantages are obvious:
- durable;
- do not deform because they bend enough;
- not subject to corrosion;
- can be used several times.
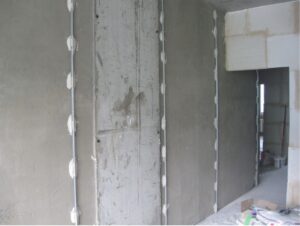
However, plastering over beacons of this type will be more expensive, and it is also necessary to strictly follow the instructions so that the surface is perfectly smooth. If you plan to carry out high-quality repairs, but have little experience in finishing work, you should choose steel beacons.
What tools and materials will be needed
It is clear what beacons for leveling walls are. In essence, they perform a guiding function, showing where the upper boundary of the mixture layer lies.Thanks to this, the leveling process is much easier, and the result is truly high-quality. To do the work yourself, you need to stock up not only with plaster and beacons, but also with the following tools and materials:
- drill with attachment or hammer drill;
- fastening element - a set of screws, dowels;
- level or plumb line;
- hammer;
- grinder or metal scissors;
- roller;
- mixing bucket;
- a set of spatulas (including wide ones);
- shaped screwdriver;
- roulette;
- acrylic-based primer;
- rule.

It is not difficult to align the walls with the beacons, but the main thing is to follow the technology for installing them, as well as mixing the mortar. The mixture is used only fresh; it is prepared in such a volume that can be consumed at a time.
In this case, they are guided by the following approximate consumption: to lay a layer of 5 cm on an area of 20 m2, you need about a cubic meter of plaster. Be sure to wear gloves; you can also use a respirator if the room is too dusty.
Step-by-step instruction
Plastering the walls under the lighthouse is carried out in several stages. First, they prepare the surface, then set up the beacons, after which they begin mixing the mortar and the actual laying.
Preparing the walls
Leveling the walls with plaster according to the beacons begins with preparing the surface. The work is done like this:
- Carefully inspect the wall in good lighting and determine unevenness by applying a level. All areas with defects are marked with a construction marker.
- Determine how to install beacons to align walls. The elements along the edges are placed so that there is a distance of about 30-40 cm to the corner or slope.
- The remaining beacons are placed at intervals of 160 cm, if the length of the rule is 200 cm.The last part of the surface, which is less than 160 cm, is divided into equal sections, for example, 80-90 cm. Draw the corresponding horizontal lines, as shown in the diagram.
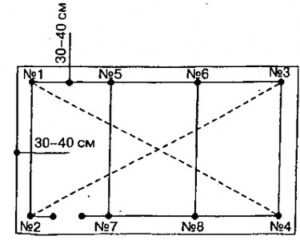
- Now you need to draw horizontal lines. Retreat 15 cm from the floor surface and draw the first straight line. Where it crosses the vertical, holes are made with a drill and dowels are hammered into which self-tapping screws are screwed.
- Step back 30 cm from the ceiling and make similar holes at the intersection with the verticals, insert dowels with self-tapping screws.
- Dust the surface and treat with a primer. Insert screws into the holes at the bottom and top. In this case, you need to screw them so that the caps stand clearly vertically.
- Now you should take the rope and run it diagonally right along the heads of the screws. Evaluate how the beacon profile fits - it should fill the space freely. If necessary, align the screw heads.
Installation of beacons
There are 2 main ways to place beacons when leveling walls. They can be placed on the solution itself or fixed to fasteners. In the first case, prepare a small volume of the mixture and add a little gypsum to it to speed up hardening. The solution is thrown onto the wall in such an amount that it exceeds the height of the lighthouse profile. Next, apply the beacon itself and press it into the thickness of the plaster. The surface is leveled using the rule.
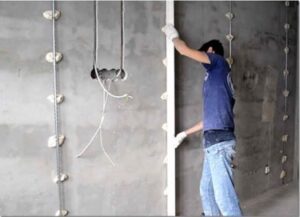
The second method is used in cases where the levels have already been set. All that remains is to make holes in them at intervals of about 30 cm. Dowel-nails are inserted into them and the caps are screwed in so that they are strictly at the same level. Then fasteners are installed under each beacon and after that the profiles are completely fixed.The plaster is applied, adjusting the thickness with the self-tapping screws on which the beacons are placed (to reduce them they are screwed in, to increase they are unscrewed).
Mixing mortar and plastering
Now the main stage begins - plastering the walls along the beacons with your own hands. The solution is prepared strictly according to the instructions, first pour in water and then gradually add the dry mixture. Mix using a mixer attachment. If the composition is gypsum, they work in two stages, allowing the solution to rest for just a few minutes.
The plastering process itself goes like this:
- Apply the composition onto the blade of a wide spatula.
- Using a ladle, place it in the space between the beacons.
- Excess parts of the solution are removed using the rule.
- Wait 3-4 hours until the surface hardens slightly.
- At this point, all beacons should be removed. But if you plan to use tiles for finishing, the profiles do not need to be dismantled.
After this, corners and slopes are formed using an angle spatula. At the last stage, they do the final leveling and begin painting, wallpapering or laying tiles. If the beacons need to be removed, the space is immediately filled with the remainder of the mixture and leveled with the rule, and then rubbed.

