Decorative, textured painting of walls with your own hands: how to apply
Decorating the interior of an apartment or house is an art. And one of the important elements of this art is painting the walls. Textured painting of the walls in an apartment can give the room a unique and individual look. This method differs from standard painting in that it creates a voluminous and relief coating. Below we will look at the main stages of decorative painting of walls with our own hands.
First you need to prepare the wall. It should be clean, dry and smooth. Remove old paint or wallpaper, fill all cracks and level the surface.
Choose a textured paint that suits your interior. There are many types of textured paints: stone, wood, velvet and many others.
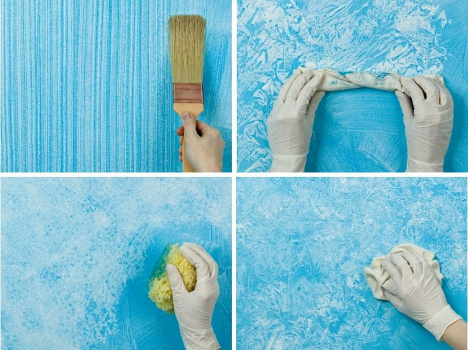
Prepare the necessary tools: rollers, brushes, spatulas. The choice of tool depends on the desired result. For example, to create an imitation of wood, you will need a spatula, but to obtain a velvety texture, it is better to use a roller.
Painting the walls in an apartment with textured paint begins with applying a base coat. After it has dried, we proceed to applying the decorative layer. Use the tool of your choice to create the desired texture.
After the main layer of DIY decorative wall painting has dried, you can apply a finishing layer - varnish or protective coating to extend the life of the paint and add shine.
The content of the article
How to apply textured paint
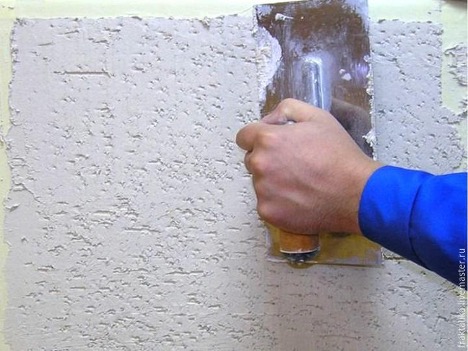
Creating unique, stylish and expressive interiors becomes easier thanks to textured painting. Do-it-yourself painting of walls with textured paint is becoming especially popular among those who strive for individuality and originality of design.
First of all, the wall must be clean, dry and level. The absence of cracks and irregularities guarantees high-quality application of textured paint with your own hands.
The choice of tool depends on the desired result. To create different textures, you may need rollers, brushes, spatulas or sponges.
Before you start painting the walls with textured paint, it is worth treating the surface with a primer. This will ensure better adhesion of the paint to the wall and extend the life of the coating.
After the primer has dried, you can begin texture painting. The paint is applied in even movements, creating the desired pattern or texture. The application technique depends on the chosen tool and the desired texture.
When using a spatula, you can create three-dimensional designs and imitate various surfaces. The roller allows you to get a more uniform and thin coating. The sponge creates interesting patterns and imitations of natural surfaces.
After the textured paint has dried, a protective layer or varnish can be applied to improve the appearance and extend the life of the coating.
Mistakes that can be easily avoided
When painting walls with texture, it is important to avoid a number of common mistakes that can spoil the final result or complicate the work process.Here are some of the most common errors and how to prevent them:
- Insufficient surface preparation. An uneven or dirty wall may make it impossible to apply an even coat of paint or plaster. Solution: Thoroughly clean and putty the wall before starting work.
- Using inappropriate tools. The wrong choice of roller or spatula can lead to undesirable results. Solution: Decide on the texture you want and select the appropriate tool.
- Too thick or thin layer of paint. A coating that is too thick may crack, and a coating that is too thin may not create the desired texture. Solution: Follow the manufacturer's recommendations and adjust the amount of paint applied.
- Fast drying paint. If texture paint dries too quickly, it can make it difficult to create the desired texture. Solution: Work quickly or add special additives that slow down the drying of the paint.
- Uneven paint application. The result may appear patchy or streaky. Solution: Apply paint in even, consistent strokes, avoiding overlapping.
- Ignoring manufacturer's instructions. Neglecting recommendations may lead to undesirable consequences. Solution: Always read and follow the instructions on the product packaging.
- High humidity or temperature fluctuations can affect the drying process and the final result. Solution: Carry out work in optimal conditions, based on the recommendations on the paint packaging.
By following these recommendations, you can easily avoid mistakes when painting with texture and guarantee a high-quality and durable result.
How to apply textured wall paint with a roller
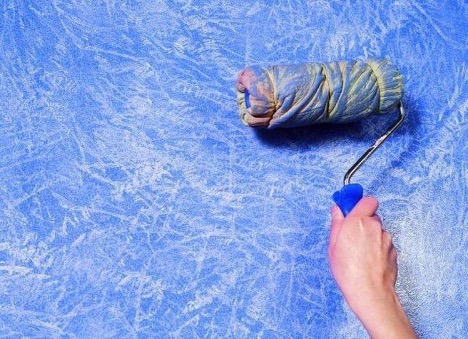
Painting with textured paint with a roller is a popular and relatively simple way to give walls an original and expressive look. The roller allows you to distribute the paint evenly, creating interesting textures and patterns. Let's look at how to properly paint walls with decorative plaster using a roller.
Description of the process step by step:
- Choose a roller with the desired texture. Depending on the desired result, rollers with different degrees of hardness and pile length may be needed.
- Before applying paint, be sure to immerse the roller in water and wring it out well. This will allow the paint to spread evenly over the surface.
- Apply the textured paint liberally to the roller, making sure that the entire surface is covered evenly.
- Start painting the walls with decorative plaster, making even up and down movements. Avoid applying too much pressure to avoid uneven paint distribution.
- To create a unique texture after applying the paint, you can use a roller to make rotational or pushing movements. This will add volume and interesting transitions to the wall surface.
Once painting is complete, allow the wall to dry completely. Drying time may vary depending on paint type and environmental conditions.
Conclusion
Applying textured paint with a roller is an excellent opportunity for those who want to update their interior without resorting to the services of professionals. By following the above recommendations and techniques, do-it-yourself textured wall painting will become a simple and fun process, the result of which will be a new, stylish and individual design for your home.


