How to use a dumpling maker
Dumplings are one of the favorite dishes of the people of our country. They are tasty, nutritious and cook very quickly. Especially if the housewife has such a convenient thing as a metal dumpling maker in her arsenal. This is a real find, with which you won’t have to spend long hours wrapping the minced meat in separate pieces of dough. It helps make the sculpting process enjoyable and fast.
The content of the article
How to make dumplings using a dumpling maker
This easy-to-use and reliable kitchen accessory significantly reduces the time it takes to prepare dinner for a large family. After all, we all love home-cooked products. And you often want to pamper your family with delicious dishes. But many are stopped by the painstaking process.
This “device” is an excellent way out of the situation. He will save the owner, even if a crowd of friends or relatives comes to visit.
What is a dumpling maker
This is a simple device with the simplest possible application. Its cost is affordable, every housewife can afford an inexpensive purchase and make her life easier.
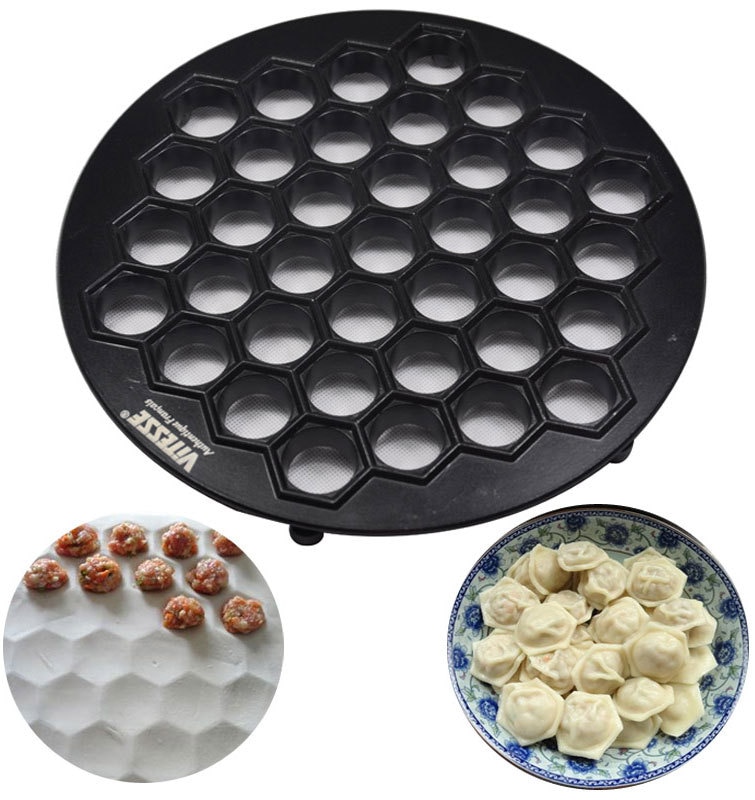
Most often it is a round or hexagonal shape made of metal. The holes are located at a short distance from each other. Outwardly, they resemble a honeycomb. There are two options in stores: metal and plastic. We recommend purchasing the first one, as it is more durable.
How to use a metal dumpling maker
The rules for using the device are very simple. The main thing is to follow the basic recommendations of experts and prepare the dough with high-quality gluten so that it does not tear during cooking. Otherwise, the result depends only on the attentiveness of the cook.
Don't forget to thoroughly flour the pan to prevent the dough from sticking. Otherwise, the result will disappoint the cook.
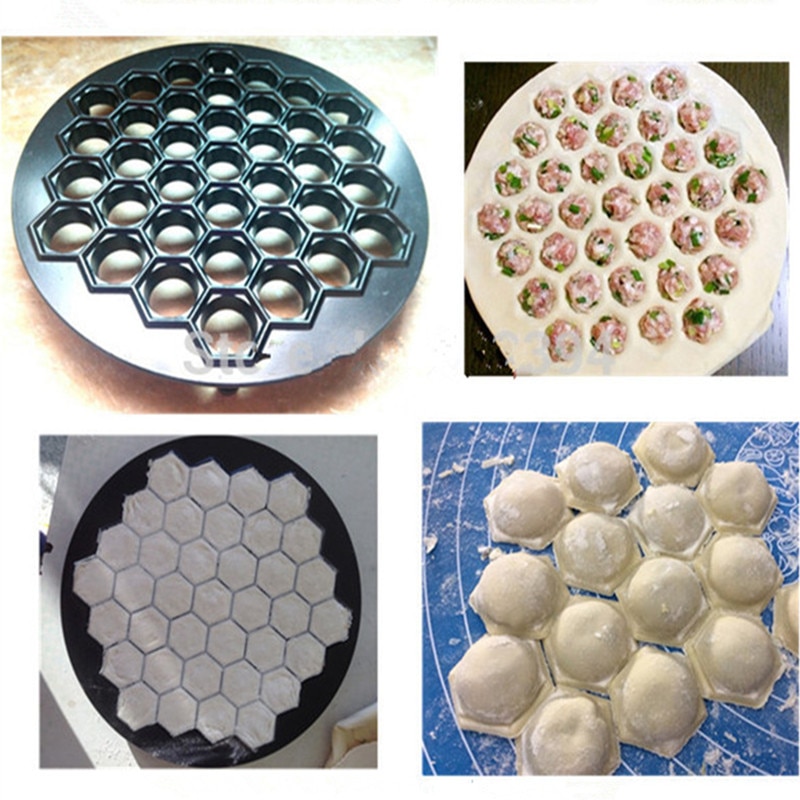
Step by step guide
The principle of working with the kitchen “assistant” is extremely simple. Even novice housewives will be able to cope with preparing their favorite dish:
- The prepared dough is divided into two equal parts, one of which is rolled out into the thinnest layer.
- Sprinkle the mold generously with flour and place the rolled dough on it.
- Lightly outline the edges of the future dumplings, but make sure that the layer does not tear.
- Place pieces of minced meat in each cell, lightly press it inward.
- Roll out the second layer and place it on top of the first with the spread out minced meat.
- Use the rolling pin lightly without applying too much pressure.
- Make sure that the meat does not fall outside the cells and that the sheet is not torn.
- Repeat the steps with pressure.
- Skim off any excess around the edges, turn the pan over and tap the free edge on the rolling pin.
- The finished dumplings will be on the table, and you can make a second batch from the remaining ingredients.
The prepared raw materials can be boiled immediately. To serve at home or freeze for future use.
Tips from housewives
Experienced housewives constantly share their secrets and best practices, which they have been accumulating for years. With their help, you will get tasty, juicy and strong dumplings.
- don’t be afraid to add flour if the dough is too sticky;
- be sure to let it brew for at least half an hour - during this time the gluten will have time to swell;
- if the seams of the connection turned out to be weak, the process was carried out incorrectly, then to ensure an adhesive effect, you can moisten the inside of the dough with a small amount of water;
- The finished dumplings leave the cells freely; you can help them by sprinkling more flour or adding less minced meat.
If you make a product for future use and put it in the freezer, use choux pastry. It holds its shape well, does not stick together during further cooking and perfectly imparts the taste of minced meat inside.