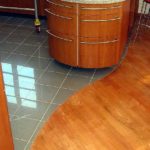
How to lay tiles on the bathroom floor
 The bathroom is a room with high humidity, and this factor should be decisive when choosing floor coverings.
The tiles have all the necessary properties that will positively affect the service life of this room. The material is not afraid of water, is resistant to chemicals, temperature changes and does not lose its attractive appearance for many years.
In order to avoid having to redo, re-lay or completely change the coating, its installation should be treated with special care and all the nuances of installation should be taken into account.
The content of the article
Materials and tools for installation
If you decide to lay the tiles with your own hands, in addition to the tiles themselves, you need 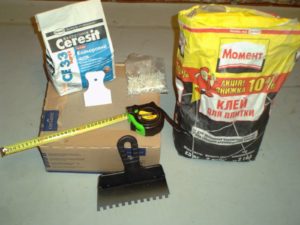 take care of the tools and consumables that you cannot do without during the work process.
For quality installation you will need:
- building level;
- rubber spatula;
- spatula with a serrated edge;
- rubber hammer;
- spacer crosses for tiles;
- drill with an attachment for mixing mixtures;
- tile cutter or other tool for cutting this material;
- tile adhesive;
- waterproofing coating, primer;
- grouting agent.
The choice of tiles should be treated with special attention; it is advisable to buy certified products.
REFERENCE! For a bathroom, tiles with a thickness of 9–12 mm and a size of 30 by 30 cm are considered optimal. In the absence of work experience, it is not advisable to use a figured covering with a complex pattern.
It is also worth mentioning waterproofing, glue and grouting agent. It is best for a novice craftsman to pay attention to cement-based glue and grout. They are cheaper, easier to use and quite reliable. As for waterproofing, plastering, impregnating and coating compounds have fairly good protection against moisture and are easy to apply.
Preparatory stage
The first priority that needs to be outlined in any business is comprehensive preparation. On 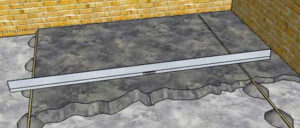 At this stage, you should decide on the choice of coating, glue and other materials. Level the surface on which the tiles will lie. Decide which styling method to use and which pattern to make.
When choosing a ceramic coating, pay attention to its thickness. If it is below 7.5 mm, then the tile will not withstand prolonged physical activity when walking and installing furniture. Most likely, this coating is not intended for flooring, but for wall cladding. It is advisable to choose glue according to the manufacturer’s recommendations.
The likelihood that the tiles will perfectly fit the size of the room is very small. Therefore, having a tool for cutting it is mandatory. For these purposes, tile cutters, an angle grinder with a special disk, and an electric or manual tile cutter are suitable.
Choosing a installation method
The installation method determines the resulting pattern and can significantly improve the appearance of the room.
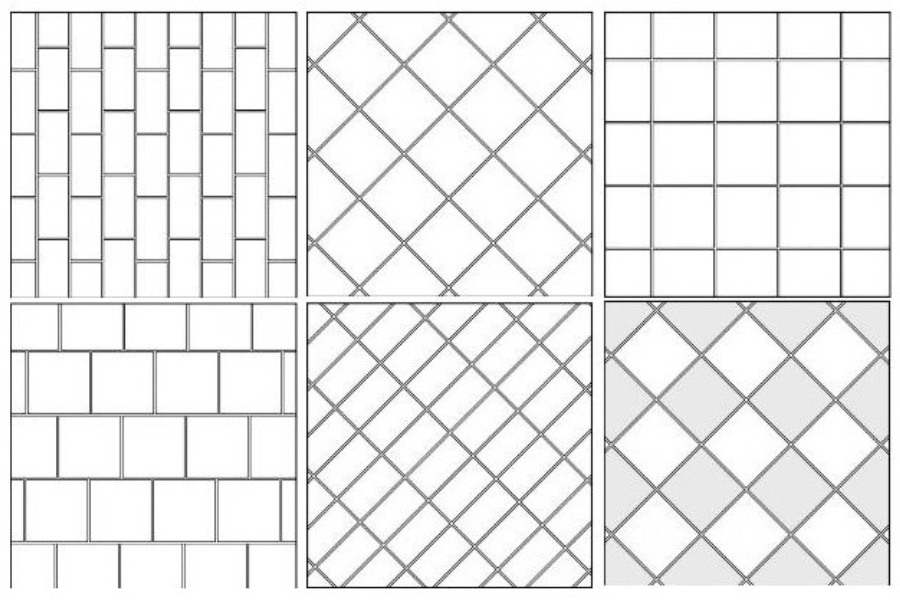
There are a huge number of patterns that can be made by laying the coating in one order or another. But for a beginner, such a task may not be possible. In addition, creating a complex pattern means a significant increase in waste.
A person who is trying to do the styling with his own hands is recommended to choose one of the following methods.
- Straight. The most common method, which can be easily accomplished without much experience working with this material. Features the smallest amount of waste. The tiles are laid in even parallel rows.
- Diagonal. The same as in the previous case, only the parts are placed not along the wall, but diagonally. If you choose this method, get ready for an increased amount of waste and the need to cut a lot of material. In this case, it is important to get a good tile cutter.
- Chess. The pattern is made in the same way as a straight one, but with a pattern reminiscent of brickwork.
The methods listed are the simplest. But even with their help you can achieve interesting results, for example, by using tiles of several colors.
Floor preparation
A smooth base is the key to a beautiful and durable finish in the bathroom.
REFERENCE! Careful preparation of the base when laying this material is also necessary because it will significantly reduce glue consumption.
- If the floor has large unevenness, you will have to make a screed.
- If the building level shows minor deviations, the surface can be corrected using a self-leveling mixture.
- If there are old ceramic tiles or other materials, they must first be dismantled. To do this you will need a chisel, hammer and other tools.
After leveling the floor, a waterproofing coating and primer are applied to it. You can do without this, but in case of flooding, tile adhesive alone will most likely not be enough to hold the water.
Laying tiles on the bathroom floor
After completing the preparatory work and purchasing all the necessary materials, it’s time to start 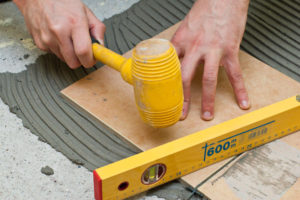 styling This process is simple, and if you strictly follow the instructions, everything will work out.
Laying ceramic tiles occurs in several stages.
Preparation of the adhesive solution
- Thoroughly clean the surface of any debris that has accumulated there during preparation.
- Prepare tile adhesive. If it was purchased in powder form, dilute it to the desired consistency, preferably with warm water.
- For high-quality mixing, it is recommended to use a construction mixer or drill with a special attachment.
Beginning of work
Per area for 2–3 tiles apply the solution with a notched trowel, spreading the glue in a wavy pattern.
ADVICE! Start laying on the side of the wall that is most visible so that the cut tiles end up being less visible.
- Apply glue to the tile, similar to the floor, place it carefully in place and press as hard as you can.
- Tap it with a rubber mallet. If this is not the case, attach a block wrapped in cloth and use a regular hammer.
Laying
- Lay the tiles one after another, controlling the distance between them using remote controls.
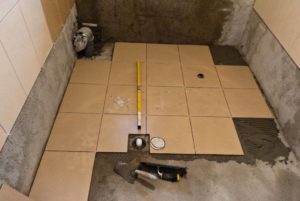 plastic crosses.
 - After each laid tile, check its level relative to those lying nearby. If necessary, lift it and add solution or remove excess.
- The last parts in the row will most likely have to be trimmed.Use a tile cutter or angle grinder for this.
Grouting joints
After installation is complete, you need to give the glue a little time (about a day) for it to set. After this, you can remove the crosses and start filling the seams.
Fill the voids between the elements with a special solution. To do this, take a rubber spatula. Care must be taken to ensure that the putty does not remain on the surface of the coating. To do this, remove excess with a spatula and wipe with a dry cloth.
Upon completion of grouting, it is necessary to wash the floor and give it a little more time to dry completely. After this, the work of laying tiles in the bathroom can be considered complete.
Useful tips for laying floor tiles in the bathroom
To successfully complete this task, you should follow a few simple recommendations.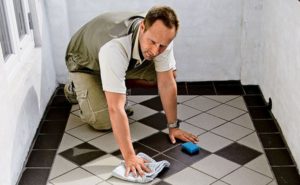
- Before starting installation, lay out the tile covering elements on the floor. This will give you an idea of the final result and will allow you to better plan the work.
- Avoid getting debris into the adhesive. Make sure the bucket and mixing water are clean.
- Use protective equipment while working. The glue has some degree of toxicity, so use a respirator and goggles. Don't forget to wear them when cutting tiles to avoid dust getting into your eyes and lungs.
- Apply glue in small sections - to install 2-3 covering elements. Hold the spatula at an angle of 45 degrees.
- For better adhesion of the glue, wet the surfaces to be treated with water.
- Make sure that there are no voids in the layer of adhesive mixture.
Properly laid ceramic tiles will last for decades. This coating will perfectly withstand all the difficult operating conditions in the bathroom.High humidity, pollution, and temperature changes are not scary for him. If you handle the installation with your own hands responsibly, this task will be completely doable.