How to lay linoleum on a wooden floor
 Linoleum is a multifunctional floor covering, the pattern of which can be stylized to match any material, from parquet to tile. Its main advantages are its affordable price, wide range of models, and versatility of use.
Linoleum covering can be laid on any base, be it concrete or wood. But in each case, the installation procedure has its own characteristics and nuances, which should be strictly observed during the work process.
So that you do not doubt whether you are doing the job correctly, we will tell you in detail how to lay linoleum on a wooden floor yourself.
The content of the article
Materials and tools for DIY flooring
Before you begin directly to work, you should stock up on all the tools and materials that may be required.
Tool Selection Options

They depend on the technology of attaching linoleum sheets to the subfloor. The following fastening methods are used today:
- using adhesives;
- on construction double-sided tape;
- “floating” option - without rigid coupling to the floors.
Depending on the installation technology, you will need to purchase either a special glue suitable for gluing polymers and wood, or double-sided tape.
To increase the adhesive properties of wood, you will need to treat the base of the floors with a primer. When purchasing a primer, you should choose a composition intended for impregnation of wooden surfaces.
Attention! When calculating the amount of primer composition, you need to remember that the base should be painted in 2-3 layers. Typically, the container indicates the average primer consumption when treating the surface in one layer.
Required materials and tools
For work you will need the following materials.
- A long ruler, preferably no shorter than two meters.
- Roller.
- Sharp knife.
- Putty knife.
- Soldering iron for welding joints.
Preparing for flooring
If you are planning to lay linoleum with your own hands, do not forget that laying the material requires preliminary preparation.
Floor surface requirements
Wooden floors are characterized by a number of defects that appear as a result of improper installation of floorboards or arise during operation.
The most unpleasant of them include the following.
- Curvature of floorboards, as a result of which they begin to bulge at the joints with each other.
- The appearance of cracks due to drying of wood.
- Floorboards creak when walking on them.
Linoleum, unlike other types of flooring, does not have the necessary rigidity to hide uneven floors. Therefore, after installation, all defects in the base will immediately appear on the linoleum surface. The situation will get even worse if you lay linoleum, which has a certain geometric pattern.For example, in the form of parquet, floorboards or tiles. Therefore, before starting work, you should prepare the surface.
How to prepare an uneven floor for linoleum flooring
The smoother the base of the floors, the more aesthetically pleasing they will look after laying the covering.
Alignment
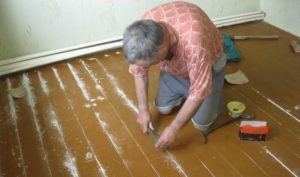
- Small cracks in the boards or gaps at their joints can be repaired using wood putty.
- Larger joint seams, more than 0.5 cm wide, can be filled with sealant or spray foam. After it has dried, the protruding parts should be cut flush with a sharp knife.
- Minor unevenness of the floorboards, for example, in the places where they connect to each other, can be eliminated using a sander or electric planer.
- If the base defects are more significant, then the only solution is a continuous covering with a leveling layer. This can be sheets of plywood, laminated chipboard, OSB board. The leveling sheets should be placed in such a way that there are no irregularities at the joints. Otherwise, differences are leveled with a grinder with a coarse-grained wheel or plane.
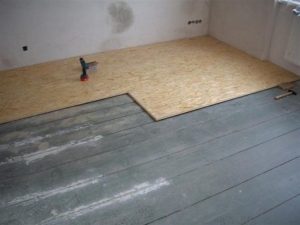
At the same time, the sheets should not lie too tightly. It is necessary to leave a gap of 2–3 mm between them to compensate for thermal expansion. They are attached to the floors using self-tapping screws. The distance between adjacent screws should not exceed 20 cm. The slabs themselves must be laid in relation to each other at random, like bricks in a masonry. Thus, the likelihood of the formation of unevenness at the junction of four adjacent slabs is reduced.
Antiseptic treatment
After completely leveling the bases of wooden floors, it is necessary to treat them with antiseptic and water-repellent impregnations.
Attention! Linoleum is not a moisture-proof material, so moisture may accumulate underneath it, evaporating from the wood or glue.
This, in turn, leads to damage to the wood by putrefactive fungi and mold. Special impregnations can increase the resistance of plywood and chipboard to moisture.
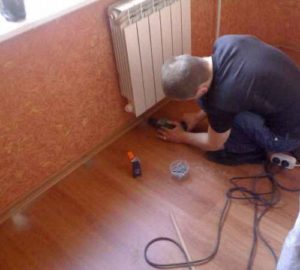
Primer
The next step is to apply a primer that increases the adhesion of the adhesive to the wood. For this purpose, mixtures specially created for processing wood are used, and “concrete” or “metal” soils are unsuitable for these purposes. The primer should be applied in several layers, usually at least 2. Each subsequent layer is applied only after the previous one has completely dried. This allows you to increase the adhesion of the adhesive composition to the base several times.
Preparing linoleum for flooring
Like floors, linoleum also requires preliminary preparation before laying.
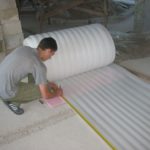
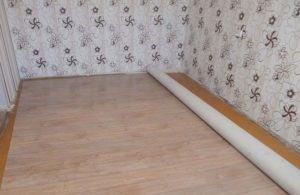
Before work, the rolls should be brought into the room where the installation will take place and left at least overnight. This is necessary so that the flooring material gets used to the temperature of the room. This is especially true for the winter season. Cold sheets of linoleum, laid without prior heating, will subsequently expand, which will lead to their deformation at the joints.
Commercial and semi-commercial varieties differ from household ones in being more rigid. Forcing them to straighten, especially when cold, can cause cracks to appear. Before laying, such rolls should be rolled out in advance so that the linoleum can straighten out on its own, and during operation its sheets will fit snugly to the floor.
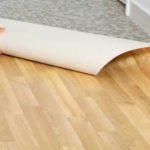
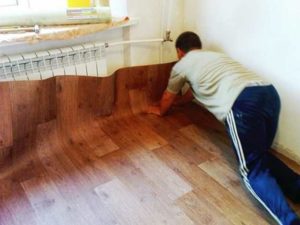
Next, you should cut the linoleum along the length of the room.When installing the coating end-to-end with the walls, a small temperature gap of 3–5 mm from the edge should be left. This seam, subsequently covered with baseboards, will compensate for the expansion of the material when it is heated, for example, in the summer heat.
Linoleum flooring methods
Dry method
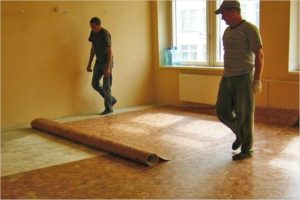
The easiest option is to lay linoleum on wooden bases - the so-called floating or dry method.
In this case, no fastening devices in the form of glue, tape, screws, etc. are used to fix the coating. The whole process in this case looks like this.
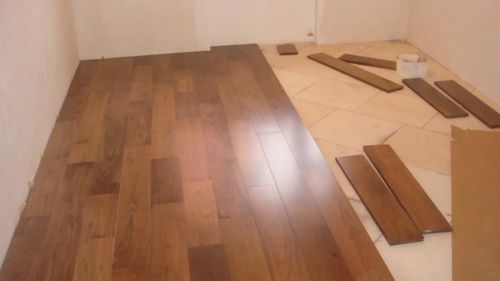
- A sheet corresponding to the size of the room is cut out from the roll.
- All protruding elements in the form of risers of heating or water pipes are marked on the workpiece and cut out with scissors.
- The workpiece is spread on the floor for several days and only after that, it is fixed along the walls using skirting boards.
Despite the ease of installation, this technology has its limitations.
Important! The floating option is recommended to be used exclusively for small rooms where you can get by with one linoleum sheet.
On tape

Therefore, if the width of the room is more than four meters (the maximum width of standard rolls), then it is better to use glue or tape to attach the covering. The fact is that without fixation to the base, the individual canvases will shift relative to each other when walking and ride up at the joints.
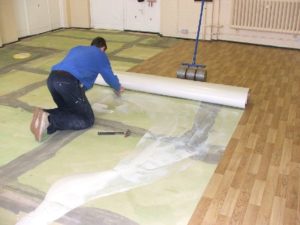
A popular option for fastening linoleum sheets is with tape. To do this, you will need to purchase a special mounting double-sided tape.
As in the first case, we first cut out the necessary blanks from the roll.Then we tear off the protective layer on one side of the adhesive tape and stick it on the floor along the direction of rolling out the roll. The distance between parallel strips should be approximately 0.5–0.7 m. Thus, for a roll 2 m wide, three to four strips of tape will be sufficient.
Next, we spread the pattern along the pasted strips at its future location. Roll a piece of linoleum from one edge into a roll up to half its length. We remove the top protective layer from the tape and carefully roll out the sheet of flooring, carefully pressing it in places of contact with the tape. Then we twist the linoleum on the other side and repeat the whole procedure again.
On glue
If it is necessary to cover large areas with linoleum, the canvas is fixed with glue. To do this, use universal adhesives suitable for gluing wood, PVC or polyurethane.
Before starting work, the pattern is also laid out in place, checking the accuracy of the convergence of the contours. Then it is rolled into a roll either to the middle or to the end. Pour the finished adhesive composition into a rolling tray or other suitable container. Using a roller or notched trowel, coat the space in front of the roll 1–2 m forward.
After this, we roll out the roll, gluing the linoleum to the wooden base. In this case, you should especially ensure that the canvas fits tightly to the floor surface over its entire area. To do this, its surface is carefully smoothed with a wide spatula, air bubbles and excess glue are expelled from under it. The linoleum is left for 20–30 minutes, after which the whole procedure continues in the same order.
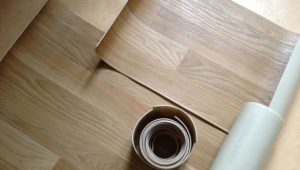
Attention! Adjacent sheets are laid with a slight overlap on each other.This is necessary to obtain more even joining seams.
After all the linoleum is covered, the glue is allowed to set for some time. Then the edges of the canvases, overlapped by 2–3 cm, are cut through using a long metal ruler and a sharp knife. The result is a thin, tightly fitted joint.
The next step is to seal this joint. This can be done with an adhesive composition, for example, “cold welding”, carefully rubbing the seam with it. Another option is to use a special soldering iron with a fusible cord. Melting, this cord tightly seals the joints, forming a smooth surface.
Useful tips
- Before starting work, you should check all linoleum for bubbles, swelling and other defects.
- If such deviations are detected, the best solution is to exchange the roll for a better one. Because in this case it will still not be possible to obtain a flat surface.
- You should start work from the corner farthest from the doors. Laying the canvas this way will be more convenient because you will always, at any stage of laying the material, have access to the front door.
- If you want to achieve not only an aesthetic effect when laying linoleum, but also improve sound absorption or insulate floors, you should use a special underlay. It can be made from jute, cork or polymer.