How to cover a door with laminate
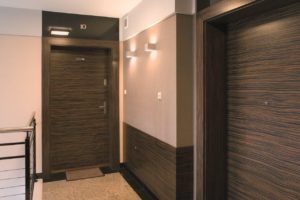 Often today they prefer to sheathe doors in an apartment with laminate. It is quite convenient and practical. And the special texture of the material makes the style very unusual. We will tell you how to do this type of door decoration with your own hands.
The uniqueness of laminate cladding
For many, it will be unusual that laminate is used not only to cover the floor, but also to cover walls, doors and even furniture. All this is possible due to the universal design of this material.
Multilayer tiles are very easy to learn, and thanks to their strength, they are not afraid of impacts or scratches.
An important factor in choosing laminate for finishing is its price. For comparison, if you use a laminated MDF card for the same purposes as a laminate, purchasing the latter will be at least two times cheaper.
The content of the article
Which laminate to use for door trim
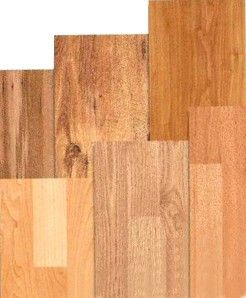
Before choosing a specific type of material, you should study the gradation of quality.
Class
In total, there are 6 classes of material for ordinary consumers. For residential premises, laminate grades 21–23 are mainly used. For offices, class 31–33 is used.
IMPORTANT! The higher the class, the greater the impact resistance, and the material is less susceptible to wear.
There is also a 34th class, it is distinguished by enormous wear resistance and strength, but its price is appropriate.
So, for the door we choose from 21–23 classes
Thickness
Along with the strength of the material, the thickness also increases. Starting from 6 mm, it reaches 12 for the most shock-resistant variations.
IMPORTANT! The simplest tiles, no more than 7-8 mm thick, are suitable for finishing doors.
Since the doors are not subject to strong impacts or high loads, it is not advisable to purchase an expensive and wear-resistant coating. However, you should pay attention to the water-repellent material.
Dimensions
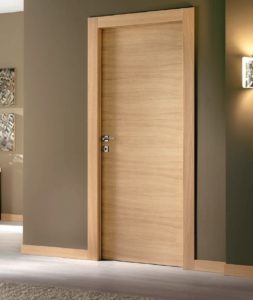
As for the choice of sizes, first you need to decide how the door will be sheathed - along or across the canvas.
The door can only be sheathed vertically in staggered directions, since the longest planks reach only 1500 mm, which is too short for vertical sheathing. That is why a coating with a length of about 1200 mm and a standard width is suitable for finishing.
Materials and tools for cladding
The main material will be laminate. Since the tiles are very pliable, they can be cut with an electric jigsaw, a grinder, or a saw.
The simplest and most obvious way is a jigsaw, but it makes uneven edges, which somewhat spoils the appearance. Therefore, decorative corners can be useful to correct flaws during carving.
In addition to the cutting tool, the work requires:
- roulette;
- pencil;
- level;
- screwdriver;
- perforator;
- square;
- metal scissors.
You may also need durable glue and screws.
How to sheathe a door
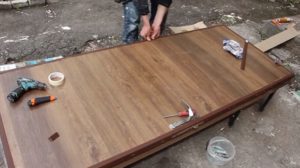
It is much more convenient to sheathe an iron door with laminate from the inside, so before work you should remove it from its hinges.
ATTENTION! The laminate should not be allowed to touch steel surfaces, as this may spoil the appearance of the material.
- For insulation, foil penofol should be used. In addition to preserving the appearance, this gasket provides sound insulation.
- Before work, the material must be treated, namely degreased and the surface primed.
- When installing planks, you should remember that the width measurement is not made level, but slightly less by 1-2 mm. This place is necessary for the subsequent decorative corner. He will also be able to hide any flaws that may arise during cutting of the material.
- Then the planks are screwed in around the perimeter using self-tapping screws.
IMPORTANT! Before tightening the screw, you should drill a hole in the laminate, otherwise the material may burst.
- After the first strip is screwed in, the next one should be attached to it. The laminate strips are inserted into the grooves. To make the structure denser, you may need a mallet.
IMPORTANT! When joining, do not use too much force; there is a chance of breaking the tenon or groove of the plank.
- Using the technology described above, the entire door leaf is covered. Difficulties may arise only in the area of the door handle and lock. When the tile reaches the keyhole, holes should be drilled into the material to follow its shape. Then, use a file to process the resulting shape.
- The bottom and top tiles should be secured with self-tapping screws in increments of 200–300 mm from the top and bottom edges, respectively.
- After the laminate has completely covered the door leaf, you should attach decorative corners that will hide flaws during cutting and screwed-in screws.
- The corners should be measured and adjusted. They need to be screwed in with self-tapping screws, but from the end side of the door. If the corner is made of plastic, you can use glue instead of screws.


