DIY Christmas tree made from laminate backing
 New Year is a magical holiday, a time when children and adults expect miracles and magic. Waiting for the celebration can be exciting if you approach the preparation correctly. Decorating your home, buying gifts, tinsel and Christmas tree decorations, lovingly hung on the beautiful forest spruce - all this creates a special atmosphere. A Christmas tree is an integral attribute of New Year's Eve; you can buy it at the market or make a smaller copy from scrap material. Let's consider a simple option for creating a Christmas tree from a laminate backing.
The content of the article
What you need
 Before we start manufacturing, let's prepare everything you need:
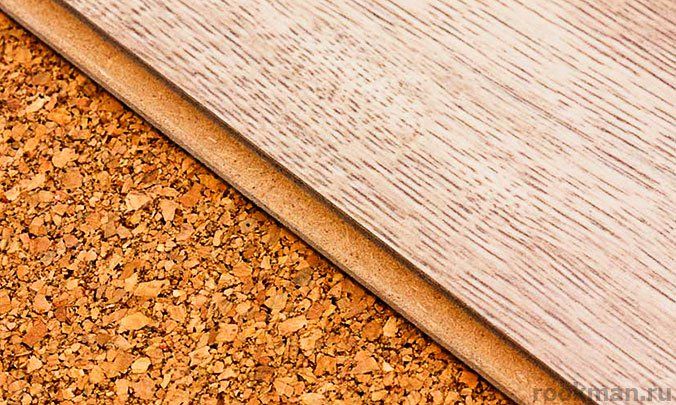
- substrate, approximately 2 mm thick, you can take white or blue;
- small multi-colored beads;
- a nylon lid for a jar, or other dense material for a stand;
- 2 mm wire;
- thick cardboard;
- glue moment;
- scissors;
- pen;
- awl;
- pliers.
All components can be bought in the store or you can use the leftover material after laying the laminate.
DIY Christmas tree option
Let's consider the simplest option for making a Christmas tree from a foil backing, which is ideal for crafts in kindergarten, especially since it can be made together with your child.
The execution algorithm is as follows:
- Make a hole in the nylon lid or in a round piece of plywood exactly in the middle.
- Insert the wire and secure it on the reverse side.
- Cover the stand with white material or cotton wool using instant glue or PVA.
- From the backing, cut the required number of rhombuses of different sizes, large for the bottom row, and the smallest for the top;
- Using an awl, make holes in each element and string them onto the wire in a checkerboard pattern. Improvised branches should gradually become smaller from bottom to top.
- Decorate the top with a star. Cut out 2 identical parts from the backing and glue them together with soda right at the end of the wire.
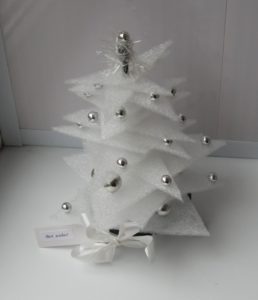
 The Christmas tree is ready, it just needs to be decorated.
REFERENCE! Another version of the New Year's beauty, it is more difficult to perform and will require time and patience from you. But the result will be a delicate tree with carved branches.
You need to proceed as follows:
- attach the wire to the polyethylene cover. It's not difficult to do this. We make a loop at one end of the wire, thread the other into the hole in the middle of the lid - pierce it with an awl. We mask the loop on the back of the stand with plasticine.
- On paper we draw patterns of branches and tops, which we then transfer to a substrate and cut out. Make the right amount of branches, depending on how tall you want the Christmas tree to be. When drawing branches, you need to remember that the lower legs should be larger than the upper ones.
- Now you need to cut a circle from the substrate with a diameter of 20 cm;
- A circle with a diameter of 15 cm is cut out of thick cardboard;
- You can assemble a stand. We place a lid on the cardboard, then pierce the substrate with wire and cover it on top - we get an imitation of snow. Apply glue along the inner diameter and fasten the cardboard to the backing.
- Let's start assembling the Christmas tree. String several beads onto the wire. Then place the first row of spruce branches - there should be 5 of them.To prevent them from moving, they can be glued to the base.
- Then string 2-3 beads and the second row - 5 pcs.
- Continue the process until the entire trunk is hidden by beads and branches.
- At the end, at the top, arrange the crown, glued together from two parts.
The Christmas tree is ready, you can start decorating.
Interesting! This is a very convenient version of a forest beauty made by yourself - it can be disassembled, put in a small box and stored until next year. But, there is a condition - you cannot glue the branches in this case.
How to decorate
Now it's time to decorate the beauty you created with your own hands. Remember, the backing is a very soft material - it will not withstand heavy jewelry, so you can use light beads, seed beads, a little rain and glitter.
The beads can be glued on momentarily. Place beads and sparkles on hairspray. This is done very simply - spray a large amount of varnish on the Christmas tree and sprinkle glitter on top. When the fixing composition dries, the glitter will firmly adhere to the spruce legs from the backing.
 In the same way, you can make decorations from rain cut into small pieces.
REFERENCE! Small snowflakes made from a thin substrate (less than 1 mm) look very beautiful.
You can decorate the forest beauty from the backing in any way, for example, paint the paws in different colors - use your imagination and you will get an exclusive option.
Finally
Making decorations and gifts for the New Year with your own hands is a very exciting activity, especially if the whole family takes part in this process. A Christmas tree made from a laminate backing can become not only a decoration for your home or a craft for kindergarten, but also an excellent gift for a loved one. Moreover, you can find a lot of ideas and manufacturing methods on the Internet.

