How to make a carpet from paper
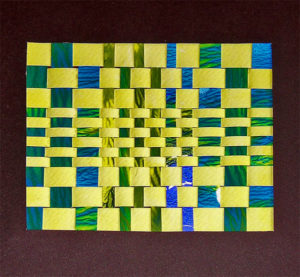 Making various crafts is very important for young children. This way, they develop fine motor skills and imagination better, and in the process they learn to work with scissors and various materials. It also develops perseverance, attentiveness and responsibility. Therefore, in kindergartens and primary schools, classes on making various objects from paper are very popular. For example, during classes they make bright mats made of colored paper.
The content of the article
What you need to make a paper rug
To make a bright rug you will need the following materials:
- paper of two colors, for example, red and blue - it is advisable to use contrasting colors;
- scissors;
- ruler;
- a simple pencil;
- glue stick.
It is desirable that the child knows how to use a measuring device and can draw. You can take paper of any size; the size of the finished product will depend on this.
How to make a paper carpet with your own hands
Some specialized stores sell ready-made strips for rugs. However, they are quite easy to make yourself.
ATTENTION! It is advisable to have the finished product in front of the baby’s eyes. This will make it much easier for him to make the rug himself.
You can make a rug by following the following instructions:
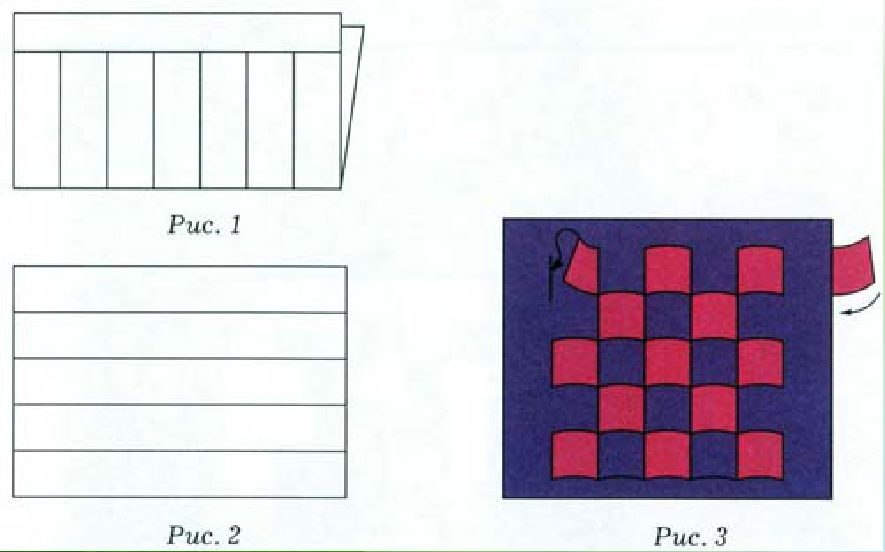
- The first step is to make the base. To do this, take a sheet of A4 paper.For convenience, it is better for a preschool child to take an A5 sheet, so the work will not be tiring for him. The sheet must be placed in front of you in a vertical position and folded in half.
- You need to draw a frame on the sheet. You need to do it on the entire surface and at the bend too. You need to make an indent of approximately 1.5 - 2 cm from the edges of the sheet. Then make markings on the sheet. The marks should be located at the same distance. Let it also be 2 cm.
- The resulting marks must be connected with a line using a pencil.
- Using scissors, carefully make cuts along all lines. You need to cut both layers of paper.
- The sheet of paper unfolds.
- The next step is making the strips. Take a sheet of a different color and line it using a ruler and pencil. The distance between the lines must match the width of the slots on the base.
- Stripes are cut along the lines.
- All the parts are ready and you can start assembling the paper mat. To do this, you need to take the base again and place it horizontally in front of you.
- Each strip is carefully threaded through the slots on the base. After it is completely threaded, the ends of the strip need to be aligned and lubricated with glue, and then glued to the edge of the base. This way it will be fixed and will not fall out of the slots.
- All strips are threaded similarly in a checkerboard pattern.
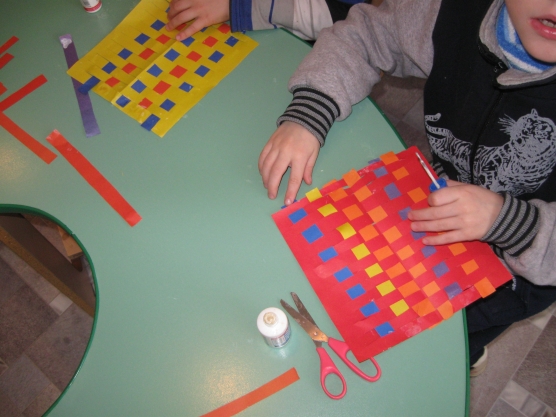
ATTENTION! Due to their age, children may not understand how to correctly arrange the stripes so that they are in a checkerboard pattern. Therefore, it is necessary to show and explain this to them in detail.
After all the strips have taken their place, you need to check the reliability of their fixation. If necessary, apply glue again and glue, and also cut off any protruding pieces of paper.
At each stage of the work, you need to check whether the child understands what needs to be done and, if necessary, help him. You also need to control its entire work process.
The manufacturing procedure is quite simple. If you show a little imagination, you can make a bookmark or wallet from such a rug.