How to install a siphon on a bathroom sink?
The process of installing a new siphon under the washbasin with your own hands is simple and does not require much effort. Read on to learn about the main nuances of the work, the necessary tools, dismantling and installation.
The content of the article
What tools/facilities are needed?
Let's prepare the following tools:
- construction knife;
- screwdriver (any shape);
- grinder or hacksaw;
- odorless silicone sealant (with or without a gun).
Attention! During the process of replacing equipment, the sewer pipe will remain open for a short time. Toxic fumes can harm the body, so wear latex gloves, safety glasses and a respirator to be safe.
How to remove the old structure?
Important! Before starting work, turn off the water at the common valve of the bathroom or, if provided, at a separate tap for the bathroom. We place a container under the siphon device and lay out rags on the floor to collect any residual water that flows out.
Let's perform the operations sequentially:
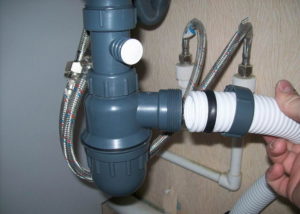 unscrew the side nut connecting the device to the corrugated tube;
- unscrew the top nut, then gradually remove the side bell from the product;
- remove the siphon body from the top tube;
- disconnect the corrugation from the sewer pipe by turning it around its axis and holding it with your hand;
- remove all seals (or cut them off with a knife);
- Unscrew the top nut counterclockwise;
- We pull out the drain part of the siphon from the sink by removing the screw.
On a note! This is where a cutting tool can come in handy if the old parts are rusty.
Preparatory work
Before starting the main work, we will carry out several necessary procedures:
- Wipe the washbasin dry on both sides.
- Let's inspect the sewer pipe. If there is dirt in its upper part, remove it with a rag.
- To choose the right replacement, we measure the diameter of the old equipment (at the connection to the sewer - these are standard values) and buy a product with the same size. If suitable options are not found, then you can use a transition collar; it will create a tight connection.
- We check the purchased copy for quality: its surface must be even and smooth, without cracks or chips.
- We take into account additional connections (dishwasher, etc.), they will require an additional fitting.
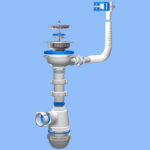
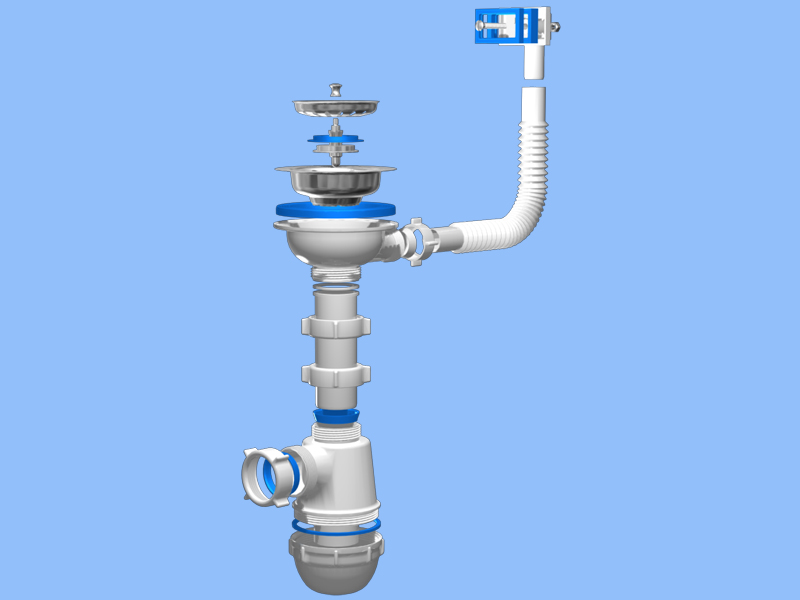
What should be included?
Before purchasing a suitable model, you should make sure that it is fully equipped. The following details must be present:
 metal threaded insert in the outlet tube, with a seal;
- two plastic nuts (possible diameters 32,40 and 50 mm, these dimensions apply to the next two components);
- cone-shaped gasket;
- cuff with plastic skirt;
- device body;
- bottom cover with seal;
- sewer outlet (in the form of a corrugated tube, flexible hose, rigid plastic pipe);
- several drain elements: a stainless screw (for fixation), a decorative cover, a gasket (made of silicone or durable rubber), a rubber plug, a protective grille.
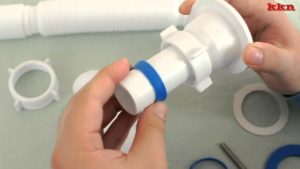
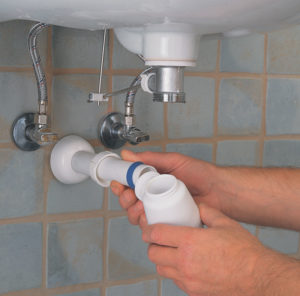
Installing a new siphon
Let's move on to the main operations:
 We fix the drain gasket to the protective grill using sealant (note that the seal is not used for stainless steel sinks, creating extra thickness);
- install the drain piece into the sink hole;
- At the bottom of the washbasin we place the lower plastic part of the drain, secure it with the screw of the drain grate, without excessive force, so as not to break the thread;
- We equip the outlet pipe with a nut with a flat seal (3-5 mm thick) and screw it to the drain structure;
- We put a gasket on the lower part of the siphon “glass” (it is necessary to place it evenly so that there is no twisting), then screw on the lid;
- nut and cone gasket (minimum size, wide side up) are placed sequentially on the outlet tube;
- take the siphon, fix it to the outlet part with the installed nut;
- we put the nut and then the cuff on the corrugation (or other connector with the sewer), attach it to the outlet of the siphon;
- The final stage is connecting the liner to the sewer pipe; to make the task easier, you can lubricate the contact areas with liquid soap or silicone.
Important! If the elements of the device are made of plastic, then carry out all manipulations manually, without using wrenches or other keys, so as not to damage the equipment. Do not use much force when twisting. It is advisable to treat all gaskets with sealant - this will ensure no leaks. Align seals installed with errors using a screwdriver.Connect additional equipment through a special fitting last.
Knowledge of plumbing work will help you not only feel like a real owner of your home, but also avoid the expensive services of a professional. It is only important to strictly follow the sequence of operations to avoid unnecessary problems with neighbors. By following all the steps correctly, you will install a device that will last a long time and be stable.