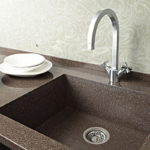
How to install a kitchen sink into a countertop
A dishwasher is an absolutely necessary kitchen attribute. Today there are a huge number of different types of sinks, but in this article we will look at the installation features of only the most common of them. These include overhead, mortise and so-called recessed sinks installed under the countertop.
The content of the article
Preparing to install a kitchen sink
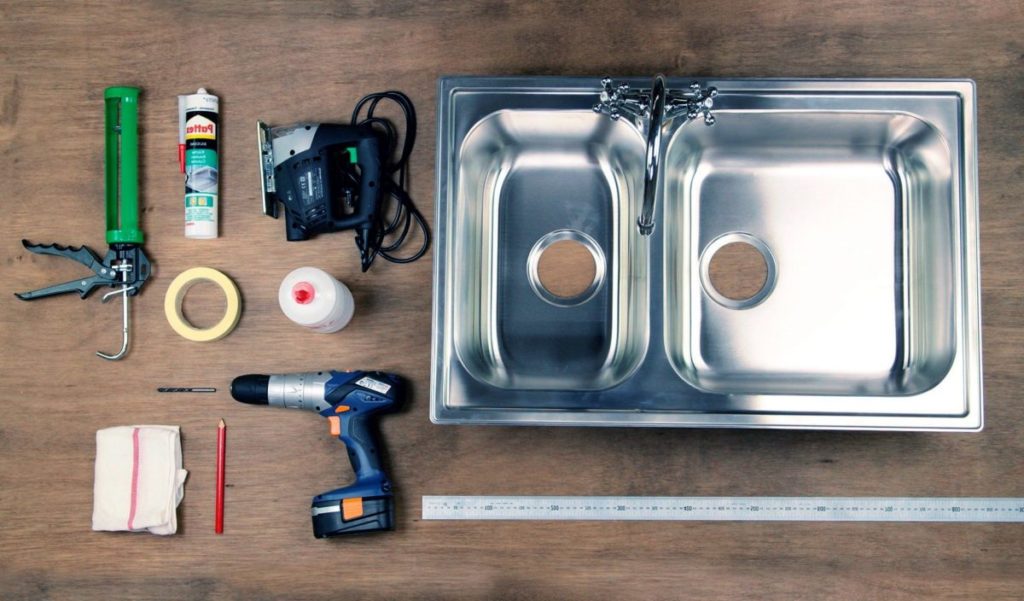
The tools required to install a certain type of sink can be expanded depending on the type of sink and the complexity of installation. For example, for overhead sinks you can only get by with a screwdriver and the necessary fasteners (screws, bolts, etc.), but for mortise or undermount models, the list of tools will be much wider. So, we need:
- Drill.
- Tape measure and pencil (marker).
- A special grinding attachment for a drill (can be replaced with sandpaper).
- Screwdriver.
- Screwdriver Set.
- Electric jigsaw.
- Sharp knife.
- Masking tape.
- Sealant.
Important! In order to protect the countertop from mold, you can purchase a special sealant containing antiseptics.
When all the tools are prepared, you can proceed to dismantling the old sink (if there was one), and then to installation work. Depending on the type of sink, the installation steps will also be different.
Overhead and mortise sinks: how to install correctly
Overhead models are the most convenient and easy to install. Such a sink is usually placed on a cabinet specially made for its size (however, the sinks themselves come in virtually any size and are even made to order).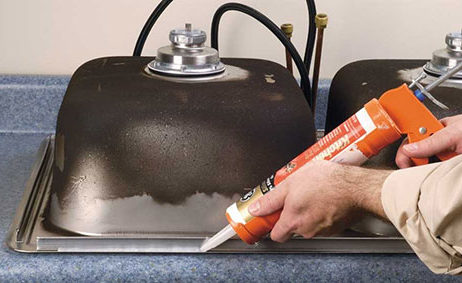
The material used to make the cabinet (most often it is chipboard) is extremely susceptible to moisture, therefore, to extend the life of the tabletop or cabinet, it is necessary to pre-treat the ends with sandpaper before installation, and then apply a layer of sealant to them. The latter will not only protect the material from moisture, but will also ensure a tighter fixation of the sink in its place.
Important! It will be easier to install the mixer on the sink even before installing it on the cabinet.
You can attach the overhead sink to the cabinet using corners with holes. Self-tapping screws are screwed into these holes using a screwdriver (or a screwdriver, if you have the patience), fixing the sink “in the socket.” Excess sealant protruding from under the edges of the sink must be carefully removed.
Important! It is better to remove excess sealant after it has completely dried, using a utility knife. In this case, you need to be careful with the “delicate” surface of the countertop.
As for mortise sinks, they look a little more impressive than overhead sinks, but they also require more effort from the installer during installation. The first step in the algorithm of actions when installing such a sink will be choosing the location for its installation.
Remember that setting the sink inset too small from the front edge of the countertop can lead to premature failure. The minimum recommended indentations are at least 5 cm from the edge and 2.5 cm from the wall.If the dimensions of the countertop simply do not allow installing the sink further from its edge, it is necessary to fasten the countertop in a vulnerable place using a wooden block (from the inside).
After choosing a place is finished, you can move on to marking. Some sinks (especially those with an unusual shape) come with special templates for insertion. If you find one, you can consider yourself lucky. Apply it to the tabletop, trace it with a pencil and start inserting. If the template is not included in the kit, you will have to apply the markings yourself.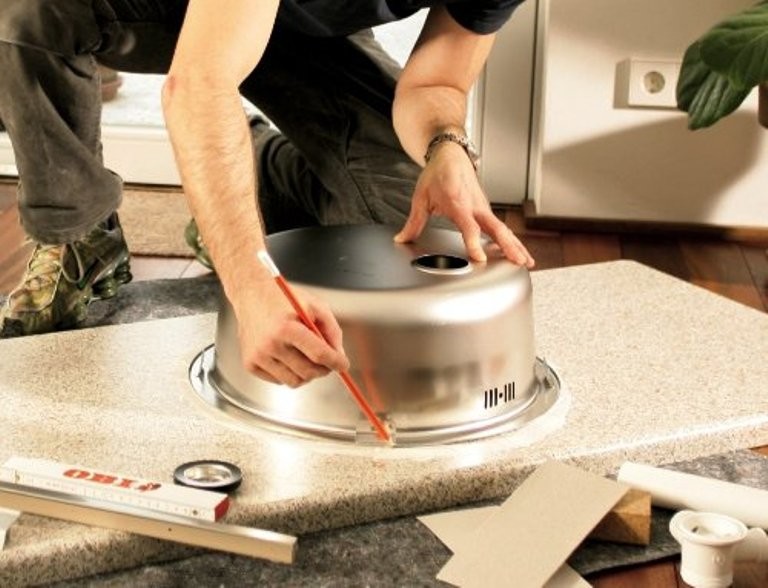
The sink is turned upside down and placed on the countertop. The outline is drawn with a pencil, then the length of the side is measured in several places (it can be different), and the measurements are transferred to the circle outlined on the tabletop. After this you can start cutting the hole.
Important! In order for the jigsaw file to enter the material without problems, it is necessary to use a drill with a large-diameter drill to drill a hole anywhere in the inner circle of the marking. The jigsaw file is inserted into the hole and the cutting begins.
When cutting a hole, you should not rush, because cutting too quickly will cause chips on the edges of the tabletop. In order to minimize their number, the marking outline is sometimes covered with masking tape. To prevent the hole being cut from falling out prematurely, splitting a good part of the tabletop, it must be supported from below. It is more convenient to make the cut together, however, if you don’t have an assistant, you can screw self-tapping screws into the resulting gap as you cut, which will support the part being cut and prevent the material from pinching the jigsaw blade.
After the hole is cut, it is necessary to check its dimensions by briefly putting the sink in place. If everything is in order, you can remove the sink and proceed to sanding the surfaces. This is best done with a special attachment on a drill, but you can also use sandpaper. The result should be the same - a smooth cut surface without roughness or nicks.
Fixing a mortise sink is carried out according to the same principle as fixing an invoice. At the fastening stage, it is better to abandon the screwdriver and work with screwdrivers. The last stage of installation is assembling the siphon and connecting the sink to the communications, after which it is checked.
How to install an undercounter sink
The installation of “recessed” sinks is carried out in the same order as the installation of mortise sinks, with the only difference being that even more attention is paid to fastening the product. If we are talking about countertop models made of artificial stone, then its sections are covered with a special film before installation. Otherwise, the installer can only carefully follow the instructions provided by the manufacturer.
General Tips
As mentioned above, it is better not to carry out such installation work alone, and the proverb “one head is good, but two is better” comes in handy here. It is best if at least one of the installers already has experience in such work in the past, as this will help avoid many small but unpleasant mistakes during installation.
The main rule is that you shouldn’t rush anywhere. If you still have a lot of things to do on the day of installation, then it is better to postpone installation, since in a hurry during installation you can ruin not only your own mood, but also an expensive sink or countertop.