How to assemble a siphon for a kitchen sink
The sink is an integral part of every kitchen. But in order to be able to use it, it is necessary to install additional plumbing elements: faucet, siphon. During operation, the latter often becomes clogged with product residues, which leads to clogging or disruption of water drainage. In this case, you will need to clean or replace the siphon.
At the same time, assembling the device is a simple procedure that does not require calling a specialist. You just need to choose the appropriate product option and strictly follow the instructions.
The content of the article
Features of the device and principle of operation of the siphon
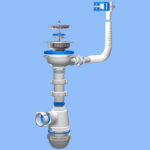
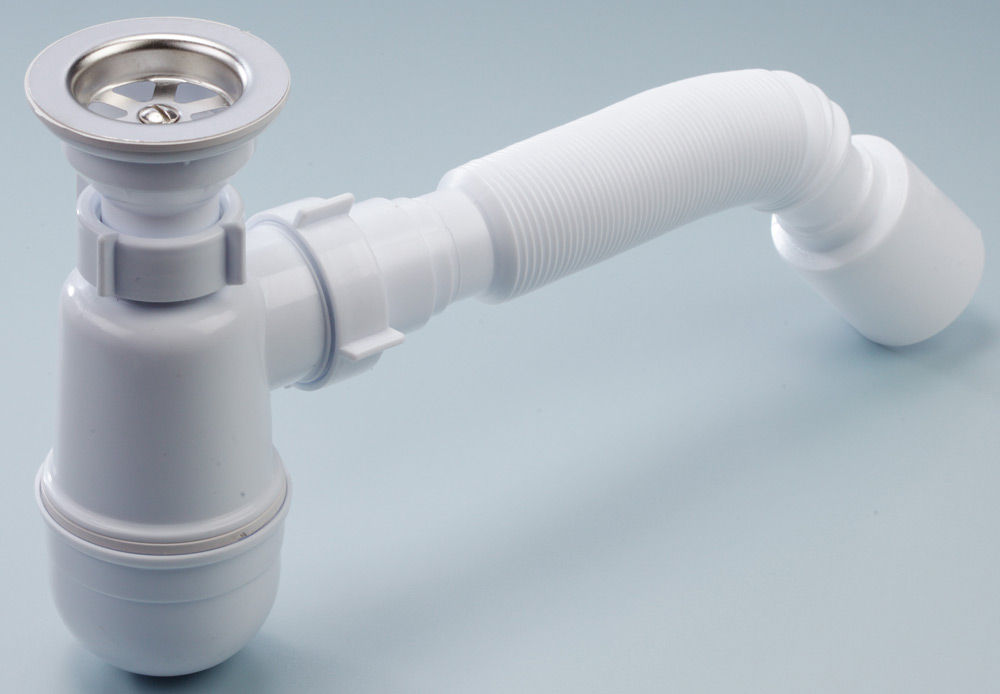
A sink siphon is a plumbing element designed to drain water and small contaminants into the sewer system. Most often it is a product that has a specially curved design.
Reference! On sale you can find siphons with several pipelines.
The curved shape of the product serves to create a water seal under the sink. Thanks to this, large residues of contaminants do not penetrate into the sewer, and also prevent the penetration of unpleasant odors from the drainage system into the room.
Despite the abundance of different models, they can all be divided into two options:
- Bottle. Installed if there is no shortage of space.
- Knee.The most common option. This model can be installed even if the space under the sink is very limited.
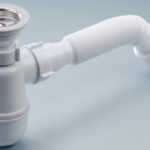
For the production of modern models, various materials are used: polyvinyl chloride, propylene, brass. But the material of manufacture does not affect the functions and service life of the product, while the brass version has a higher cost. Therefore, it makes sense to install it in cases where the room needs to be given a more aesthetically pleasing, stylish design.
In addition, plastic options have a number of advantages - they have higher strength indicators and are also lighter, which helps prevent unnecessary stress on plumbing elements.
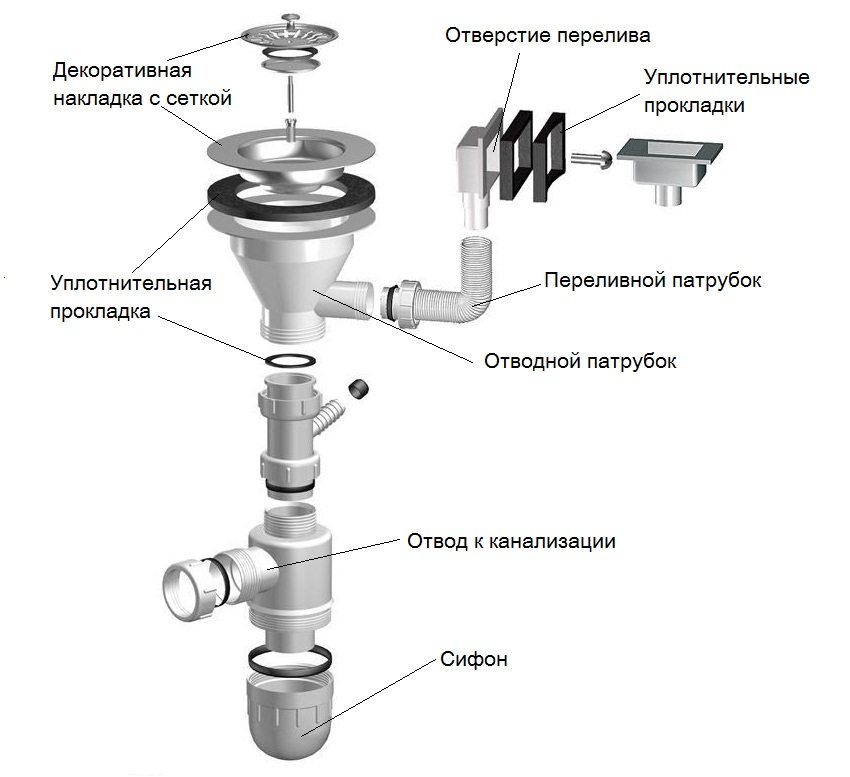
Regardless of the material of manufacture, all devices have a similar design. The standard package most often includes:
- Protective grille. It is necessary to prevent large food particles from entering the sewer system.
- Cork made of rubberized materials. Necessary for sealing the drain hole. Inexpensive models may not have a rubber stopper.
- Pad. It is placed between the outlet pipe and the sink.
- Pipe branch. Necessary for water drainage. There are models that have an additional outlet. You can connect a washing machine or other household appliances to it.
- Sealing gasket for the outlet pipe.
- Nut for the pipe.
- Connecting screw. A high-quality product is equipped with a stainless steel screw, because the inexpensive version made of iron is susceptible to corrosion. This significantly reduces the life of the device.
- Frame. It can be a knee or bottle version.
- Lid. Necessary for cleaning the siphon from various contaminants.
- Sewer outlet. Depending on the chosen model, it can be made in the form of a corrugated hose, a plastic pipe, or a plastic pipe.
Reference! To determine that the connecting screw is made of quality materials, when purchasing the product, check it with a magnet - a stainless alloy will not be magnetized.
The process of assembling a siphon for a kitchen sink
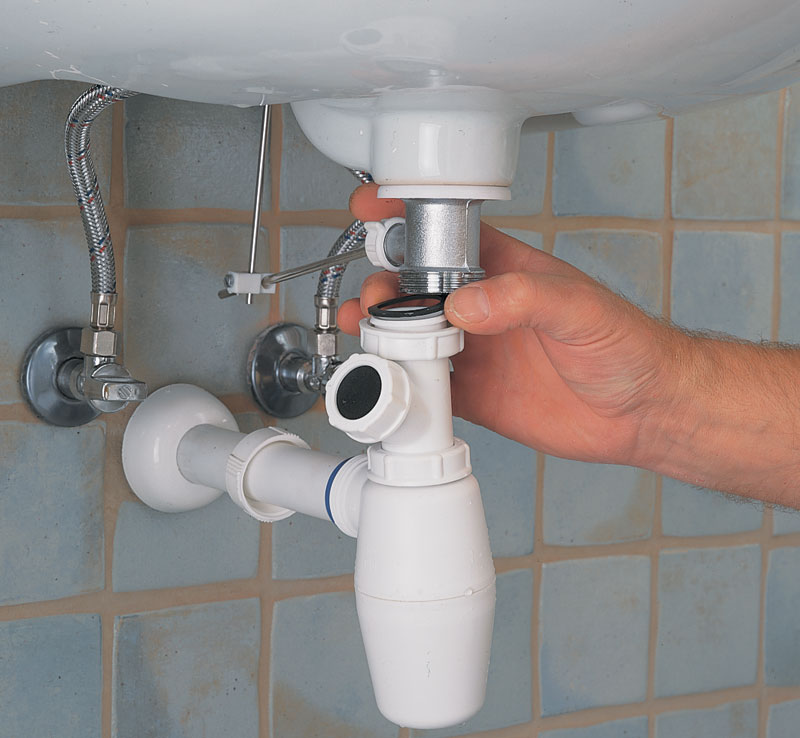
Each product model has assembly instructions. This greatly simplifies the assembly and installation process. Therefore, anyone can handle it, even without minimal experience working with plumbing devices. However, to avoid various problems in the future, it is important to ensure that each assembly step is performed correctly. It looks like this:
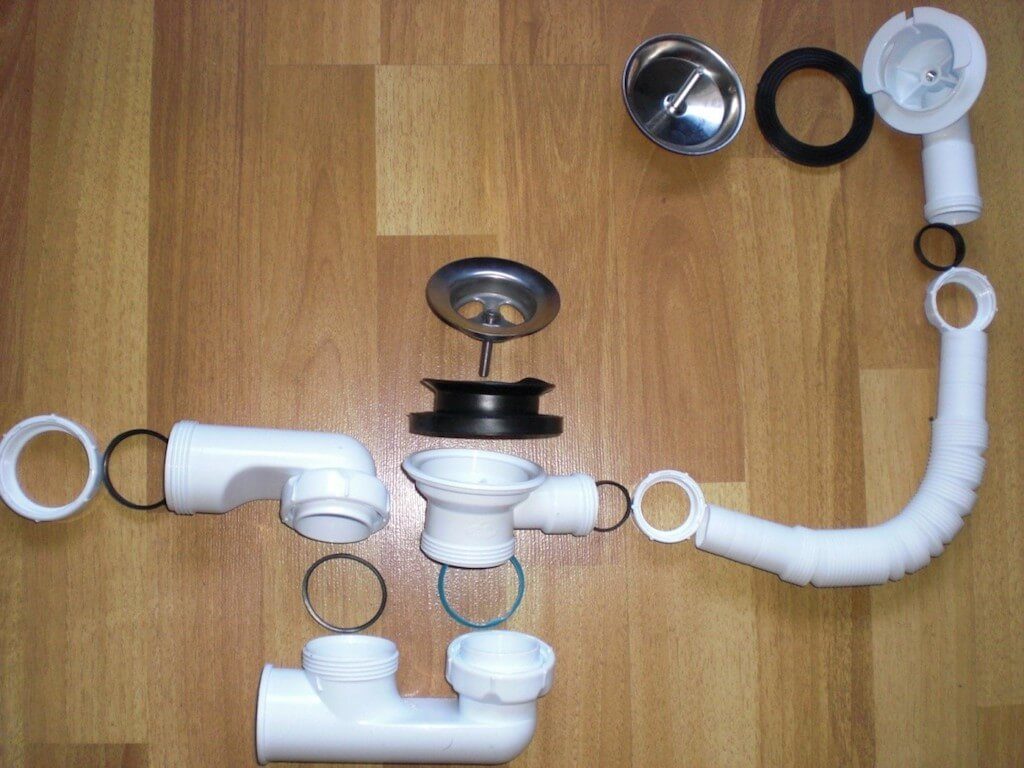
- A protective mesh should be installed on the sink drain hole, as well as a sealing gasket.
- The rubber gasket should be placed on the boss of the inlet pipe.
- Using the screw included in the package, the protective mesh should be carefully fixed to the siphon pipe.
- At the bottom of the sanitary ware you need to secure a fastening nut and a rubber gasket.
- The outlet pipe is placed in the body of the device, after which it should be secured with a nut.
- The cover and sealing gasket should be screwed to the sanitary ware.
- Install a rubber gasket on the drain pipe.
- The connection point between the pipe and the sewer pipes should be secured with a nut.
Attention! When purchasing a siphon, check the product carefully. It should not have various defects: burrs, irregularities, roughness.
How to assemble a siphon with overflow
Some siphon models are additionally equipped with an overflow system. It allows you to avoid flooding of the room in the event of a device failure. The system is a corrugated tube that should be placed on the opposite side of the sink. It is mounted opposite the drain hole. The second end of the product is installed in the drain pipe. To fix the overflow, use the nuts included in the kit.
After installation, it is important to check the tightness of the system. To do this, fill the sink with water and check the flow of liquid into the overflow. If there are leaks, all nuts at the joints should be additionally tightened.
Now you know how to properly assemble and install a sink siphon in the kitchen. If you follow all installation steps, installation will not be difficult for you.