Installing a food waste disposer for your sink
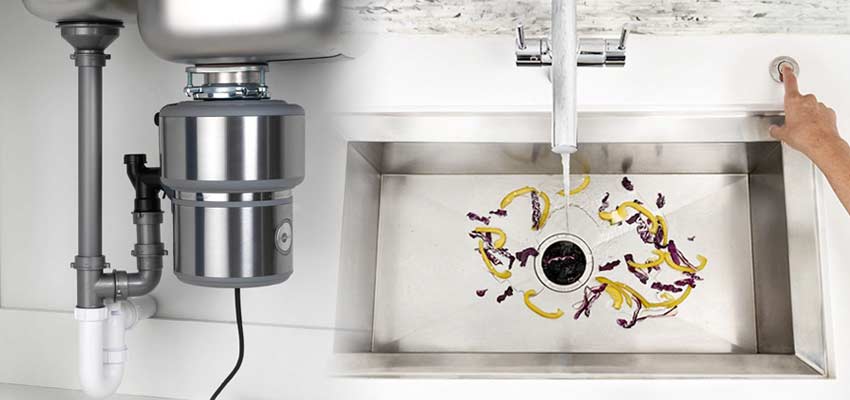
Every housewife faces the problem of household waste. A modern device – a disposer – will help you get rid of the daily need to independently collect and throw away garbage. This is a small kitchen device designed to collect and dispose of household waste generated during dishwashing.
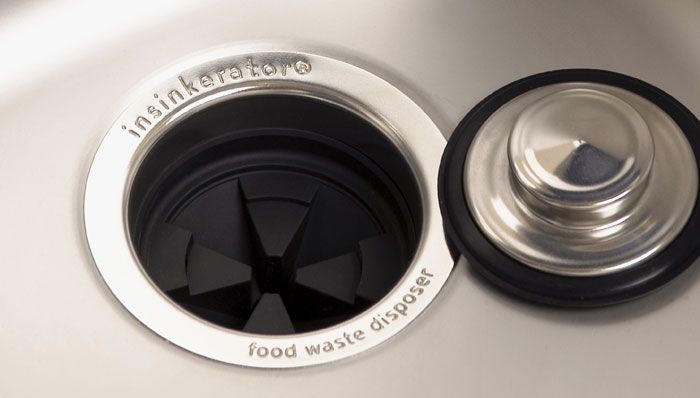
The small device can process not only soft debris, but also bones. This is an indispensable assistant in every kitchen. The product is attached directly under the plumbing fixtures, where the siphon is usually located. Thanks to this placement method, the generated waste is sent directly to the sewer pipes.
The content of the article
Features of installing a food waste shredder
Installation of the device does not require special knowledge, and therefore anyone can handle the installation. Old-style plumbing may cause some inconvenience - all modern disposals are designed to work with sinks with a neck diameter of 90 mm. On sale you can find options that allow installation on a siphon measuring 50 cm. But they are extremely rare, so experts recommend simply replacing the plumbing with a more modern model.
Before purchasing and connecting, you need to make sure that there is enough space for the device: the working container may be excessively voluminous, so you should check important parameters:
- device dimensions;
- distance from the bottom of the plumbing to the center of the outlet neck;
- how many centimeters between the exhaust manifold and the pipe;
- the distance between the middle of the mounted device and its connection point.
It is important not only to check that the level of the outlet pipe is located below the opening of the disposal device. You also need to be prepared for the fact that you will have to look for another place for the trash can - the shredder is quite large and takes up almost the entire space under the sink.
Disposers are especially common in the United States, where the Department of Health recommended placing the device in every home back in the middle of the last century. That’s why these devices can be seen so often in American TV series. According to statistics, they are installed in every second home.
Also, before carrying out work, it is necessary to purchase smooth-walled drain pipes. Corrugated ones will not work - waste residues will accumulate on the embossed surface. As a result, the neck will narrow, making it difficult to dispose of waste. This will lead to the appearance of an unpleasant odor, from which even a water lock will not help.
You must purchase an outlet or circuit breaker. Preference should be given to options that are resistant to moisture. Otherwise, the shredder will soon deteriorate.
How to connect a disposer with your own hands: installation diagram
It is important to remember that the device comes with installation instructions that describe each step in detail.It is important to study it, even if the installation is not being performed for the first time: each model has connection features.
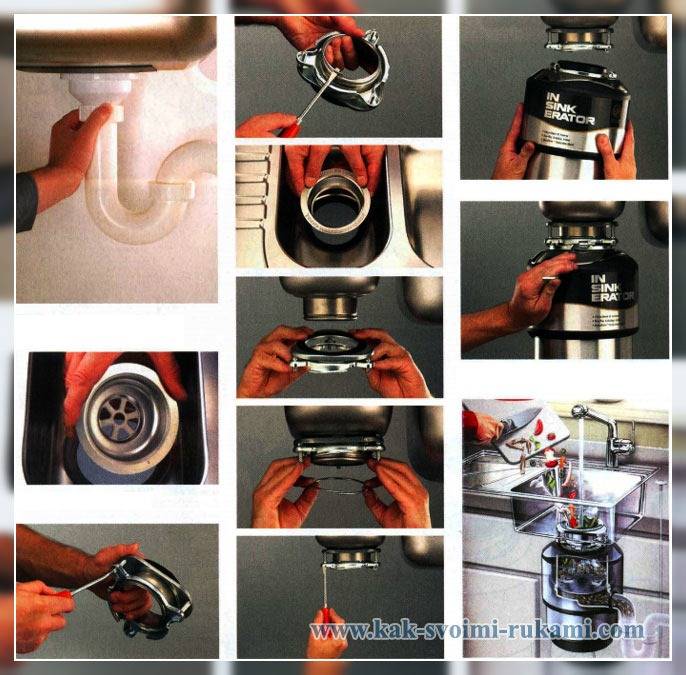
A small step-by-step guide to installing a waste disposal unit will also help:
- The first step is to disconnect the drain pipe, siphon and thoroughly clean and rinse the elements from accumulated dirt, food debris and greasy deposits.
- Under the plumbing flange, you must install a rubber gasket that comes with the fixture. This will help avoid leaks.
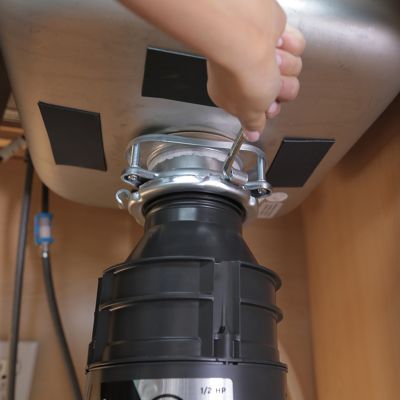
- Connect the fixing elements of the structure to the drain hole of the plumbing fixtures as indicated in the attached instructions. This is done using the fasteners included with the device.
- Attach a household waste disposal unit to the base of the structure.
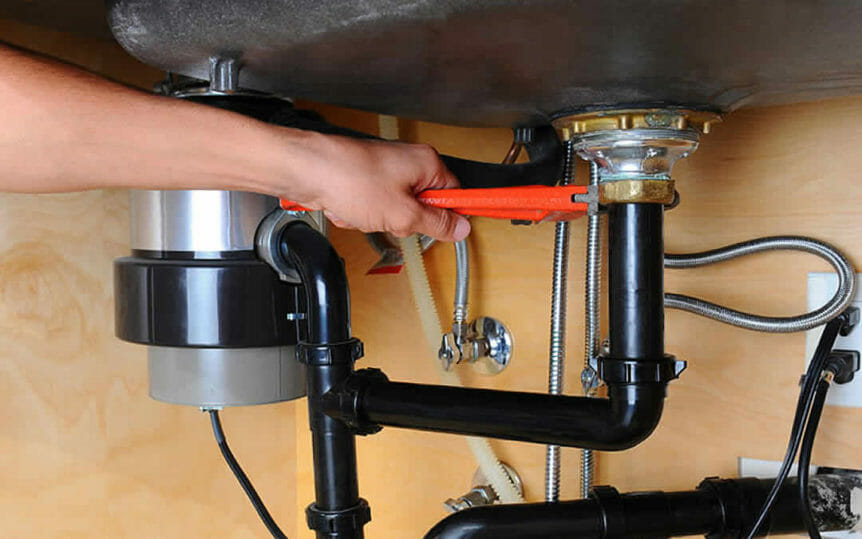
- Next, you need to connect the drain pipe to the device. It will create a transition between it and the sewer. This is done using plastic adapters included in the kit.
- Then connect the adapters to the sewer system.
- If the kit does not include a pneumatic switch, you must install it separately by connecting electrical wiring to the device.
- If a dishwasher is installed in the kitchen, it also needs to be connected to the chopper. It is usually equipped with an additional hole for this purpose. During connection, you need to knock it out, and then install it.
- After direct assembly of the structure, it is necessary to install the catcher, if available, and the plug.
- The last stage is connecting the device to the electrical network. After that, you need to fill the sink with water to check for leaks.
It is important to remember that the disposer is an electrical device that requires mains power to operate.Moreover, the voltage must match the technical characteristics of the device, and also have protection from moisture and grounding. If the latter is not present, you need to seek help from a professional electrician who will help install the missing elements.
Features of dismantling and minor repairs
The most common problems faced by device owners:
- the appearance of a leak;
- clogging;
- flywheel failure.
Dismantling and repair work can be carried out without seeking help from a specialist. To do this, you will need a hex wrench, tweezers and a basin into which the water will drain.
Leak
Water that has accumulated under the sink is the first sign of a leak. You can diagnose a problem by feeling the main structural elements. If water enters the area of the seal, then it is necessary to tighten the loose bolts. If the leak does not go away, a complete replacement of the hose or seal will be required.
Flywheel
During a visual inspection, no blockages were found, but the device refuses to work? The reason may be hidden in the flywheel, which has become unusable:
- First of all, the element must be cleaned of contaminants.
- Then use a hex wrench to loosen the flywheel.
- Inspect and thoroughly clean the structure again. There may be a thread or a piece of polyethylene wrapped around the parts - they should be removed.
- Then you need to remove the fasteners and clean the impellers.
The flywheel is a reliable design and rarely fails. If cleaning does not help, the element should be replaced with a new one.
Clogging
The most common cause of breakdown is the accumulation of dirt or the entry of a foreign object. This could be a large piece of bone, polyethylene, or small metal elements.
Troubleshooting: the structure should be carefully inspected and foreign objects removed. Did not work out? Then you need to disconnect the hoses and clean them manually.
Dismantling
In rare cases, complete dismantling of the device will be necessary. This could be repairs or replacement of equipment with new ones.
Stages of work:
- First of all, the device must be disconnected from the power supply.
- Remove everything stored under the sink and bring the necessary tools: a hex wrench or pliers.
- With their help, you need to disconnect the drainage pipes and unscrew the fasteners of the device from the bottom of the sink.
- Next, remove the pneumatic switch.
- If it is necessary to do complete dismantling, then using a screwdriver you need to loosen the bolts of the installation ring, remove the retaining ring, and then remove the structure from the drain hole.
As you can see, the installation and maintenance process does not cause difficulties. The work does not take much time, effort or the purchase of special tools. By installing such a useful device as a disposer, you can forever forget about the need to sort waste and store cleaning and other household waste under plumbing fixtures.