DIY sun mirror
Making something with your own hands is not only an interesting and exciting pastime. It also saves money, develops your creativity and teaches you something new.. In addition, you will not be able to find in any store the same original and beautiful thing that you will get. Today we will tell you how to make a sun mirror with your own hands. This item will decorate any interior and will also help you always look perfect wherever you go.
The content of the article
Which design and construction should I choose?
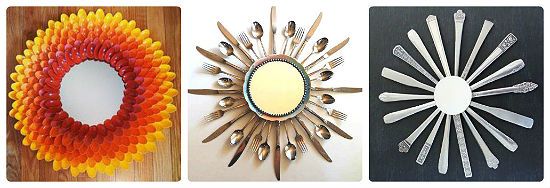
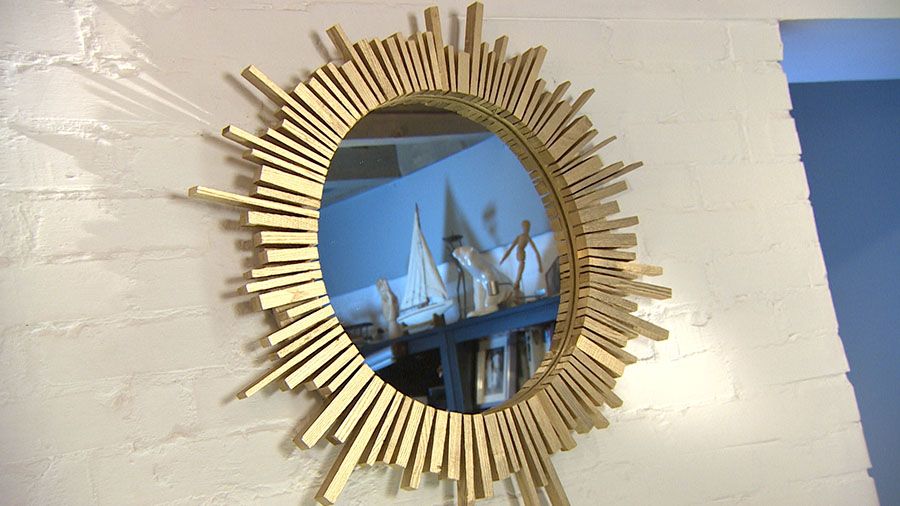
There are a huge number of different types of such mirrors, for which there is no clear classification. Their main feature is the round shape of the glass itself and the rays framing it made of different materials. When choosing, you should consider two criteria: the material you have at home and the size of the desired item. For example, snack forks are ideal; they can be connected to each other, coated with paint, and now a magnificent mirror is ready!
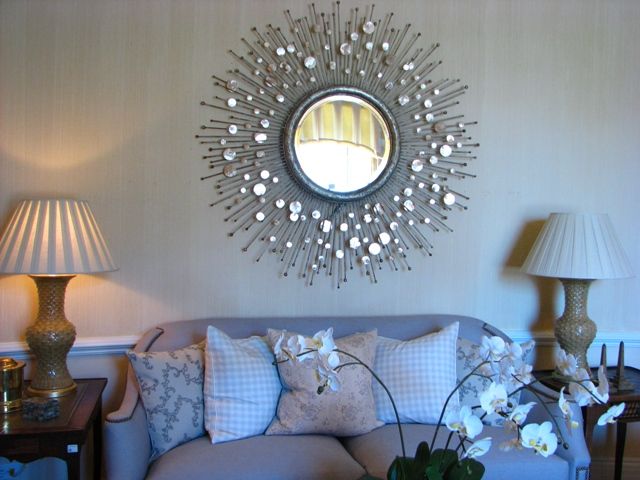
IMPORTANT! The sun will suit many types of interior, but still not all due to its exotic appearance. Therefore, it is very important to imagine how the finished mirror will look in your room. Perhaps to make it more suitable, you only need to change the color of the so-called beams, or maybe it would be better to try hanging it in another room.
It is also important to understand that although this is a mirror, it is more of a decorative nature due to its very small size. You can, of course, make it larger, but then you will need a lot more materials, and also the rays, which should be quite long, will take up too much space. A massive sun mirror will look ridiculous. It's better to stick to the middle options.
Required materials and tools
In order to make such a thing with your own hands, you do not need any special materials that had to be purchased specially. Here's a list of what you'll need:
- Snack forks or spoons.
- Cardboard.
- An unnecessary round mirror, for example, made from a powder compact.
- Acrylic primer.
- Acrylic paint of the desired color (usually gold or shades of brown).
- Cutter.
- Brushes.
This is how the set turns out. It is worth noting that those sun mirrors that are sold in stores and are so expensive are most often made of wood. It is their rays. Therefore, in most cases, self-taught craftsmen tend to choose paint shades that will resemble real interior items made by professionals.
Making a sun mirror with your own hands
When all materials have been found and prepared, you can begin to work. The first step is to select the base for the future mirror - from thick cardboard.
- First, cut out a square that roughly fits the size of the glass that will be glued later.
- Then place the glass on it, trying to make it as even and neat as possible. It is important that the glue you use does not leak out from under the glass and does not stain the entire base, otherwise further elements may not stick neatly, and then the entire craft will be ruined.It's better to do everything right right away than to waste time on endless redoing.
- Then you should proceed to the forks - future rays. They should be coated with gold or any other acrylic paint. If you cannot cover their original color, you will also have to apply a primer. In this case, the forks need to be coated with several layers of primer and only then painted over.
IMPORTANT! Please note that it is very important to allow each coat to dry thoroughly before applying a new one. Of course, this approach may delay the work process significantly, but the resulting product will look much more beautiful and will please the eye of everyone who notices it on the wall of your room.
- The next step is to fit the forks to the base. First space four of them evenly apart and then add the rest. You shouldn’t paint over all the elements at once; there may be too many of them. And if in case of a shortage you can simply make a few more, the extra forks painted with acrylic paint will remain unnecessary and useless items that will have to be thrown away.
- If everything is in order, then you can glue them to the base. It is best to glue the rays more tightly to each other so that you get a real round sun. The final stage will be another painting of the finished product. Now it will shine like a real sun!
If you plan to hang the mirror on the wall rather than place it somewhere on a dresser, you will also need a mounting hardware on the back. You can take it from an old unnecessary photo frame.
Now you know how to make your own sun mirror in order to diversify the interior of your apartment!