DIY mirror frame
The mirror not only performs practical functions, but also sets the style for the entire room. If you have been looking for that very mirror of your dreams for a long time, but the options from the store are somehow unsatisfactory, it’s time to take matters into your own hands and make the frame yourself. Making a DIY mirror frame for the hallway is not as difficult as it might seem.
The content of the article
Product Features
- Your imagination is not limited by anything. You can make a laconic frame from light wood in the Scandinavian style, be inspired by ideas seen in the movies, or give in to your child’s requests and hang a mirror decorated with pink sparkles in the nursery, like in Barbie’s house.
- You don’t have to worry about the safety of the product, since you choose the material and decor yourself. From the very beginning, you control the manufacturing process and you will be sure that no toxic substances or, for example, small sharp parts were used that could fall off and injure children/pets.
- Pay only for the material, saving a significant amount on the services of the designer and workers.
- Your mirror will be original and one of a kind, and not an assembly line craft from a factory.
Deciding on the material
You can use any materials and add decor from everything that is at hand, but it is better to choose one thing as a basis. Different textures can combine strangely with each other, and during production they will add work to you, not wanting to stick together and stick together. Let's look at the features of the materials:
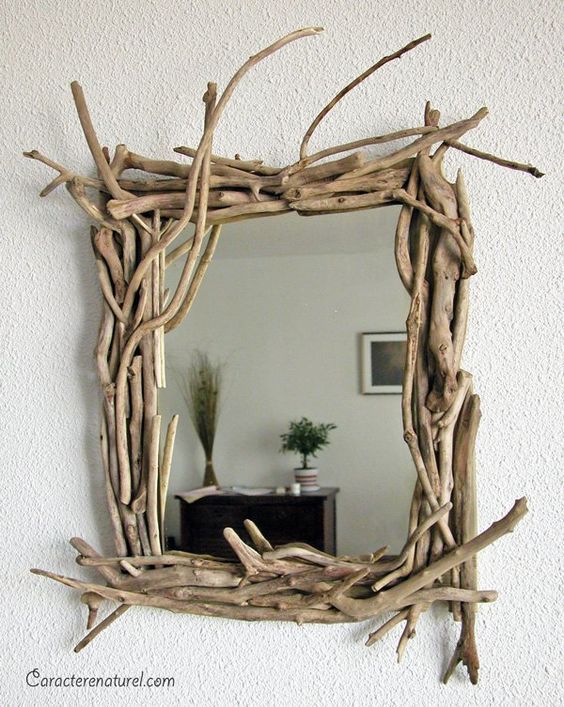
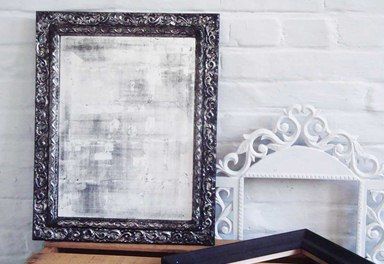
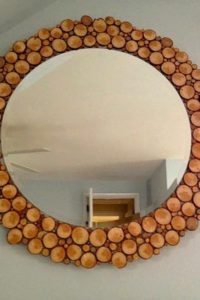
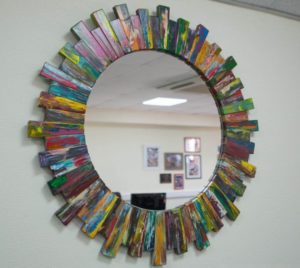
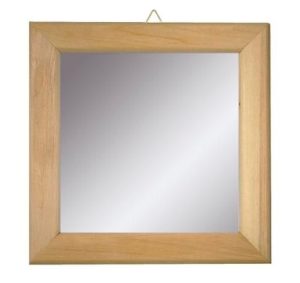
- Tree. It is easy to obtain, easy to work with, and with the help of a coating you can completely change the style of the finished product. A frame made of roughly processed wood will suit a loft-style apartment, covered with white paint will fit into a Scandinavian-style room, and if you add plant elements, you will get a mirror in the style of a fairy-tale forest for a child’s room. A baguette is an excellent solution.
 Plastic is a lightweight and durable material. The polyurethane baguette frame bends easily and can be used to frame a round or oval mirror. The material is not afraid of water and is suitable for placement in the bathroom.
- Metal baguettes. Metal requires certain skills to work with it, but the finished product looks solid. Such a frame will definitely not look like a cheap craft and will add chic to the room.
- Mirror glass. Glass details not only allow you to decorate a mirror, but if used correctly, they can visually expand the space of a room. Use special coated glass for a solid frame or assemble it from small pieces of glass.
- Leather or leatherette. An original option that is more suitable for a small tabletop mirror. The frame can be covered with leather, or it can be made soft and voluminous.
- Rope and straw. These materials look good in a bright room, but have a number of disadvantages: they are afraid of moisture and are not so easy to clean from clogged dust.
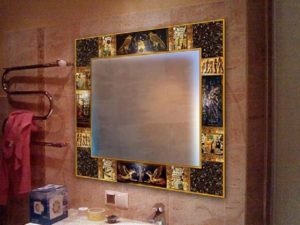
- Mosaic is a real find for creative people.With its help, you can create a whole work of art, experimenting with colors, shapes and textures. Mosaic pieces are attached to a base - for example, made of plywood.
- Polyurethane foam. At first glance, this is a strange choice, but foam is very convenient to use - as a base material or as an auxiliary material. It’s easy to put various small details on it, and when you see the finished product, no one will guess what’s hidden under the decor.
- You can make an entire frame from plaster or decorate another canvas with it. This mirror is suitable for a room in a retro or baroque style. But be careful: plaster is very fragile.
Choosing the color of the future design
 There are no clear rules “this is possible, but this is strictly forbidden!”, the main thing is that you like the frame and fit into the interior of the room. Black and white colors are universal and will go with almost anything. Use them if you don't want to focus on the mirror. Bright colors are appropriate in the design of any room, just take into account the placement: if the mirror hangs opposite the window, the colors may fade in the sun over time. Painting in bronze or gold is suitable for a room in the corresponding style. Try not to overdo it with such details so that the room does not end up looking like a hall in the Hermitage. Experiment not only with color, but also with textures - glossy, matte or voluminous. Your frame will certainly turn out very beautiful.
DIY mirror frame - making
The process of making any frame, be it a simple square one made of wooden beams, or a round floral pattern, fits into the following scheme:
- Preparation of tools and materials.
- Taking measurements.
- Assembly of the main structure.
- Decorating the base - painting, adding details.
First, consider some practical points:
- Materials that suffer from water - untreated wood, straw, paper - are not suitable for the bathroom. Also keep in mind that in conditions of high humidity, glue and paint deteriorate - choose waterproof ones.
- If there are small children in the house, you will have to discard small sharp parts that may accidentally fall off the frame, or an inquisitive child himself will decide to test the structure for strength.
- Heavy massive frames also pose a danger to children or pets; you need to be 100% confident in the reliability of the fasteners.
Prepare all the necessary parts and tools, because afterwards it will be inconvenient to look for them yourself. You will need a tape measure and a corner for measurements and markings, and then, depending on the material, glue or self-tapping screws, a drill, a screwdriver or hammer, a construction stapler, and do not forget about the fasteners for which you will hang the finished mirror on the wall.
Taking measurements
Before starting work, measure the sides of the mirror and write down the result.
IMPORTANT. It’s better to double-check the numbers again than to make a mistake and end up with a frame in which the mirror will dangle, or even worse, it won’t fit. To ensure that the corners are even, use a special ruler or construction angles.
If you want to join the pieces at a 45 degree angle, the length of the inner edge of the frame or the part into which the mirror will be inserted must exactly match the adjacent side.
If you want to connect the parts at an angle of 90 degrees, cut two strips along the side length and two - side length + width of the strips.
Manufacturing process
REFERENCE.Before starting any work, cover the mirror with film so as not to accidentally scratch or stain it in the process.
Let's consider three simple options for the base for the frame:
- From the baseboard. Measure and mark the four sides of the future frame using a tape measure and a corner. Along the inner edge they should correspond to the length of the mirror and fasten together at an angle of 45 degrees.
NOTE. If there is decor on the plinth, arrange the parts so that the pattern smoothly transitions into one another at the joints.
Connect the parts with glue and tie them with rope so that they are pressed closer to each other. When everything is completely dry, you can lightly treat the joints with putty. This will not only give them a neater look, but also make the entire structure more reliable. Insert the mirror into the finished frame, also spreading a thin layer of glue on its edges. Place the hanging mount on the glass itself, and not on the frame, in case the mirror does slip out of it.
- From slats. Such a frame will consist of two parts: a frame is formed on the outside, and on the wall side the glass will be held by a tightly fitted frame.
Make both frames: the back one exactly to the size of the glass, and measure the front one so that it protrudes about a centimeter from the inner edge. Insert the mirror into the wooden frame, bordering the back with plywood corners and now connect it to the front. The glass, fixed on all sides, will not fall out anywhere.
- On a flat base. This option is suitable for a small round mirror. Take a sheet of paper, plywood or other material larger than the glass itself. Trim it so that there is room at the edges for decoration. Secure the mirror in the center with hot glue. Now decorate the surface to your liking.

Decor
It’s easier to say what is not suitable for decoration - toxic and dangerous materials. Otherwise, you are limited only by your imagination, budget and free time.
Here are some ideas for framing:
- Seashells remind us of a vacation at sea. You can combine them with a simple frame made of white rope, or lay them tightly on a base, interspersed with multi-colored stones, beads and pieces of mother-of-pearl.
- For the kitchen, you can decorate the mirror with food products - coffee, pasta, beans or dried and varnished pieces of fruit.
- Decoupage is a way of decorating objects using special napkins. They already have a design applied to them, so you don't have to worry about your ability as an artist. Choose the ones that suit your design, transfer them to the frame and varnish them.
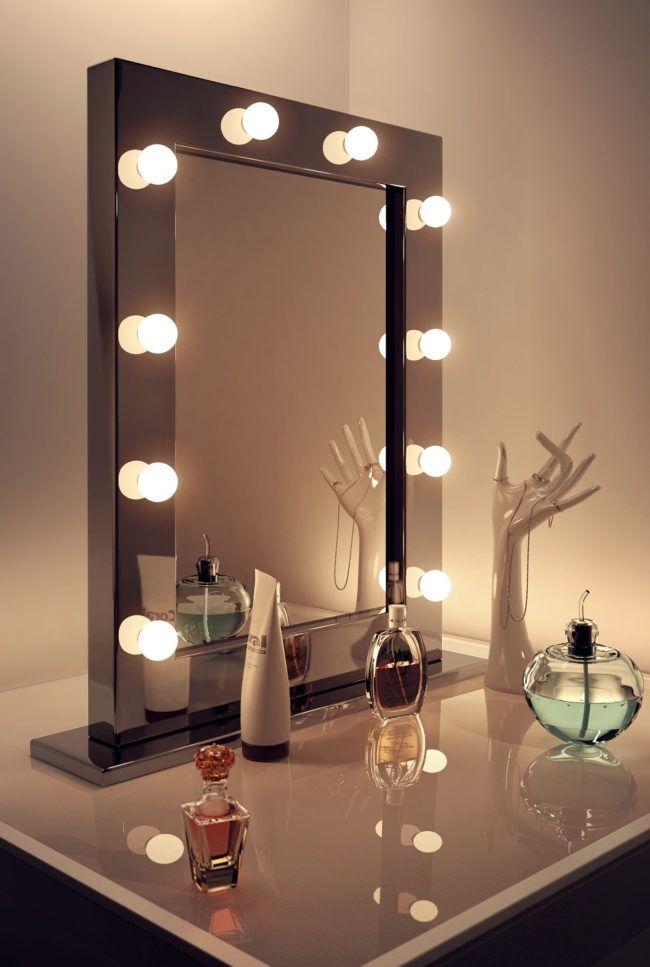
- Textiles simply open up endless possibilities for creativity. You can surround the mirror with lace, slightly extending onto the reflective surface - such a mirror will look cute in the bedroom next to the dressing table. Or use bright ribbons and threads to braid a figured structure from other materials.
- Nature is the best designer, borrow ideas from her. The cork board itself looks nice, and additional parts can be attached to it very easily. You can play with the unusual bend and texture of wood for an original shaped frame. Or use branches, acorns and chestnuts for decoration. A bright frame in an oriental style will be made from green bamboo branches.
- A large frame decorated with beads and sequins will immediately attract attention. You can hem them to a textile base or sprinkle them in a creative mess on plywood coated with glue.
- The floral design can be painted with a brush on a smooth material, laid out with beads, or plastic or wire parts bent as needed.
- You can decorate a mirror without using a frame at all! You will need tape or adhesive film and a can of spray paint. Cut out a stencil with patterns, cover the center of the mirror with it, and then apply paint to the edges. After drying, remove the protective film - and the original mirror is ready.
If you are not confident in your abilities, start with simpler options, and over time take on more interesting tasks. Don't be afraid to experiment, and your home will delight you with every little detail.