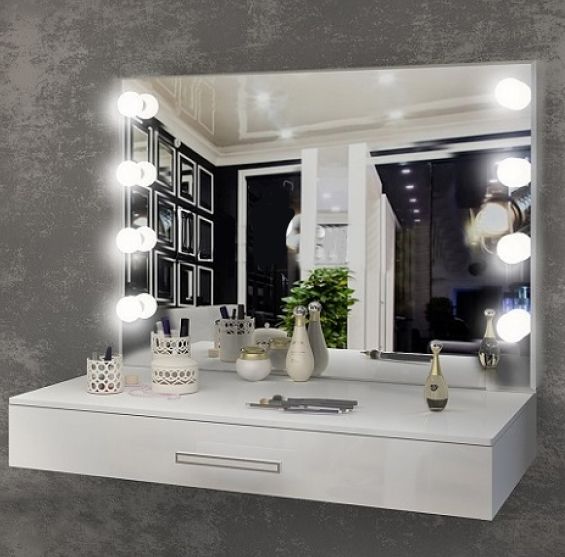
DIY dressing room mirror
 Any girl wants to have a makeup mirror at home, like in Hollywood films. It will be the best gift for women who love to apply makeup and do beautiful hairstyles. This is not only a practical thing, but also an excellent solution for room design. It will also add uniqueness to the bedroom, dressing room, and bathroom. You can buy a mirror in the store. There are many options sold there, at different prices. However, you can save money and make this piece of furniture with your own hands. It will turn out no worse than from the store and will be exclusive.
The content of the article
Dressing room mirrors - varieties
Mirrors vary in shape:
- round or oval;
- square;
- rectangular;
- to the floor
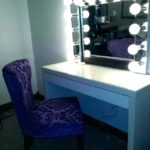
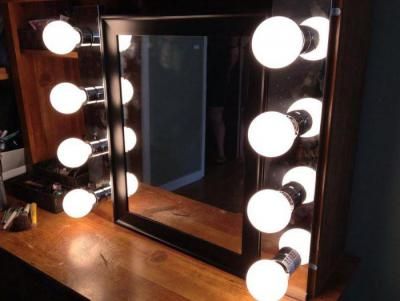
Rectangular and square shapes (50*50) are recognized as a classic option. If you have free space, you can make it larger in size. More and more women are choosing models with round shapes. They look very attractive and fit any room design. They give it comfort and romance.
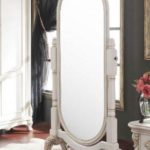
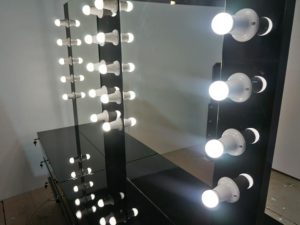
A floor-length mirror allows you to fully examine yourself and evaluate your overall appearance. Additional lighting allows you to replace mistakes in the image that are invisible under ordinary lighting. Floor-length models with white, black, or silver frames look especially impressive.
Benefits of Using a Makeup Mirror
A makeup mirror helps you apply makeup on your face, carefully do your hair, and choose clothes well. The backlight correctly distributes the light, thanks to which you can clearly see all the details. This cannot be done in an ordinary mirror, because only fragments of makeup and clothes are visible in it. In addition, not every room has the correct amount of light; illumination can also be worsened by weather conditions.
In a mirror for applying cosmetics, you can see even microscopic imperfections on the face: pimples, enlarged pores, pigmentation, etc. Thanks to this, you can choose a suitable tone or powder for the face and apply it in an even layer. As a result, you will be able to hide all the shortcomings.
A makeup mirror has the following advantages:
- Versatility - placed in the bedroom, dressing room, bathroom. It is hung on the wall, placed on a cabinet, or on the floor. Fits into any design solution.
- Mobility - many models can be detached from the cabinet and moved to any place.
- A variety of shapes and colors - every girl will choose an option to her taste.
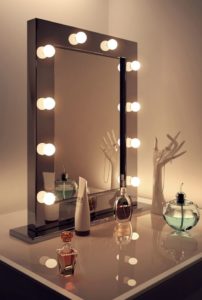
A dressing room mirror is not only an indispensable assistant for any woman who cares about her appearance, but will also add zest to the decor of the room and give it status.
How to make a make-up mirror with your own hands
NOTE. Before you start work, you need to decide on the design. If the interior is dominated by clear geometric patterns, it is recommended to choose a square or rectangular model. If the room is made in soft, pastel colors, then it is better to focus on rounded shapes.A floor-length mirror looks harmonious in spacious apartments, designed in modern styles, with high ceilings.
The ideal option would be to intertwine frame fragments with decorative elements. For example, if there are gold patterns on the bed, curtains, or walls, it is desirable that they be repeated on the frame.
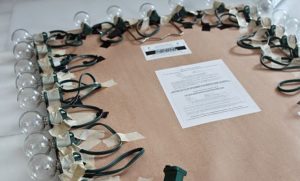
Necessary materials
Before making a mirror, you need to take care of materials and tools. You need to prepare:
 mirror glass;
- wooden beams;
- furniture corners;
- sandpaper;
- ruler or tape for measuring length, pencil;
- small blue and white copper cable;
- tweezers;
- paint, varnish;
- double sided tape;
- drill;
- saw;
- screwdriver;
- 2.5 centimeter bolts for attaching lamp holders to the frame;
- container for diluting paint;
- brush or sponge for painting the frame;
- glue.
For illumination, light bulbs are required (it is recommended to purchase up to 25 Watts) with sockets and fuses included. It is better to use LED ones, because it will be too hot when the regular ones are turned on. The number of bulbs depends on the size of the mirror. You will also need a plug for the wire.
IMPORTANT. While working, you need to take care of your safety: wear special shoes with rubber soles, clothes without metal buttons, locks, etc.
Step-by-step instruction
Making a mirror step by step:
 For the classic version of a square or rectangular shape, a frame is made of wooden beams (you can choose another material, but wood is the most reliable and lends itself well to tools). The frame must match the size of the mirror. Parameters are measured with a ruler, marks are made with a pencil. After fastening with furniture corners, the bars should form 45° angles.When making round and oval models, the dimensions are fixed with a measuring tape or ordinary thread or rope.
- The wooden frame is sanded until the surface is completely smooth.
- A drill makes holes for lighting. The distance between them is the same, thirty to forty centimeters. It is measured with a ruler. The cartridges are inserted into the holes made and secured to the frame with glue.
- The frame is painted in a suitable shade. Decorative elements are fixed to it with double-sided adhesive tape. It will be less expensive to leave the frame in its original form, covered with varnish. It is applied to the surface with a special sponge. The frame painted in white, silver or golden shades looks most impressive.
- The backlight is connected.
- The mirror is inserted into the frame. It is important that it fits into it without effort, while there should still be room for the light bulbs. The mirror in the frame is secured with thin bars.
- If desired, the back part can be made closed. For this, a plywood board is used, fastened with small screws.
The very last step is to connect the backlight.
NOTE. If you have no experience working with electricians, it is recommended to invite a specialist to connect the lighting and arrange the wires correctly. This will help avoid unpleasant consequences such as short circuits and electric shocks.
Making the backlight
If, after all, it was decided to connect the lighting yourself, rather than hiring an electrician, this is done as follows:
 Separate the white and blue wires. The length should be fifteen to twenty centimeters. Lead them into the holes so that each has two white and two blue wires.
- Twist the exposed wires onto the required side of the socket screw.
- Attach each cartridge with a bolt to the frame.
- Attach the plug: you need to cut a long piece of wire, place one end to the first socket in the line. Attach the other side to the plug, matching the color. To prevent the wires from sticking out or dangling, they must be secured to the back of the mirror with tape.
- Plug the plug into the socket and check the operation of the lamps.
If any of the light bulbs does not work, but is not burned out, you need to check the wiring. You may have to swap cables somewhere.
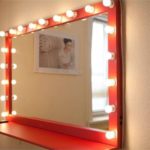
The mirror can be illuminated in other ways. For example, the simplest is to mount small lamps on top or on the sides. They also look aesthetically pleasing and do not spoil the appearance.
Another option is LED strip. It is attached to the edges of the frame. Its advantage is the variety of colors. Selecting an LED strip to match the interior of the room will not be difficult.
Expert advice
Safety rules and useful recommendations from experts:
- You can hang a dressing room mirror above the cosmetics cabinet. You don't have to go far for makeup supplies.
 It is necessary to use several fuses to extend the life of the lamps.
- Electricity is connected to the mirror, so it is not recommended to allow children near it.
- It is better to use LED bulbs, they have a longer service life and are energy efficient. There is also less heat from such light sources.
- Additionally, you can connect a device to adjust the brightness of the light bulbs.
- It is not recommended to use fluorescent lamps, they distort reality. It starts to seem like your makeup is perfect. However, in daylight all the shortcomings emerge.
- Before purchasing light bulbs, you need to consider their shade. Cool tones highlight unevenness and imperfections of the skin. This makes them easier to disguise. Warm shades, on the contrary, smooth out unevenness, but are more comfortable for the eyes.
- The number of lighting fixtures depends on the size of the frame. The most important thing is that two of them are at eye level. This will help you consider your appearance in more detail.
- There should be a comfortable distance between the mirror and the person.
- Illuminated mirrors can be used for more than just beauty events. They look impressive on wardrobes. Such mirrors will not only be an additional source of light, but will also add romance to the interior.
When purchasing a mirror in a furniture store, or having it made to order, you need to be prepared to spend money, since they are not cheap. To save money, you can do it yourself. It's not difficult at all and won't take much time. The main thing is to be careful and strictly follow the instructions so as not to redo the work later. With a little effort, you will get an exclusive piece of furniture that no one else will have.