DIY floor clothes hanger
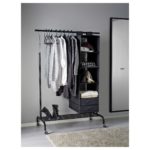
 When entering a house, the first thing a person does is look for an opportunity to hang outerwear on a hanger. This is a mandatory ritual, like washing your hands after going outside. And the main thing here is that the hanger is comfortable and functional, can accommodate the required amount of clothes, and does not seem overloaded. Most sets already have a built-in wardrobe or hanging hanger. But there are certain moments when a floor hanger will come in handy; it will decorate the interior and add zest to it.
The content of the article
Features, pros and cons of floor hangers
If you want to be original, emphasize the style of the interior, and show everyone your sense of taste, then the idea of creating a unique floor hanger will be a great success. Anyone who can hold a hammer or drill can make such a design without damaging the work. Creating a product does not take much time, but the end result will definitely please the eye.
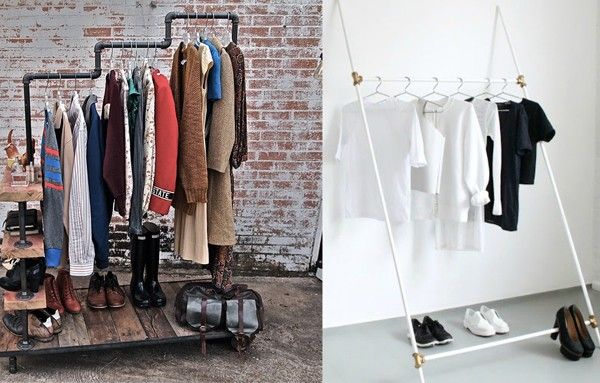
Everyone knows that there are two types of hangers: floor and wall, they have their advantages and disadvantages. And, if you have already decided that you want a floor structure, it is worth understanding what you will have to face.
Advantages of a floor hanger:
- mobility - it can be easily moved to any room of the home, placed in a convenient place;
- the design, measuring 1.5 in width, can accommodate a sufficient amount of clothing on trempels, thereby freeing up space in your closet;
- As a rule, clothes on such a hanger hang on hangers, which means they will retain their appearance and quality for a long time, and will not tear or stretch;
- It is possible to create a product with drawers for shoes, or a separate place for them.
Of the minuses, perhaps, the only thing that can be noted is that the floor structure for clothes can look bulky in small rooms. But there is always the option to make the product on one leg with hooks at the top.
Materials for creativity can be wood, plywood, metal and PVC pipes. Even a schoolchild can make such an addition to the hallway, because the process is simple and will give the master pleasure, provided that the material is chosen correctly.
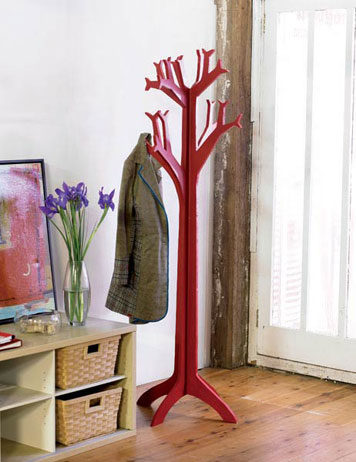
Wooden floor clothes rack
Wood is preferred by most craftsmen; you can make anything from it, which is why wood is so common in furniture products.
IMPORTANT! When working on a wood floor structure, choose hardwood.
The hanger, shaped like the trunk and branches of a tree, looks very impressive. It is functional, saves space, and is suitable for both large and small rooms. You need to stock up:
- two sheets of plywood measuring 70×170, thickness 18 mm;
- electric jigsaw;
- furniture glue;
- sandpaper;
- pencil.
To get the best look for the finished structure, you need to make a drawing; the drawing should be applied directly to the plywood sheet. To avoid drawing it twice, simply fold 2 pieces of material together and cut them along the contour with a jigsaw. Work slowly because the parts must be the same. You need to make slits in the finished two parts. In one we make it in the middle from top to bottom. The width should be equal to the thickness of the plywood sheet. On the other workpiece it’s exactly the same, only from bottom to top. Sand the cut edges well with sandpaper, lubricate the slots with furniture glue, and place the parts on top of each other. Lock them down. After this, you can paint the finished product and decorate it as you see fit.
For someone who values creativity and bold design solutions, the idea of creating a hanger from a whole tree, or rather a trunk, will seem interesting. To implement your plan, you will have to find a suitable barrel. It should be completely dry, but it would be better if the tree is deciduous, clean it completely of bark and lower branches, leaving only the knots at a distance of a meter from the floor. Once the wood is cleaned and all the branches have been trimmed, you can begin to make the stand. The thicker it is, the more stable the entire structure will be. The shape of the stand can be very different, it all depends on your imagination, and you can attach the stand to it using self-tapping screws.
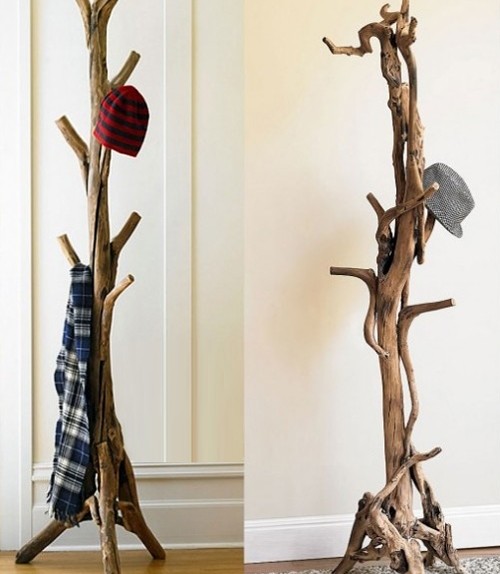
IMPORTANT! Do not clean the trunk of traces of the bark beetle, this will make the material look even more textured, and there is no point in covering the finished product with varnish, because the highlight is in naturalness.
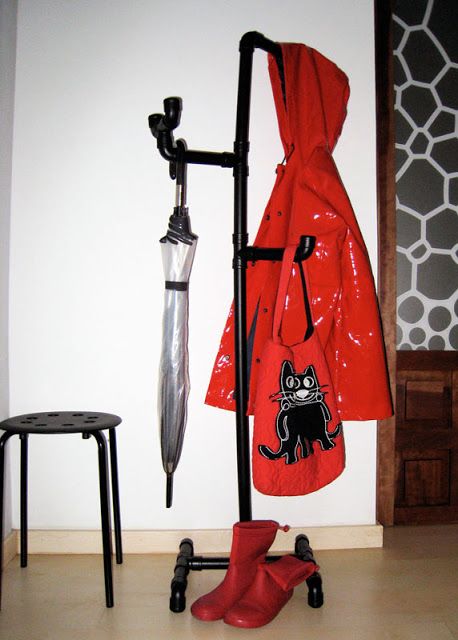
DIY hanger made of copper pipes
Copper floor structures are often used in offices; they are lightweight and can accommodate quite a lot of clothing. To work you will need:
- copper pipes, 2 pieces, 1 m 50 cm each - this will serve as the support and height of the future structure;
- copper crossbar 1 m, on which things will hang;
- short tubes 20 cm long, you need 4 of them;
- 4 pieces of copper corners, also tubes - for fastening the parts together;
- 2 connecting elements in the letter T;
- 2 caps;
- felt pads.
Let's look at the assembly process step by step:
- The finished product should fit on the floor, so measure your desired space. According to the above data, the hanger will not be small. Start assembling the legs first. Secure the 20 cm long tubes with connecting elements, and do the same with the second pair.
- Place a cap on the finished legs; it will prevent dirt and dust from getting inside the structure.
- Corners are attached to the back of the pipes with caps, they should. The connecting element should be directed upwards.
- A meter pipe needs to be inserted into the corners, this is the base.
- Next, make the side posts by inserting 1.5 m long pipes into the connector.
- Almost everything is ready, all that remains is to attach the corners to the racks on the sides and insert the last 1 m long pipe into them. Now the hanger is ready.
- If you don't want the structure to scratch the floor, stick felt pads into the base.

IMPORTANT! The stability of a hanger made of copper pipes is achieved by increasing the size of the structure.
Floor hanger made of PVC pipes
There is a more budget-friendly version of the product; you can make a hanger from PVC pipes. The principle of connecting the elements is similar to the previous design, but the material costs several times less. To make it you will need the following parts of PVC pipes:
- 6 pieces of pipe 12 cm each, 1 piece 80 cm, 2 pieces 20 cm each, 1 piece 10 cm, the diameter of the pieces should be 2.5 cm;
- a PVC pipe with a diameter of 2 cm and a length of 50 cm is cut into 3 parts of 15 cm each;
- 4 corners 2.5 cm in diameter;
- 3 corners 2 cm in diameter;
- T-shaped connecting elements 6 pieces;
- adapters from 2.5 to 1.5 cm 4 pieces PVC;
- adapters from 2.5 cm to 2 cm 3 pieces PVC;
- special glue for PVC pipes;
- aerosol with paint.
So, if you can cut the pipes yourself, great, but if not, ask the store when purchasing the material to cut the PVC into the necessary pieces.
IMPORTANT! Sand the edges of the pipes at home to avoid cuts during assembly.
To avoid errors during assembly and to facilitate the process, arrange all pipe sections into different groups:
- for the stand you will need: 4 pieces of corners, 4 pieces of adapters from 2.5 to 1.5 cm, 3 connecting elements, 6 pieces of 12 cm in length:
- for clothing holders you need: 1 connector, 1 adapter, from 2.5 to 2 cm, 1 piece of pipe 15 cm, and a corner 2 cm in diameter;
- stand: tube 80 cm long, 1 piece, 2 pieces of 20 cm, 1 piece of 10 cm.
As shown in the photo, assemble the stand. To do this, connect the pipe sections with T-shaped elements. You should get 3 structures, insert one between each other, make legs on which the hanger will stand, putting corners on the edges.
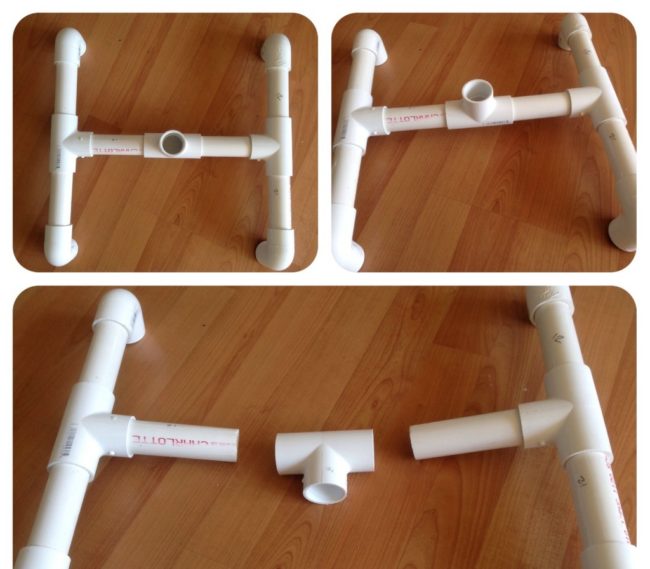
Next, we make the arms of the product; you need to put on each other the elements that are in your pile for the clothing holder.
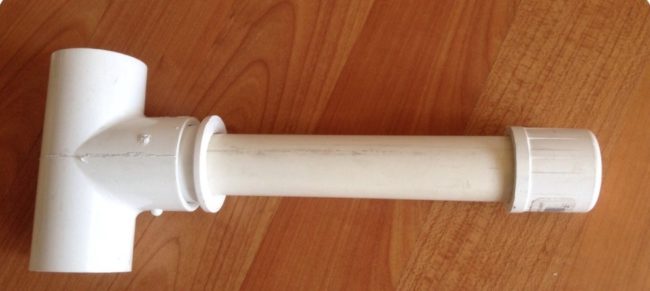
Now it’s the turn of a piece of pipe, 80 cm long. It needs to be inserted into the connecting element, put the arm of the hanger on it, then attach a piece of pipe 20 cm long, and the next arm on it. Continue assembling the structure in this manner until the end. The final stage of assembly is to place the cap on the top of the product.
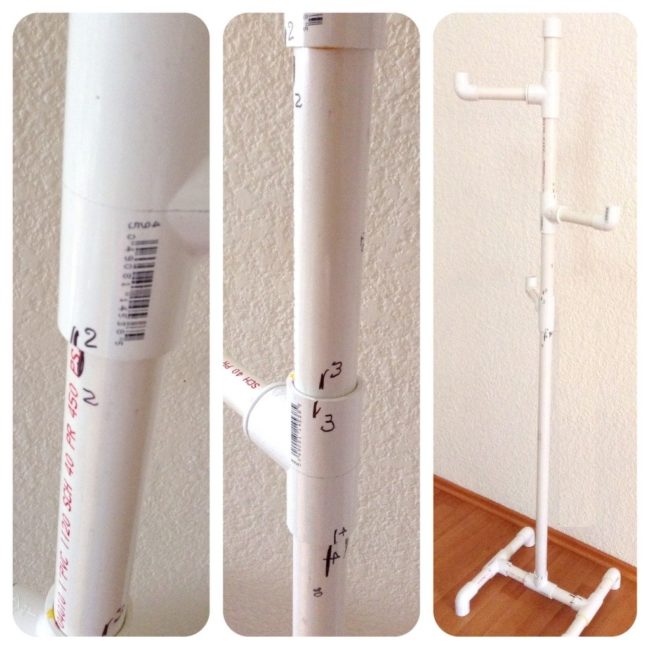
It is advisable to coat all elements with PVC glue, then the hanger will become stronger. The next step will be painting, choose the color to your taste.
IMPORTANT! You can weigh down the hanger using sand or small stones. They fall asleep inside and the hanger becomes stable.
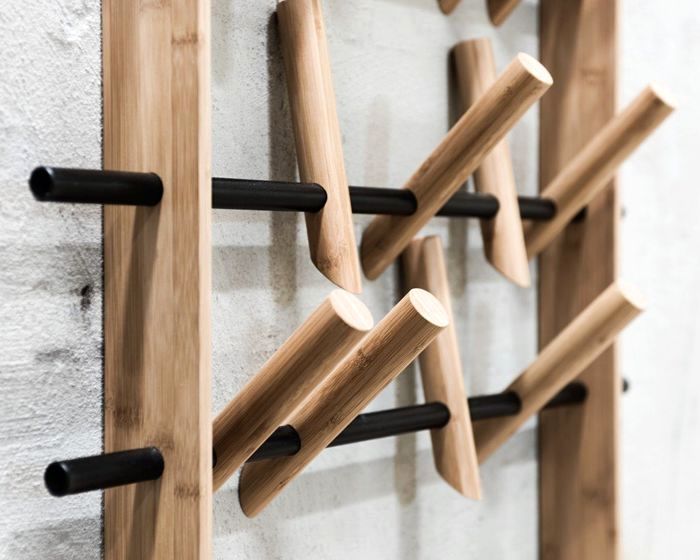
Other interesting ideas for floor hangers with photos
In fact, there are a lot of ideas for creating floor hangers, and if you create something of your own and unusual, it will be a huge plus. Here are some options for inspiration.
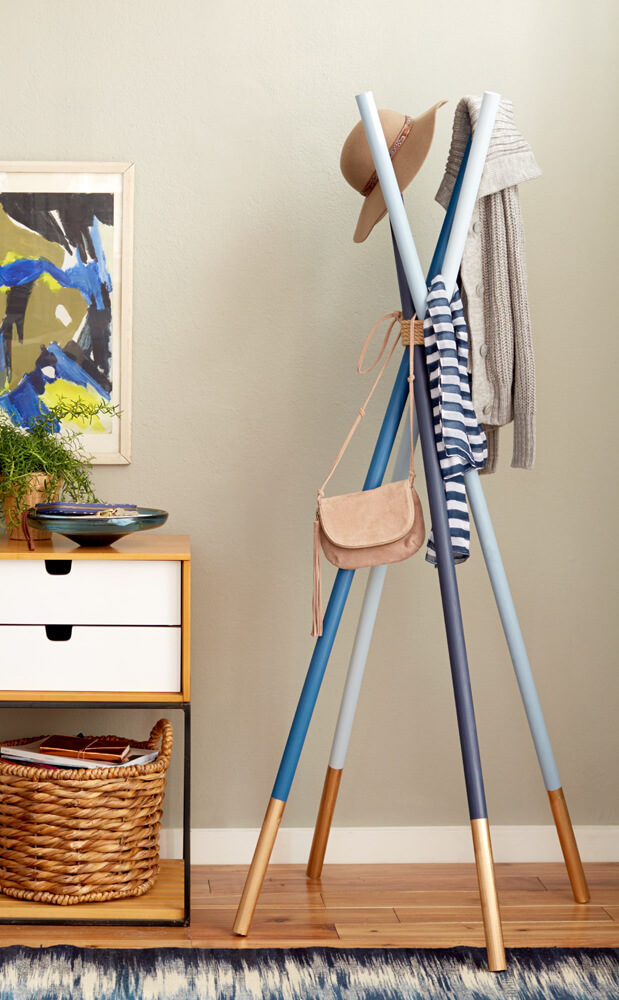
Quick wooden hanger
This product will consist of wooden sticks. Only they should be even and the same length. Fold them into a tent, fasten them on top with self-tapping screws or suitable bolts. Decorate the attachment point with string or twine. You can paint the legs of the product. Here's an unusual hanger for you.
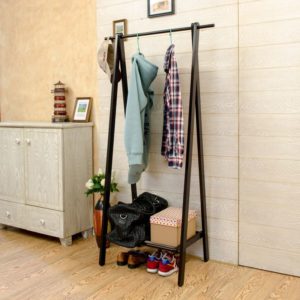
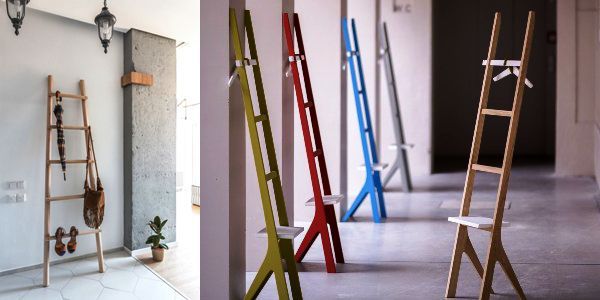
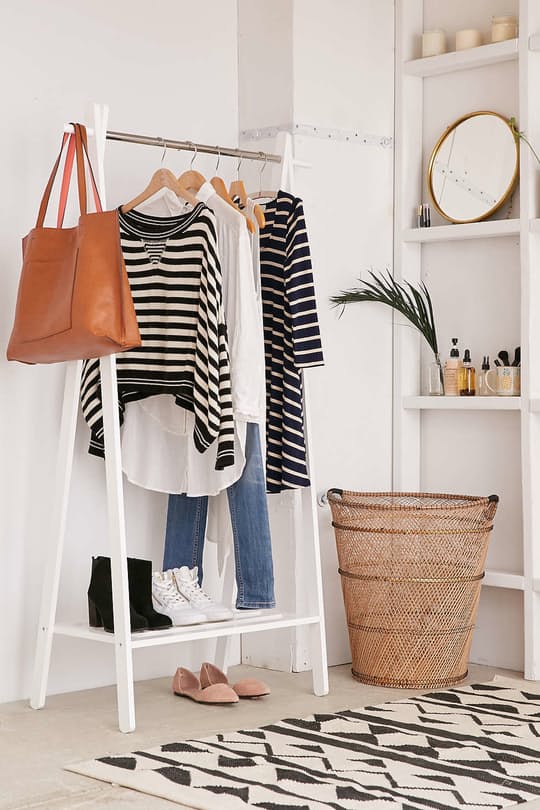
Ladder for clothes
A staircase will fit into any interior, and if you can also hang clothes on it, that’s great! So, for such a design you need the same wooden stick. You can choose the length yourself. As a rule, these are 170–180 cm, they will serve as side parts, and for the crossbars you need smaller pieces; also select their length based on the desired width of the stairs. At the bottom you can screw a shelf for shoes.
Folding hanger
A mobile product that can be carried with you to any corner of your home. The material for work can be either wood or PVC pipes.
As you can see, it is difficult to choose just one option. It is important to take into account the style of the interior and rely on your taste.