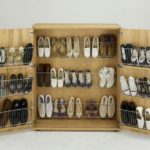
DIY shoe cabinet
The hallway of every house is undoubtedly the face of its owner. Shoes scattered everywhere will cause confusion among an unexpected guest. A shoe cabinet is designed to help you avoid such incidents.
Its function is not only to sort and store shoes, but also to prolong their life. After all, shoes stored in special furniture are less susceptible to external factors. Dust does not settle on the shoes; pets and small children cannot reach them.
But, unfortunately, choosing a shoe cabinet that fits well into your interior design is quite difficult. Therefore, it makes sense to make it yourself.
ATTENTION! Before you start assembling your dream cabinet, you need to decide on its type..
In the modern world, there are many different options for shoe racks. They can be made from a variety of materials and are limited only by your imagination. Let's list just a few of them:
- Sliding wardrobe (Great option for small apartments);
- Showcase (Interesting, but unstable design);
- Slim wardrobe (An interesting design where shoes are placed at an angle. As the name implies, they are usually very thin);
- Galoshnitsa (Classical design, the appearance of which is more suitable for a loggia or balcony than for a hallway);
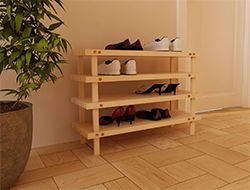
- Rack (The simplest, but unstable design. Moreover, it is unlikely to fit into any design).
The content of the article
Drawing up a drawing to create a cabinet
 Having decided on the type of future design, you need to choose the material for manufacturing. Plastic, metal, wood and plywood can be used to create a shoe cabinet.
REFERENCE! In a shoe cabinet made from metal or plastic, it is essential to provide ventilation! It is best to make open structures, since the materials presented do not transmit well air, thereby harming some types of shoes.
It is most convenient to use wood or plywood as the main material for manufacturing. They breathe great. It’s easy to make all the necessary parts from them, even on your own.
ADVICE! It is better to apply the drawing on the inside of the material from which the shoe rack will be made. This will help you with later assembly! You should also label every detail!
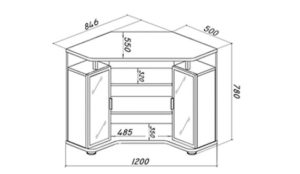
Now, taking into account all the factors, it is necessary to create a drawing of the future furniture. The drawing takes into account:
- Width, length and height of the future shoe shelf (Taking into account the thickness of the manufacturing material!);
- Number of shelves and their size;
- Other design details, if provided!
ATTENTION! You can find a huge number of ready-made drawings on the Internet! However, before you start working on them, you need to adjust the dimensions of the structure to your requirements. Measure the width, height and length of the space in your apartment where you want to install a shoe rack, and then adjust the dimensions of the drawing to fit it!
Procurement of the necessary parts
 Now you need to make the parts for the shoe cabinet with your own hands. Having a ready-made drawing in hand, the easiest way would be to go to a store where parts and components of the structure are made.However, all this can be done with your own hands. To create the parts and subsequently assemble the bedside table, we will need:
- Tape measure and a simple pencil (marker);
- Jig (tool for processing holes on a drilling or milling machine);
- Drill;
- Hammer and nails;
- Drill for confirmations.
So, you need:
- Following the diagram and observing the dimensions, draw a cutting map using a simple pencil or marker. Every detail must be clearly visible!
- Using a jigsaw, cut out parts, shelves, walls and risers. Cover the edge of each piece.
- Purchase confirmations, adjustable feet, shelf holders, guides and other necessary accessories.
Rules for assembling a shoe cabinet
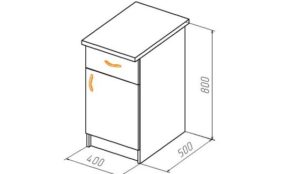 The principle of assembling different models of furniture is no different from each other. It is recommended to carry it out in a well-lit room. It’s also worth arranging your workplace and conveniently arranging your tools. For successful assembly, you must strictly follow the following order:
- Using a drill, we drill the places in the parts specified in the drawing. This will speed up and simplify the assembly process.
- We fix the metal corners and install guides for the drawers.
- We install tightening confirmations.
- We measure the thickness of the material used. It is necessary to drill two holes along a line 6 mm from the edge. You need to retreat at least 50 mm from the back wall.
- We calculate the position of the holes for the internal rack using the formula - material thickness + width of the proposed shelf + 50% of the material thickness.
- Drill holes for the shelf holder. It is necessary to calculate their location using the formula: height of the rack - thickness of the partition, and then divide by the number of shelves to be installed.
- We install metal corners on the cabinet lids.
- We assemble the boxes following the drawing.
- We are preparing for confirmation. We install racks.
- We attach protective covers to each corner.
- We install shelves and drawers on the guides.
- Assembly completed successfully!
Interesting options for homemade cabinets
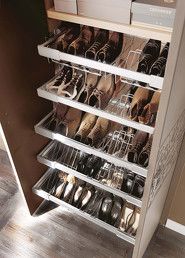 The DIY shoe cabinet is unique. There are hundreds of options for additions that can highlight the individuality of your product. For example, a homemade furniture handle can become a memorable design feature in your interior. You can provide such design elements as:
- Additional side shelves that allow you to store shoes of different seasons;
- Mirror or carved figured insert;
- Tabletop for things.
Craftsmen often paint doors and glass inserts. Install transparent or mirror doors. They often take up the cabinet itself, painting it. When decorating your product, you can use rhinestones or wallpaper with a wide variety of designs. Hand-made furniture is a worthy decoration for your home, the beauty of which is limited only by your imagination.

