DIY CrossFit cabinet
CrossFit is a sport that combines exercises of varying difficulty levels. If you want to achieve good results, each exercise should be performed at an intense pace. Only in this case can the desired results be achieved. You can diversify your workouts by assembling a CrossFit stand and you can do it yourself without the involvement of specialists.
The content of the article
CrossFit stand - benefits of use
Introducing exercises with a CrossFit stand into your training allows you to develop explosive strength and actively train all muscles.
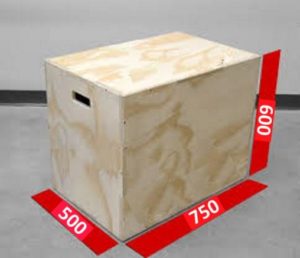
REFERENCE. The optimal solution would be a plywood cabinet with different sides. The length can be 50x60x75. This will allow you to gradually increase the height, and therefore the load.
Making a cabinet with your own hands
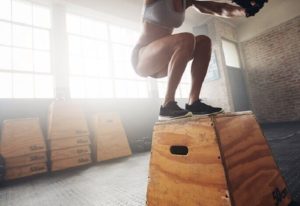
If you plan to carry out active training, then the CrossFit stand will help you a lot with this. This is a box that is used not only for performing the exercise - jumping, but also for squats and stretching the legs.
What you will need
In order to assemble such a cabinet you need to prepare the following materials and tools:
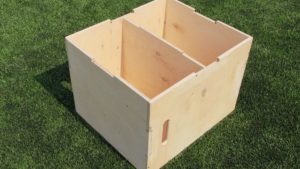 plywood sheet;
- pencil or marker;
- jigsaw;
- special glue;
- grinder.
A do-it-yourself CrossFit cabinet is quite easy to assemble if you have even the slightest skills in performing such actions.
REFERENCE.Choose a thicker sheet of plywood and it is advisable that it be made of birch.
Algorithm of actions
First of all, you will need to decide on the optimal size of the future structure. Let's assume these will be parts with dimensions of 50x60, 50x75 and 60x75. For ease of assembly, you need to make a groove or notch on each part so that they can later be assembled like a puzzle. The size of the grooves and recesses is about 2 cm, this will be quite enough.
IMPORTANT. If you wish, you can calculate the dimensions that will suit you and make a box according to them.
When all the structural elements are marked on a sheet of plywood with a pencil, you can start cutting them out. Use a jigsaw, be careful.
Having cut out all the parts, you can start connecting them. To do this, use special wood glue. To make the structure more reliable, you can fasten it with screws.
IMPORTANT. All connections must be strong and reliable enough so that the box does not break under your weight during active training.
Once the glue has dried thoroughly, you can begin sanding your box. The main task is to round the edges.
REFERENCE. To determine what size box to make, check how high you can jump.


