DIY kitchen set
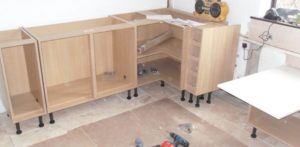
Manufacturers of kitchen furniture offer a wide range of original design solutions. However, the prices for such products are in most cases exorbitant. In such conditions, many people decide to make a kitchen with their own hands. After all, you can find all the necessary materials and accessories for this. Also on the Internet on thematic forums there are all the recommendations, as well as various product drawings.
The content of the article
Benefits of self-assembly
Assembling kitchen furniture yourself has a number of significant advantages compared to purchased sets. These include the following positive points:
- The quality of furniture can be much better than the finished product. There is personal quality control at each stage of production. In addition, the owner is interested in purchasing reliable materials.
 The cost of the product is reduced by at least two times. After all, you can always find cheaper analogues of materials that do not differ in quality.
- It becomes possible to create an individual design scheme that best suits all wishes and requirements. You can choose the design yourself, and the appearance will depend only on the author’s skills and imagination.
How and where to get materials and what you will need
To realize your plans to make a headset yourself, you need to stock up on materials, fittings and available tools. Let's consider options for preparing the necessary components:
- You can contact a specialized company that will provide cutting of materials according to specified parameters.
- One of the easiest ways is to purchase ready-made parts. The only downside in this case will be that the elements will not be original.
- Searching and cutting all materials yourself. For a sample in this version, you can take old furniture after dismantling and make some changes to the design.
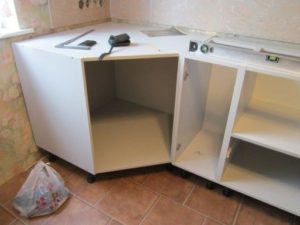 The master needs to analyze the materials available on the market from the point of view of various characteristics and choose the most suitable option for himself, or be guided by a photo of the approximate desired result. Let's consider popular materials for making kitchen sets:
- MDF boards. They are inexpensive and allow you to make elegant furniture for small kitchens.
- Solid wood. This is the most reliable, durable and environmentally friendly material. However, it has a high price. The wood texture looks expensive and elegant and is more suitable for interiors designed in a classic style.
- Chipboard with a protective laminated layer. A distinctive feature is the presence of a wide variety of options, including imitation of many natural objects.
- Postforming. It is an innovative material with high wear resistance. It consists of slabs covered with durable plastic. There is no need to paint it during operation. There is also a rich color palette.
- Fibreboard is the most suitable material for making the internal surfaces of the back walls of cabinets.
Fasteners, corners, legs, handles and other fittings are also selected. As a countertop, you can use panels made of artificial stone, tempered glass, plastic, stainless steel, as well as laminated slabs.
It must withstand water, high temperatures and be resistant to mechanical stress.
ATTENTION! Wood cannot be used as a countertop if a stove is built into the set. Therefore, wood requires additional treatment to protect the natural surface not only from heat and moisture, but also from some insect pests.
How to decide on a design
 It is important that the kitchen set harmoniously fits into the overall style of the room. Very often kitchens and living rooms are combined with each other. This is especially true for studio apartments. The choice of layout is determined by the personal preferences of the owner. There are the following options for kitchen furniture by structure:
- Corner. This is the most difficult type of headset, especially for a beginner. However, it is well compact. An important point here will be the calculation of the corner module, which is most often used under the sink.
- The linear scheme is the simplest and is used mainly in long kitchens. So, all the cabinets will be lined up along one wall.
- U-shaped. This product is more in demand in spacious rooms. A table is usually placed in the center of the structure.
- Peninsular. This version includes a bar counter. She looks very unusual and impressive.
IMPORTANT! For beginners in furniture making, it is better to take simple models that are easy to cut and assemble.In the future, you can update the set by replacing individual elements and facades with more complex and sophisticated ones.
Measurements
First, you need to correctly measure the wall along which the set will be placed. A regular tape measure works well for this. Plan where household appliances will be located. It’s good if it has already been purchased and there is an opportunity to take measurements from it. This is especially true for large items such as a refrigerator, hob and oven, hood, microwave oven, dishwasher and others.
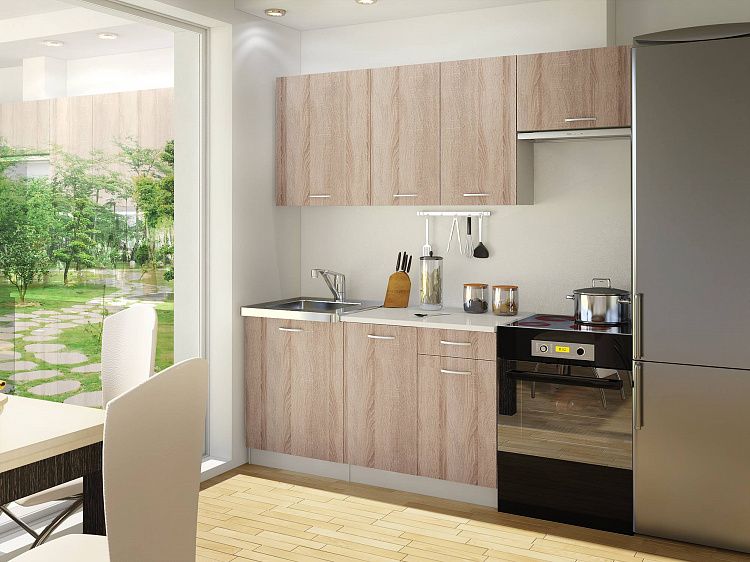 Be sure to count the number of cabinets and divide them into categories. They can be wall-mounted, floor-mounted, corner, wall-mounted, as well as with retractable doors and cabinets. It is important to consider the maximum possible number of drawers and closed places for storing food and other kitchen utensils.
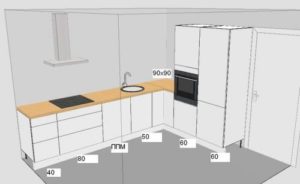
Next, we begin making the layout. You can draw the drawing by hand yourself. To do this, just take a sheet of paper, a pencil and a ruler. It is necessary to think through all possible nuances of fastening, installing shelves, facades and other nuances. For more experienced users of design programs, it is much more convenient to make a 3D projection on the screen. These can be programs such as Basis Furniture Maker, AutoCad, Blum Dynalog and many others.
ATTENTION! There are programs that, when processing a finished drawing, make a sketch with the placement of fittings and components, and also mark out the layout and assembly diagram.
When building a structure, especially for corner options, it is important to follow the following rules:
- The hob or gas must be at least 1.5 m away from the gas pipe.
- Gas and sink should be at a distance of 50-80 cm from each other.
- Gas pipes and hoses are not recommended to be placed above or below the plumbing system.
- You should especially carefully consider the installation of the water supply system where the sink will be located. To be safe, it is better to remove the back and side walls of the cabinet.
- Also mark in advance the installation locations of sockets for connecting the electric stove.
Step-by-step assembly instructions
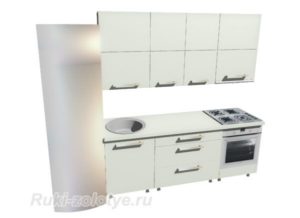 To assemble the kitchen set, you need to mark it on the wall using a special level. Let's look at the assembly process step by step:
- Preliminary preparation for assembly includes cutting all elements and modules, unless, of course, they were made to order from a third-party company. The elements are cut out using a jigsaw, and the cuts are carefully sanded using sandpaper.
- Next, you need to cover the ends of the parts with a plastic edge. To do this, you can use an iron, pressing the edge against the panel through a piece of paper (on one side it is treated with glue). This is done to protect the material from swelling and deformation. The edge must match the color of the blanks.
- After cooling, the protruding edges of the edge are cut off with a file so that all areas are even.
- Let's start assembling the modules. It is necessary to sort all the parts and accessories to ensure that the future product is completely complete. This will help significantly save time during assembly.
- We start by connecting adjacent parts to each other and drilling recesses for fasteners.
- We tighten the screws into the holes.
- We fix a piece of fiberboard or plywood to the back wall using a stapler.
- We install fasteners for shelves inside all modules. We install slides for drawers, because...in the future it will be almost impossible or very difficult to do this.
- Next, we drill special slots in the facades and place hinge cups in them.
- We hang doors on cabinets.
- We attach legs to the lower bedside tables, and hangers to the upper drawers for mounting on a wall surface.
- The upper modules can be secured using mounting strips. In this case, one of them is screwed to the wall, and the other to the cabinet. It is important to first determine at what level to fix the mounted modules. It is better to use a level for these purposes. Experts do not recommend using a tape measure to avoid distortions and unevenness. Wooden spacers must be installed between the tool and the surface of the cabinets. This will help protect the surface during installation.
- The final stage will be installing the countertop and installing the doors on the top drawers.
- Next, you will need to cut out a space for the sink and connect the water supply. Also, all household appliances must occupy their pre-designated places. Often the gap between the top drawers and the countertop is decorated with tiles or decorative panels. This is very convenient, because... In case of contamination, such a surface can be easily cleaned.
- All handles and additional fittings are also screwed on.
REFERENCE! During the assembly process, it is very important to constantly monitor the squareness of the assembled cabinets. To do this, you can use a level, ruler or a good eye.
Completion
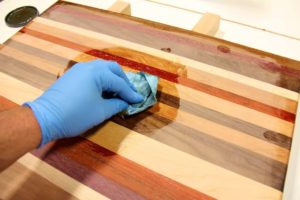 Your DIY kitchen set is ready! All that remains is to decorate the facade, if provided. Depending on the chosen style, you can use varnish, paints, patina, stencils for applying patterns, balusters, metal overlays, self-adhesive paper and much more.A good addition to the new headset would be high-quality lighting. Typically, spotlights located on the canopies are used. So, light is needed above the stove and above the work surface. These areas should be well lit for quick and easy cooking. If necessary, you can illuminate the inside of the boxes themselves.
At the end of the work, we thoroughly wash and clean the surface from construction debris and begin to fill the resulting product with various kitchen utensils, appliances, and food.
Modern kitchen furniture is quite easy to make yourself. This process can be easy and fun, and even somewhat reminiscent of assembling a LEGO set in an enlarged version. The resulting furniture will fully comply with all the necessary parameters. In addition, by eliminating the costs of assembly, cutting and design solutions, you can purchase more expensive and high-quality materials.


