DIY growing chair
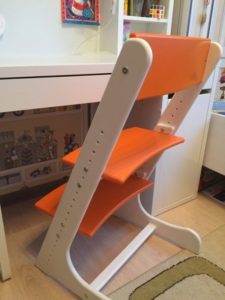 You have to create a growing chair with your own hands if there are children in the house. It is important to monitor their posture (most problems arise at this age, because the child’s bones are not fully strengthened). A huge number of similar designs are sold on the market, but not all of them are suitable for a child. Therefore, it will be easier to buy the material and do all the work with your own hands, taking into account the age of the child.
The content of the article
How to make a growing chair with your own hands
Making such a chair is quite simple if a person has experience in assembling furniture. But if this is your first job, you need to be careful when creating design drawings. It is in this step that an inexperienced person can make a mistake.
Attention! The choice of material and the preparation of the necessary tools are also important. The entire structure will be made according to the child’s size.
Benefits of growing stool
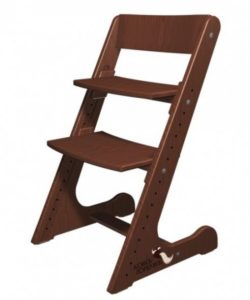
The growing chair (often also called the humpbacked horse design) has the following advantages:
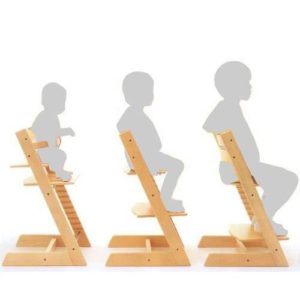
- Will preserve the child’s posture (such chairs are considered orthopedic).
- Can be used when the child is six months old.
- Saves your budget. But ready-made structures are expensive.
Materials and tools
Not every material is suitable for creating a children's chair. Treated wood or plywood are best.When creating a chair, remember that choosing the wrong material will make it heavy and large. This is inappropriate and uncomfortable for children. Therefore, it is best to stick to plywood.
To create a chair you need the following tools:
- Paper for creating drawings.
- Pencil for markings.
- Roulette.
- Glue.
- Jigsaw.
- Sandpaper.
- Router and copy cutter.
- Brush.
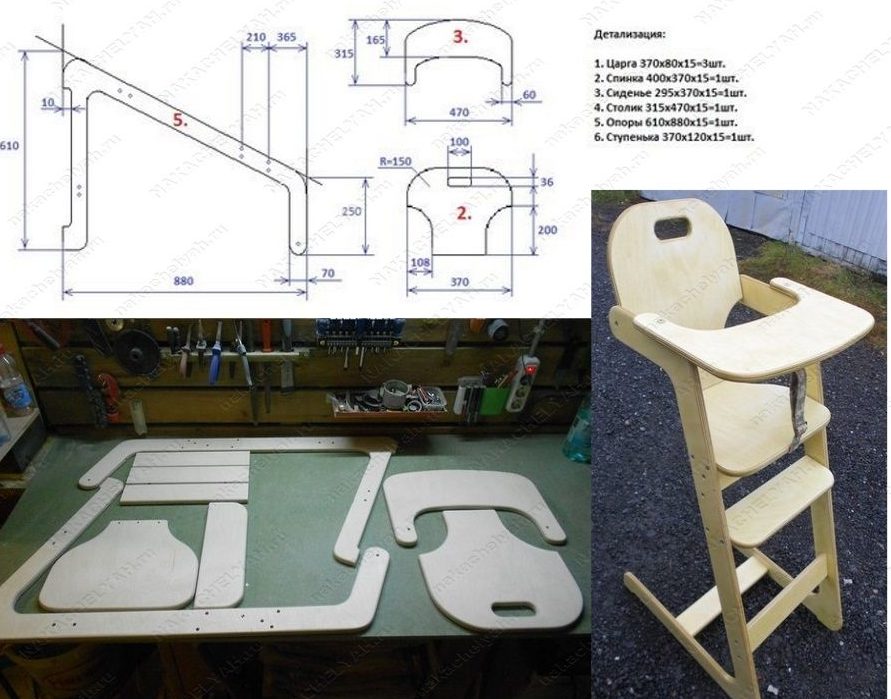
Measurements and diagrams
The work will begin with the creation of drawings. It is necessary to calculate the dimensions of the structural parts and their angle of inclination.
To create racks, you need plywood more than 2 cm. According to calculations, for each plywood there are 2 blanks (then they will be glued together). The main parts of the chair (seat and back) are made from 1.5 or 2 cm plywood.
Attention! The dimensions of the backrest depend on the size of the person’s back (this should also include the shoulders). Same with the armrests and seat. But perhaps a person wants the back to be at the level of the head or neck. Then calculations are made according to wishes.
Growing a chair on your own: step-by-step instructions
You can start working:
- The pattern made according to the drawings must be attached to the plywood. Cut out the first part of the side legs. The workpiece is made with a margin of several millimeters. Thanks to this reserve, we will not have problems when cutting.
- Using a copy cutter, the workpiece must be brought to the specified size.
- Cut out 3 legs.
- Stack all 4 legs.
- We grind all the legs.
- Now you need to glue the blanks. We wait until the glue dries.
- Using a router, we create grooves on the inside of the legs. The depth of one groove is 1 cm and the width is 2.5 cm. Grooves are important to adjust the position of the elements.
- Through holes are made in the middle of the grooves. They are needed to secure the footrest and seat.The distances between the holes must be the same. To avoid distortion of the outer side, you need to place a wooden block under the leg during the drilling process.
- It is necessary to make runners. They are needed to fix the seat in the correct position. You need to make 4 runners (2 on each side). The size is equal to the size of the feet.
- Round the corners and edges of the slider. We make a gutter in the center. It is needed to glue slats into it, which are inserted into the grooves of the legs.
- The size of the slats depends on the width of the gutter. They are inserted into the gutter on one side, and into the grooves on the other.
- It is necessary to glue the slats and runners. We wait until the glue dries.
- We make holes in the runners. They secure a given position.
- Now you can cut out the back and stand. The dimensions depend on the person who will sit on the chair.
- Now we cut out the back.
- A transverse insert is also needed. She fixes her legs.
- We collect all the details according to the healing principle, instead of the final method. This will allow you to discount the results and eliminate problems that may appear during the assembly process.
- If the design turned out according to your expectations, you can begin final processing. First, we clean the surface with sandpaper.
- We can start painting the chair. Choose a color. Some people don't paint the chair, but use a primer and varnish it. This will preserve the natural wood color. But if plywood was used, it is better to paint it, since the external pattern is not uniform.
- We wait until the paint dries.
- We assemble all the parts into a single structure.
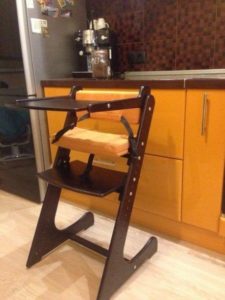
Additional parts can be installed, such as armrests. It all depends on the use of the chair.For example, there is no need for armrests if the chair is used by a student while writing homework (his hands will always be on the table).