DIY kneeling chair: drawing with dimensions
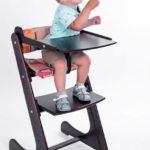
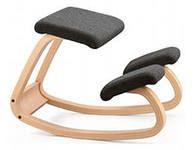
Most often, people think about maintaining their health. To achieve this, various preventive measures can be taken. One way is to make a special orthopedic knee chair with your own hands.
With its help, it is easier for a person to keep his back straight, and the main load is not applied to the spine. You don't have to go to the store to purchase it. Do-it-yourself assembly may be a more feasible option.
The content of the article
How to choose a drawing with the dimensions of a kneeling chair with your own hands
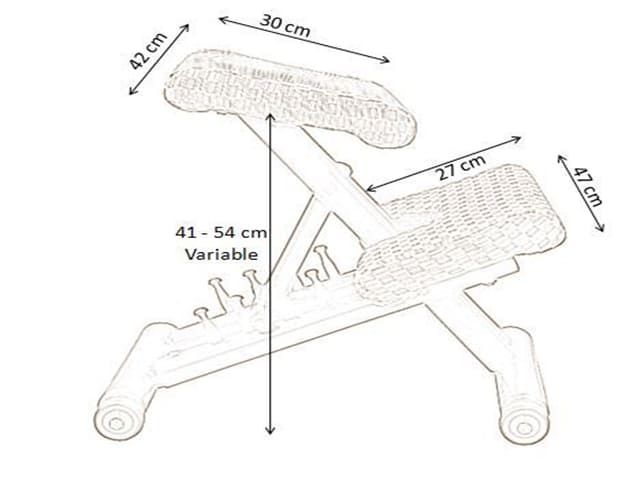 First, of course, it is recommended to understand the diagram, which will help in further work.
ATTENTION! The main thing is that every detail and its parameters are spelled out in the diagram. Naturally, the characteristics should directly correspond to personal needs and preferences.
What materials and tools are needed to create a chair?
 Before you begin, you should arm yourself with the following items, without which it will be impossible to manufacture the product:
- Screwdriver;
- Sanding machine (if you don’t have one, use sandpaper);
- Roulette;
- Pencil;
- Electric jigsaw;
- Wooden beams, the main thing is solid material;
- Fabric for upholstering the product;
- Construction adhesive;
- Special varnish;
- Filler;
- Plywood sheet;
- Various fasteners, these can include both metal corners and bolts and self-tapping screws.
Product assembly process
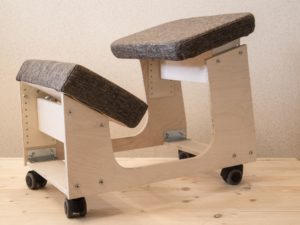 After complete preparation, you can begin the main process. You should adhere to the algorithm described below, then there will be no difficulties in your work.
- The first step is to make blanks, focusing on a pre-prepared drawing.
- Next, connect all the resulting parts.
- Cross bars need to be attached to the underside of the chair. They are necessary as future legs of the structure.
- After which you can fasten the bar to the main part - the seat. It is advisable to do this as close to the border as possible. Holes are cut out on the reverse side to allow for future adjustment of the height of the product.
- The part that will be used for the knees must be attached to the seat as follows: the front side should be slightly protruding forward.
- Then it is worth fixing the jumper in the made recess.
- Next, you should cut out a stand from a plywood sheet.
- Finally, it is advisable to attach foam rubber. Then you can cover it with fabric. If you want to achieve maximum strength, it is recommended to use glue and varnish the product.