How to disassemble a computer chair
Each workplace in the office is equipped with a computer desk and chair. A comfortable computer chair relieves stress from the spine and arm muscles, increases performance, thereby helping to cope with assigned tasks. However, over time or as a result of overload, the computer chair may lose functionality or break due to wear and tear on the plastic parts.
And then the question arises of how to disassemble it in order to repair it. It happens that the need to disassemble does not arise because of repairs, but to make it easier to transport it to another administrative building.
The content of the article
What you need to disassemble a computer chair
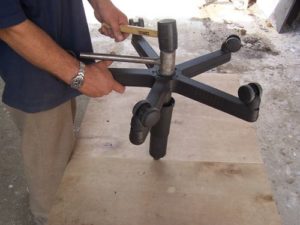 How to disassemble a computer chair? Before you begin disassembling yourself, you should prepare the necessary tools. For this you will need:
- Screwdriver with Phillips or flat tip;
- A rubber mallet (mallet), or a plumber's hammer, but you will have to work with it more delicately;
- Chisel;
- Pliers.
All these many tools will be needed to disconnect the seat from the gas lift if it is stuck. To do this, you need to turn the other side of the cross with the gas lift down, holding it in weight and applying light blows to the edge of the gas lift with a mallet. If the mallet does not reach the edge, you need to take a chisel.
Important: It is forbidden to strike the center of the gas lift, as there is a fastening bracket there that is susceptible to shock.
When the gas lift is separated, all that remains is to remove the wheels manually, and if that doesn’t work, use pliers. For further disassembly, a screwdriver will be enough.
Instructions for disassembling a computer chair on wheels
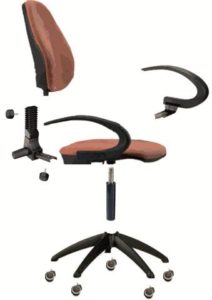 To make it more convenient to work, a computer chair must be placed on a table or stool. First you will need to remove the retaining device - permanent contact and the backrest itself. Next you will need to remove the armrests.
To do this, you need to turn the chair over so that the crosspiece faces up, then unscrew the three fastening screws on each side of the armrest using a Phillips screwdriver. A pair of short screws that secure the handle to the piaster, and a longer one that attaches to the seat. Place the unscrewed parts in a box so they don’t get lost, and put the bushings in there too. After removing the armrests, put them aside so as not to interfere.
Attention: When assembling the chair, the bushing must be installed with the larger diameter down.
If the armrests are not unscrewed, they will not allow the casing to open the approach to the main fastenings of the piastrum and the seat.
How to disassemble an office chair on wheels? The next step is to remove the four small screws that hold the casing of the piaster and the chair together. To obtain maximum space in the piastra casing, press the gas lift lever until it opens.
In this case, you should lift and rotate the casing, changing the angle of inclination, which will allow you to alternately open access to all four screws securing the piastres and the seat.
Having removed the piastrum, you need to check its suitability, look at its supporting shelves, it is required that they are in the same plane and not bent. A serviceable part has a noticeable certain angle, the upper plane of the piastrum, tilting back relative to the gas lift sleeve. If the angle is too large or the support shelves are not in the plane, then this indicates a malfunction.
This means it will require replacement with a new one. Of course, you can try to level the piastre using a hammer, but for this it is advisable to have a working sample on hand.
Important: Very frequent operations to raise and lower the seat can lead to premature wear of parts and mechanisms.
What difficulties can you encounter?
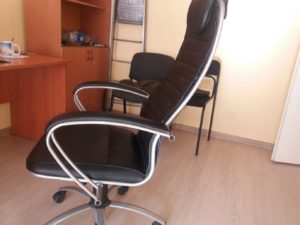
- When removing the right armrest, you may find it difficult to unscrew the short rear mounting screw. This is due to the fact that access to it is blocked by the gas lift valve lever. For easy access to the screw, lift and hold the lever with your free hand.
- Sometimes you may face the problem of removing the air chuck.
- A metal pin gets stuck in the crosspiece, this happens when removing wheels. You can remove it using pliers.


