DIY welding table
 The qualifications market is expanding every year due to growing technological advances. But blue-collar jobs will be in demand just as before. In order for an expert in his field to receive a decent salary for his work, he will need to improve his qualifications. Where else can this be done other than in the workshop? Every professional needs a working, equipped place, which is left to the person whose hands grow from the right place, but lacks the funds. The right solution is to make the work surface yourself. If everything is clear with turners and carpenters, each of them roughly imagines what their workbench should look like.
The content of the article
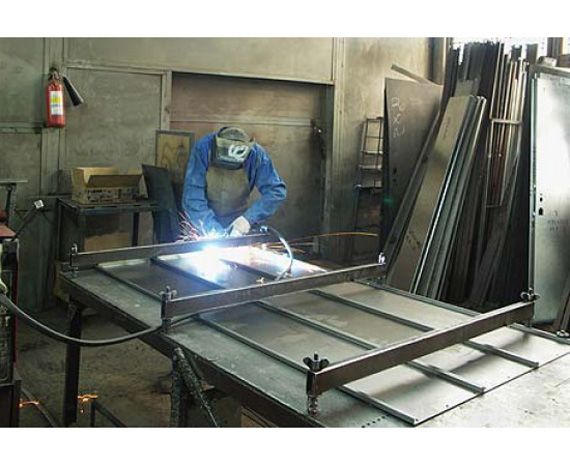
Welding table
Welding is a very specialized profession that requires certain working conditions. Of course, equipment and equipment must comply with all safety regulations. A helmet or goggles will help protect your eyes from sparks. Burn gloves. Just like the mold components, the welding table must be as accident-proof as possible.
To do this, the welding table must be made through (holes in the iron sheet or pipes welded together). This is necessary so that burning elements from the welding unit do not fall on the surface and cannot ignite something. The structure must withstand heavy weights, because the main objects that a welding specialist works with weigh quite a lot.When working, you need to strictly adhere to measurement standards so that the table does not skew and cause harm during operation.
The main advantages of this design include:
- Profitability and economy - if you have the skill, you can easily build a welding table without making large production costs.
- Individuality - the table will be made specifically for the person who will work on it. The parameters must be taken into account from the growth and scope of work.
Do not forget about the hood, which takes in some of the air containing gases and hazardous metals. This kind of thing will be very useful if the workshop is located away from fresh air.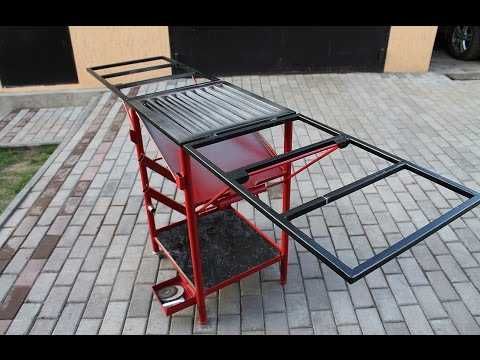
Any lamp or LED lamp can serve as illumination. The issue here is the natural light in the work area.
When working on making a table, do not forget that the metals must be non-toxic. Such harmful poisons are produced by iron containing copper and zinc. It will be much better if all facing materials are made from non-flammable materials.
It should be noted that constructing a structure that will be less than one meter is very impractical. Due to the standing position of the work, it will be uncomfortable to bend over with the device in your hands, which can affect the health of the spine.
Attention! The design consists of a frame made of profile pipes and four rack-legs. Both metal sheets and profile pipes can act as a tabletop.
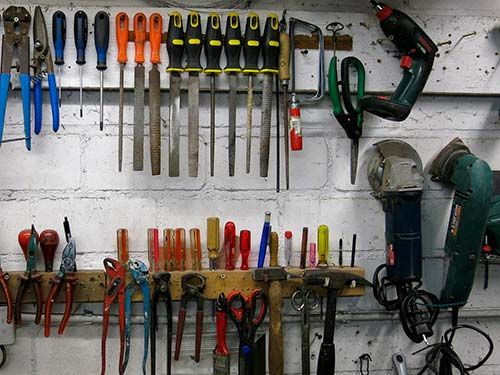
Required Tools
The necessary tools and materials will be required:
- Welding machine for carrying out work.
- A marker, tape measure, and square will be used for marking and measuring work.
- Clamps and vices will become clamps when working on welding.
- Koerner.
- A sander or a large amount of sandpaper and a file to clean the surface of the pipes.
- The drill will help install the leg attachments if the welder needs them. It is worth selecting a drill according to the diameter of the bolt thickness.
- Materials for cooking: profile pipes with a diameter of 60x60.
- Nuts and bolts. A screw with a round head, 8 cm long, is best suited.
- Jigsaw and grinder.
- Wire cutters.
Measurements and drawings
In order to carry out the correct work that will meet all the welder’s requirements, you need to work on the dimensions and perform all pipe measurements efficiently.
The thickness of the connecting pipes should not be less than two millimeters. To prevent damage to the working surface from exposure to burning welding. The cross-section of the pipe should be 60x60x2-4.
The height of the legs of the future table should be about a meter; if this is not possible, you can use a length of 800 mm.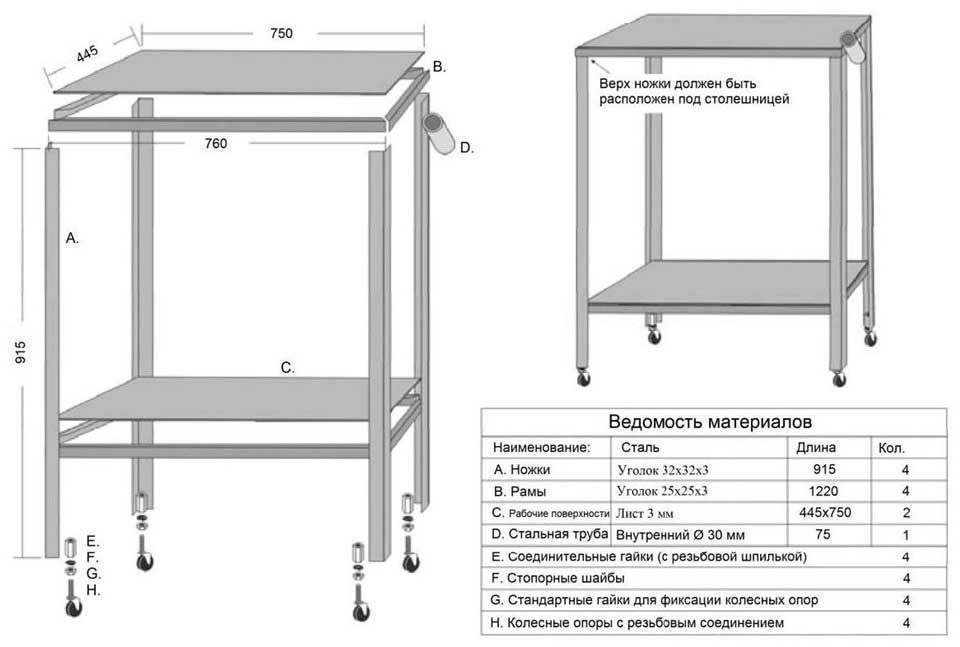
Step-by-step instruction
- Pipes are divided using a grinder with a metal cutting disc. Burrs and chips are processed with a file. The main frame 1000x800 mm is made first so that the legs can be welded onto it. The legs are installed using an angle so that they do not warp during welding. They are clamped with clamps so that the metal does not “move” during operation.
- Sections of profile pipes 800 mm long are placed inside the frame, the distance between them is about 50-70 mm. After welding these parts of the structure, all seams are cleaned with a grinder. The lower frame is made in a similar way, only the length of one segment is 992 mm and 792 mm inclusive.
- If the table will be transported around the workshop, you must first install wheels on the legs.Depending on their shape and type, it will be clear how best to fasten them - with bolts or welding. In the best case, install brake clamps that will not allow the table to move arbitrarily during operation.
- To make it convenient to store the material and the welding machine, it is recommended to weld sheet metal of the same dimensions as the frame to the lower frame. Initially mark the corners and cut them out with a grinder or jigsaw. The thickness of the canvas should be more than 4 mm so that the lower level of the tabletop is not pressed through. Make at least 2-3 welds on each side.
- Additionally, hooks and a retractable pipe are installed, which will allow you to freely and conveniently transport the table. It is made from a round pipe with a diameter of 3 centimeters, which is bent on each side so that in the original version it looks like a flattened letter “P”.
- After the main types of work, you need to treat the future surface of the table - sand it or treat it with a grinding machine. To avoid the unpleasant entry of iron filings into the lungs, it is recommended to wear a respirator mask and wear glasses over your eyes. When processing is completed, many craftsmen prefer to paint their products to preserve their service life and create a beautiful aesthetic appearance. But doing it in this case is pointless, because when working with a gas welding machine, all the tabletop coatings will evaporate into the air.
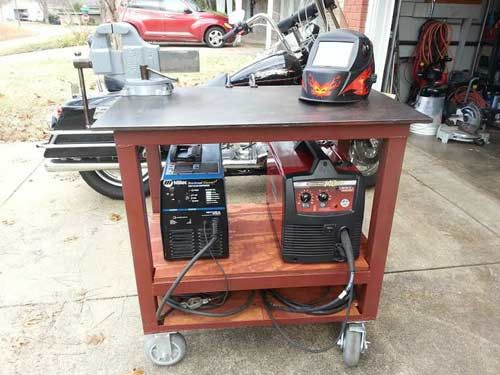
Reference! When all the work has been completed and the workshop has been cleaned, you need to put all the equipment in its place.
The welding machine will find its place on the lower tabletop; all the electrodes and attachments can be placed in a separate wooden box. To avoid getting tangled in wires, you can wrap them on pre-prepared hangers.