DIY wooden table
Tables made of wood differ from products made from other materials due to their increased strength and durability. You can cut beautiful milling on wood. Kitchen tables with carved legs and decorated with monograms look elegant.
Today we will look at several options for making tables for different purposes. The information will be useful not only to craftsmen, but also to people who want to order a product from the workshop.
The content of the article
- How to choose a drawing for creating a wooden table or make it yourself
- Which wood is best to use?
- The nuances of assembling a kitchen table made of wood
- How to assemble a computer desk
- Features of the desk
- How to make a coffee table
- Features of making a children's table made of wood
- How to decorate the finished product
How to choose a drawing for creating a wooden table or make it yourself
 To make a wooden table, you must first decide on the shape and size of the tabletop. Another very important parameter is whether the table will be sliding and how it should be folded out. And most importantly - what the table will look like.
Let's look at the general recommendations:
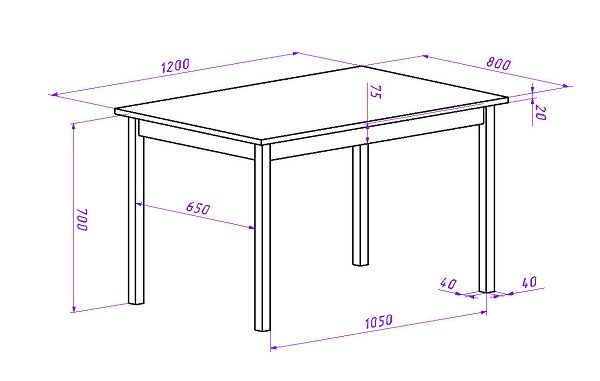
- Having chosen the length and width of the tabletop for a rectangular table or the diameter for a round one, you need to select the height. This is an important aspect; if you make the table lower than you are comfortable with, your back will hurt. The optimal average height is from 70 to 75 cm from the floor. This size includes: the thickness of the tabletop, support and thrust bearings (if necessary).
- So, we have 3 important parameters.The thickness of the tabletop is important. It depends on the thickness of the board you choose. Now we select a drawing (for example, online) according to the parameters that are needed. You can draw a sketch yourself.
- We draw the main view (remember the lessons from school) - the height and width of the table, the shape of the supports, and a possible underframe should be shown here.
- Next, we draw a side view on a sheet of paper, where the nuances from the other side are displayed. The main details must match the first drawing.
- The last stage is drawing the top view. It is drawn strictly under the main projection. You can simply draw a picture, but in such a way that you can understand it.
TIP: There is a little trick to find out the height you need - visit a furniture store, sit at the tables on display. You can ask the consultant for the parameters of the product you like. You can even take a photo of it.
Which wood is best to use?
 Basically, in the furniture industry, pine, birch, oak and beech are used for the manufacture of products. These are the most resistant rocks, with a beautiful internal pattern and increased density. Of course, the products turn out to be heavy, but very beautiful.
In order to make a wooden table yourself, it is better to choose pine or birch - boards from these species are easy to find in any area, and they are easy (relative to beech and oak) to process.
IMPORTANT: purchased boards and bars for supports must be thoroughly treated against parasites and dried. The product may fail if you choose wet materials.
The nuances of assembling a kitchen table made of wood
 We have chosen a drawing, bought good material, now we should start cutting the boards.If the width of the board does not match the dimensions of the table top, then you need to join the two boards, but this must be done very carefully. There are two options for the operation:
- Cut and knock down the frame of the underframe and nail the boards tightly onto it, then cover them with several layers of furniture varnish so that the joints are not visible. This method is suitable for a non-extending table.
- Take two boards and connect them using eccentrics (hidden fastenings), then also varnish the tabletop.
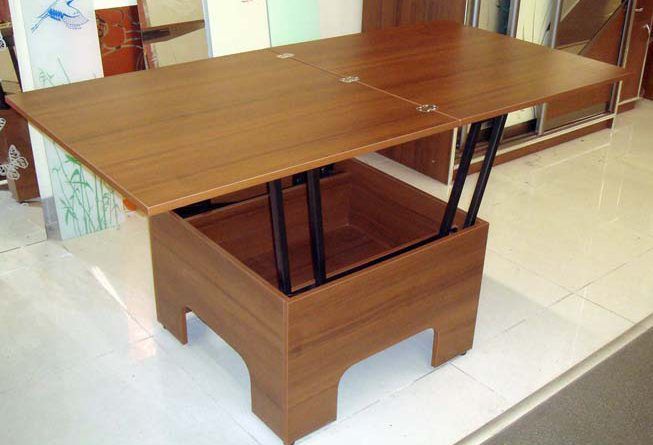
There are fewer problems with an ordinary rectangular wooden table, made by hand for a summer house on straight legs. But if you wanted to make the table extendable? There are several layout options:
- “Butterfly” or “book” - the sliding mechanism is located in the center of the table, the tabletop is attached to special rollers (everything can be purchased in the store). Two boards are taken out from the center and folded back in the form of a book. The mechanism is easy to lay out, but difficult to assemble for the first time.
- The table is moved apart on rollers and an additional processed board is placed on the table. It can be stored in a box under the countertop or in a separate place.
- The option is similar to the second, only space for the additional component is organized on the side. The table top moves to the side on rollers and a board is placed on the free space.
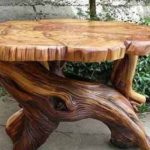
Supports are the main decoration of a wooden table. There may be one leg, there may be several. Woodworking experience is required to complete the single center support. A leg is cut out of a log (diameter at least 15 centimeters). For stability, several reinforcements (petals) are made. They are cut from the board and attached at the same level. If you cannot cope with this task yourself, professionals will help you process the wood.
TIP: The supports do not have to be made of wood. You can weld beautiful vintage legs, or buy supports at the store.
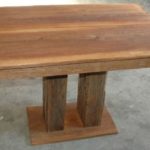
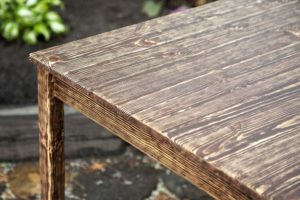
Each part can be painted with white enamel and then, after assembly, coated with varnish that hides defects. Tables made in a rough old style look beautiful - with holes, cracks, cover them with stain once or twice. In this case, the table will be non-extendable and have 4 legs - straight bars.
The table top can also be covered with a thin furniture self-adhesive film (not to be confused with PVC for MDF panels). It can be changed periodically, which is very convenient.
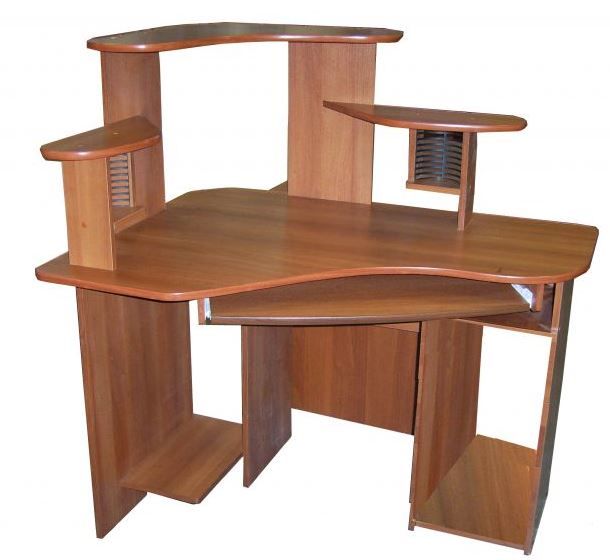
How to assemble a computer desk
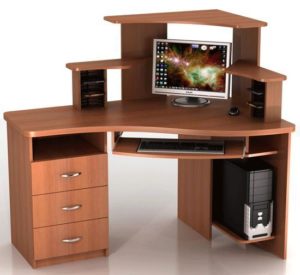 It’s worth mentioning right away that a computer desk is a piece of furniture designed for the user to conveniently sit behind it, as well as the placement of parts of a desktop computer (monitor, system unit, keyboard, speakers). It's easier with laptop PCs. Let's assume that a table is needed specifically for a stationary device.
The minimum width of the product should be 80 cm and the width (depth) - 60 cm. Typically, the system unit is placed under the table. I recommend making a wooden slide on roller supports under the body. It is very convenient, you can put it in any convenient place. It's very simple to do - cut out a board slightly larger than the size of the system unit. Cover the perimeter with bars and place it on wheels. Cover with stain or varnish (as you like).
Now the table itself, made with your own hands from wood, the photo of which you see above. You know the choice of parameters from the first part of the article. Now you need to decide on the supports. This can be the usual four bars or a closed box on which the tabletop will be placed.
It is better to tighten the closed sides at the back with a tie or an additional wall. This way the product will not wobble.
TIP: A closed space does not allow you to properly regulate the air flow from the system unit - this makes it heat up more and become clogged with dust, which damages the microcircuits.
But if you want a box, please!
Now it’s time to decide whether you need a pull-out shelf for a keyboard or whether it’s more convenient for you to organize a work area on the surface of a table made of wood yourself, photos and drawings of which are presented in the article. There is no need to invent a bicycle shelf - buy it in the store, there are many nice plastic options. If you put a shelf made of wood, it would be better if it was plywood, although it will look terrible. The boards are very heavy for the roller guide system.
It is worth thinking about the level of the monitor and its thickness. TFT monitors (yes, some people still use them) have impressive dimensions. Do you need a shelf for a monitor and how deep will it be or not? If necessary, measure the height and length of the monitor. Sometimes the display is attached to the wall. In this case, the shelves above the screen should be placed at least 15 cm.
It is recommended to install shelves for speakers and other peripheral devices so that they are convenient to use. For example, it is better to place the printer and scanner a little lower or level with the tabletop.
Each part is attached with self-tapping screws and corners, including the wooden table legs, made by hand. To cover a DIY wooden computer table, we recommend using stain. The varnish is very smooth. Can be coated with enamel.
Features of the desk
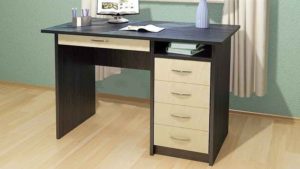 As in the case of a computer table made by hand from wood, there are generally accepted standards: height 72–74 cm, width 60 cm and length 110 cm. With these dimensions, you can place a work cabinet under the table.
IMPORTANT: the wooden parts are very heavy to install on regular rails. To make the cabinet comfortable, it is recommended to have a swing door with three hinges. And place the shelves inside on regular furniture corners and secure them with self-tapping screws.
The side walls can be completely closed or the base can be made of several bars knocked together. It is recommended to place the cabinet on legs (metal or wooden); it can be placed separately from the table. It is important to remember that wood is a heavy material and you need to work with it carefully. You can cut milling on the walls.
A shelf mounted along the entire length of the table requires additional support. A block should be driven between the countertop and the shelf.
The desk is covered with stain in two or three layers; notebooks and other stationery items are not placed on it.
How to make a coffee table
 This is where your imagination can run wild! I will offer you several options, choose which one you like best:
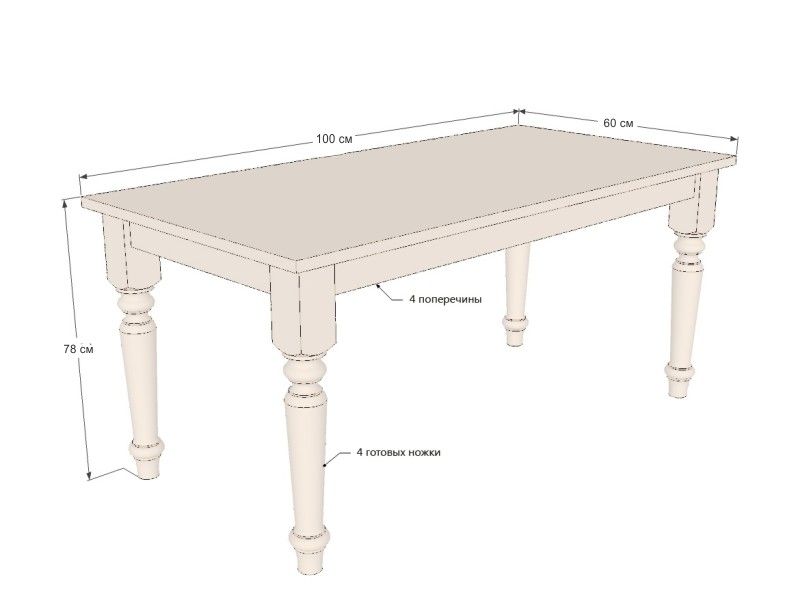
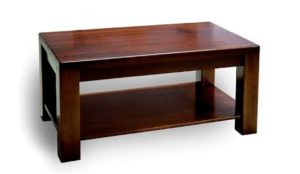
- Choose a nice wide block, process it and place the tabletop on top. Moreover, it can be wooden or glass. The combination of wood and glass looks beautiful. Four boards are fastened together in a square, a hollow is cut in the center along the perimeter and glass is placed on it.
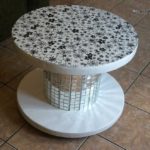
- Make a mini kitchen round table with your own hands from wood with carved legs and a shelf at the bottom. It is recommended to coat such a product with colorless furniture varnish. The supports can be straight.
- A table with a two-level tabletop looks interesting.Here it is recommended to use metal legs.
Features of making a children's table made of wood
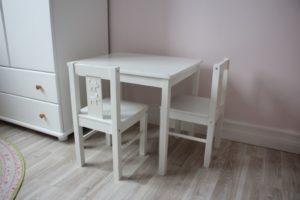 A children's table made of antique or modern wood, made by hand, is not standardized in size. The product is made on supports - bars. The tabletop is made square or rectangular. The box under the tabletop needs to be made narrow. Such tables are covered with safe enamel or stain.
For little ones, it is recommended to paint the table in several different colors.
How to decorate the finished product
 Wood itself is a very beautiful material, but sometimes you want to decorate the product a little. I'll give you some tips that apply to all options:
- Place the glass on the tabletop and fasten it with special furniture glue. Glass is optional.
- Before applying the varnish coating, natural elements (leaves, thin twigs, insects) are stolen onto the tabletop, then the wood is coated with several layers of colorless varnish (at least 10 layers of coating). The effect of glass will be created, under which various objects have been placed.
- You can do milling on the underframe.
You shouldn’t be too zealous; there should be moderation in everything.